Using Microsoft Flow to automate my process of sending stickers…
It all started with my nice idea of sketching some stickers and I offered on twitter to send those stickers for free.
Never expected that amount of direct messages and replies, so I took that as a learning opportunity to automate the handling. What I want:
must-haves
- Nice and easy-to-use form to ask users to submit their shipping details 2. Envelopes with addresses of the users 3. Email-Notification for me
Let’s do this!
1. Create a Form in Microsoft Forms
Just ask the following questions: How many stickers do you need?, (Why do you need more than 3?), Email Address, Twitter Handle, First Name, Last Name, Street & Number, ZIP Code, City, Country
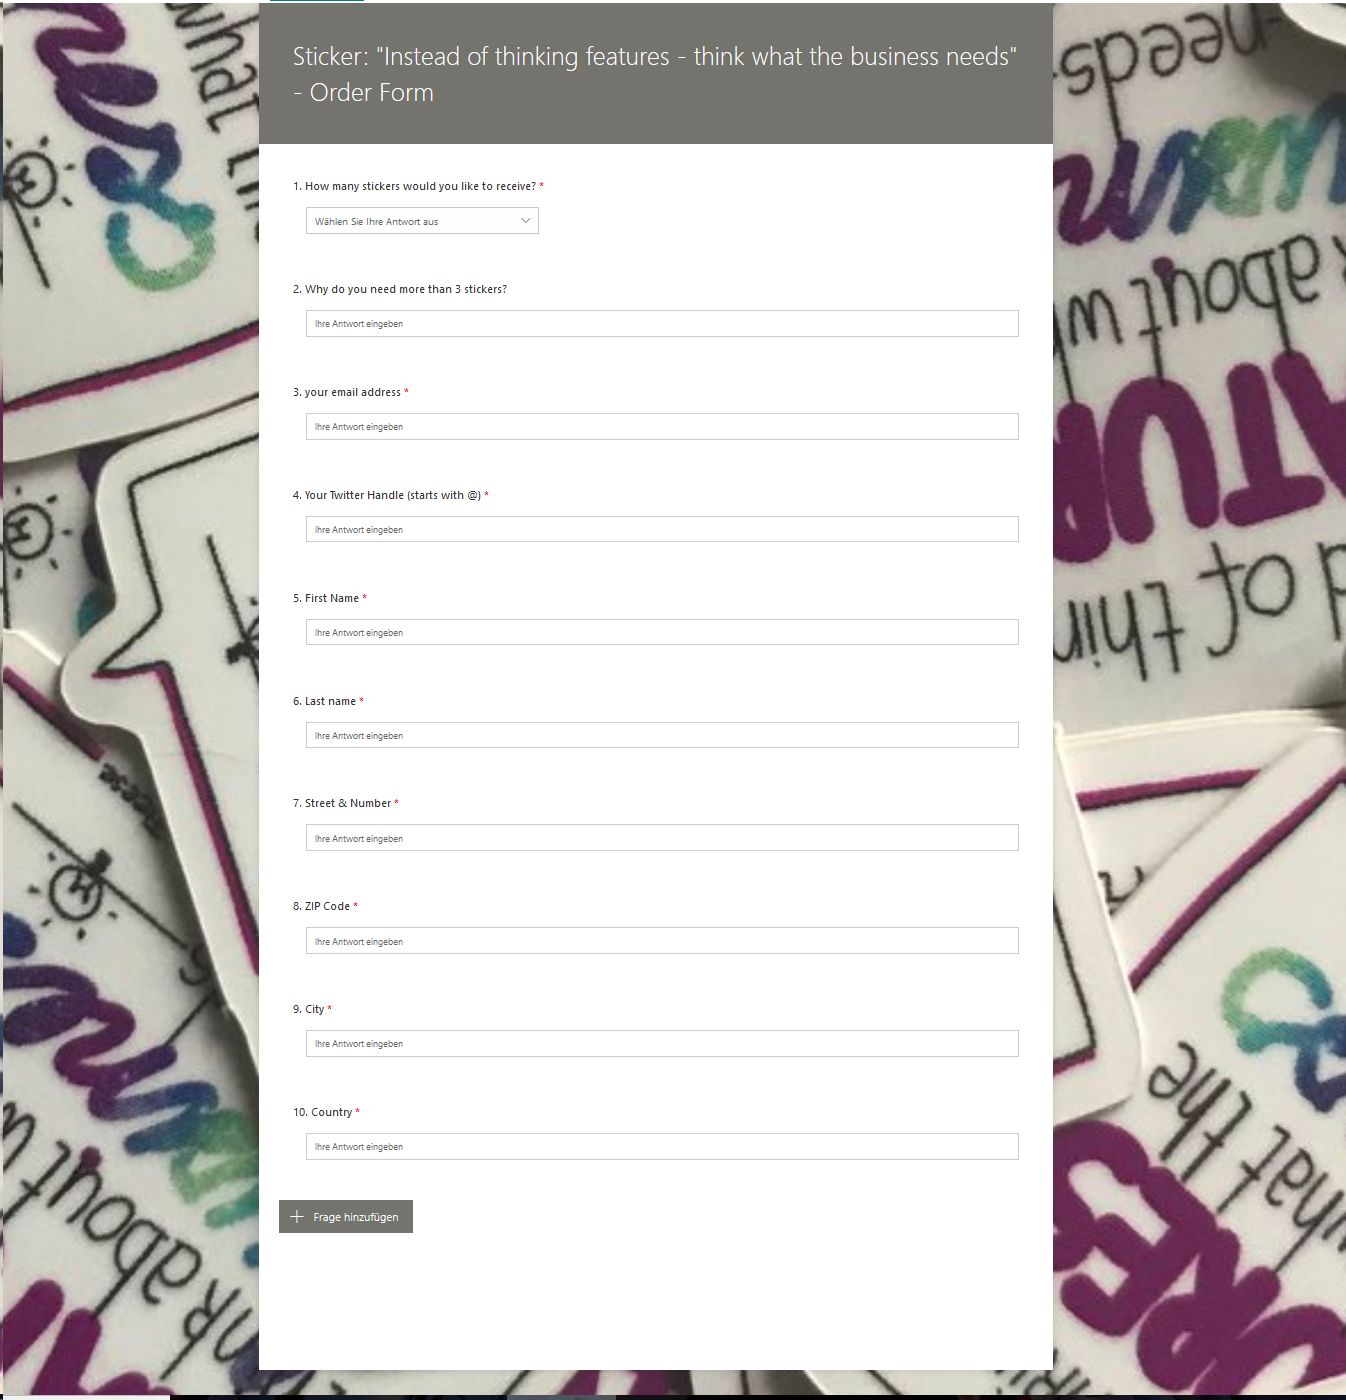
2. Create a Word Document
a) enable the Developer-Tab (File → Option → Customze Ribbon → Check Box at Developer Tab)

b) Create new Word Document, save it to OneDrive (AutoSave enabled)
c) Design the labels for the envelope using Plain Text fields (Aa)
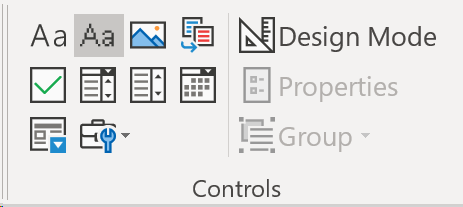
like this:

d) go to flow.microsoft.com and click on My Flows → New → Create from Blank → Create from Blank
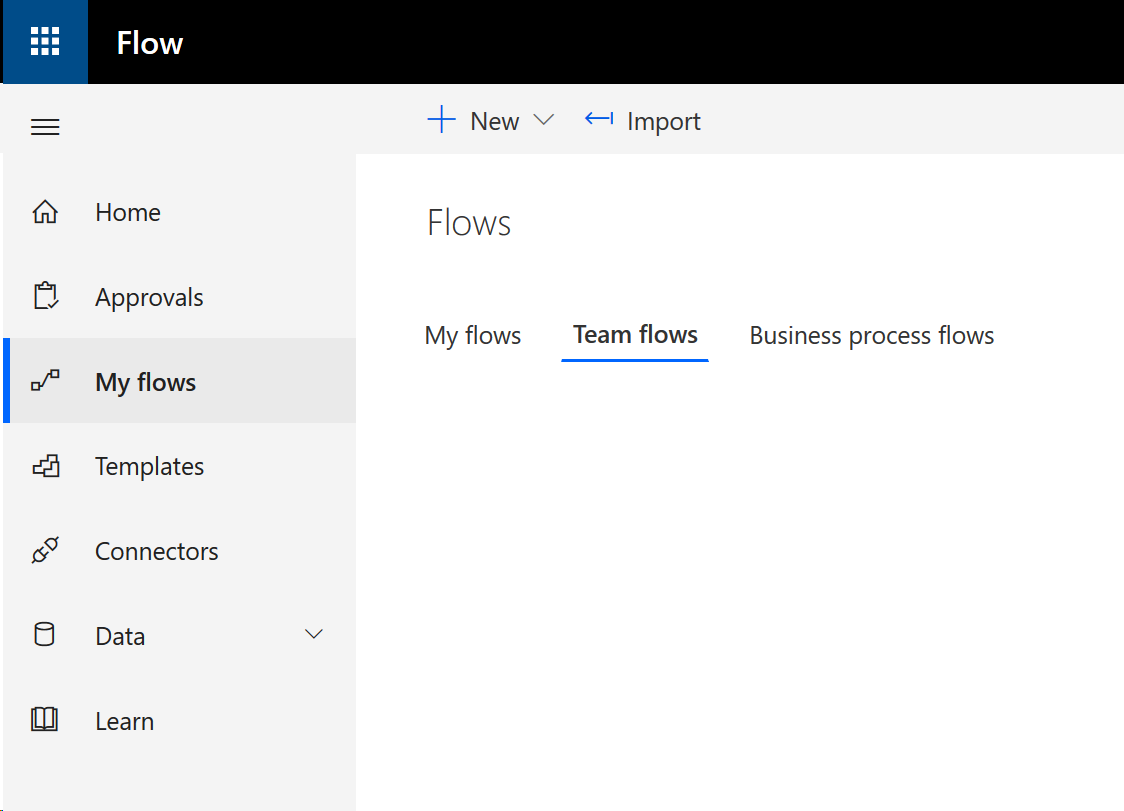
e) Type “forms” in search bar and choose “Microsoft Forms”

f) choose “ When a new respond is submitted”

g) Pick your form
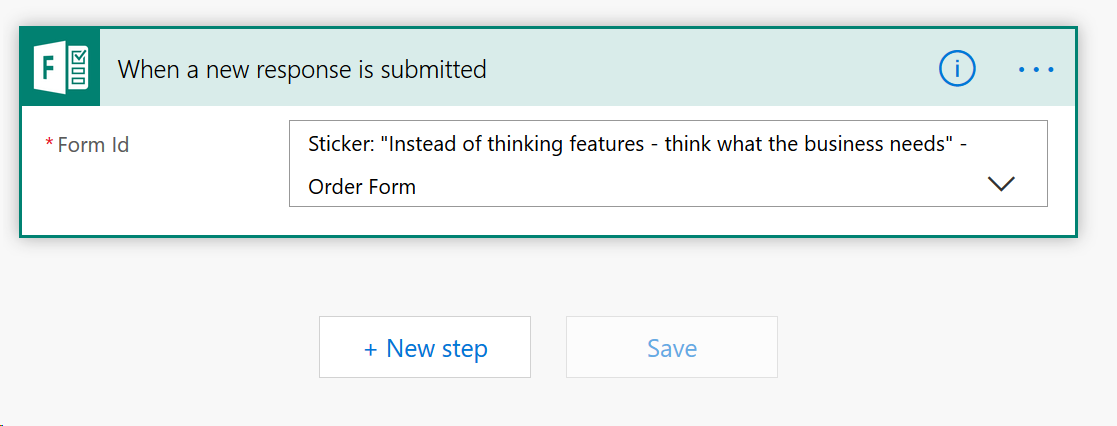
h) Click “Add action”, then type “Forms” again and select “Microsoft Forms”. Select now “Get response details”.

i) Again, select your form and now click on “Add dynamic Content” for the Response ID. Select “List of response Notifications Response ID” on the right hand side.

j) Click “Add action” and type “Create Item”, then select “SharePoint Create Item”

k) Hop over to SharePoint, create a new List.
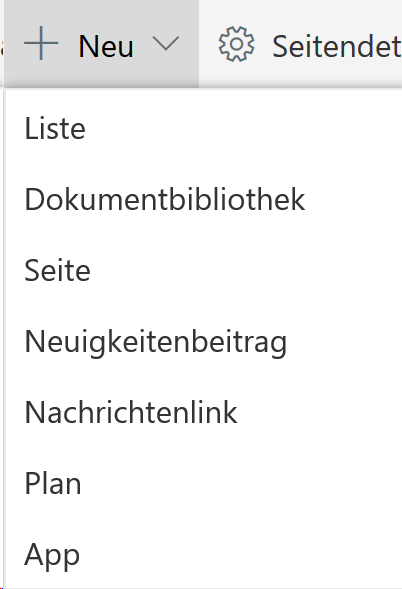
l) Create a few Columns, make sure they are ALL just text. Rename the Title Column with “Twitter Handle”. These are the Columns needed:

(as these represent the questions of your form.)
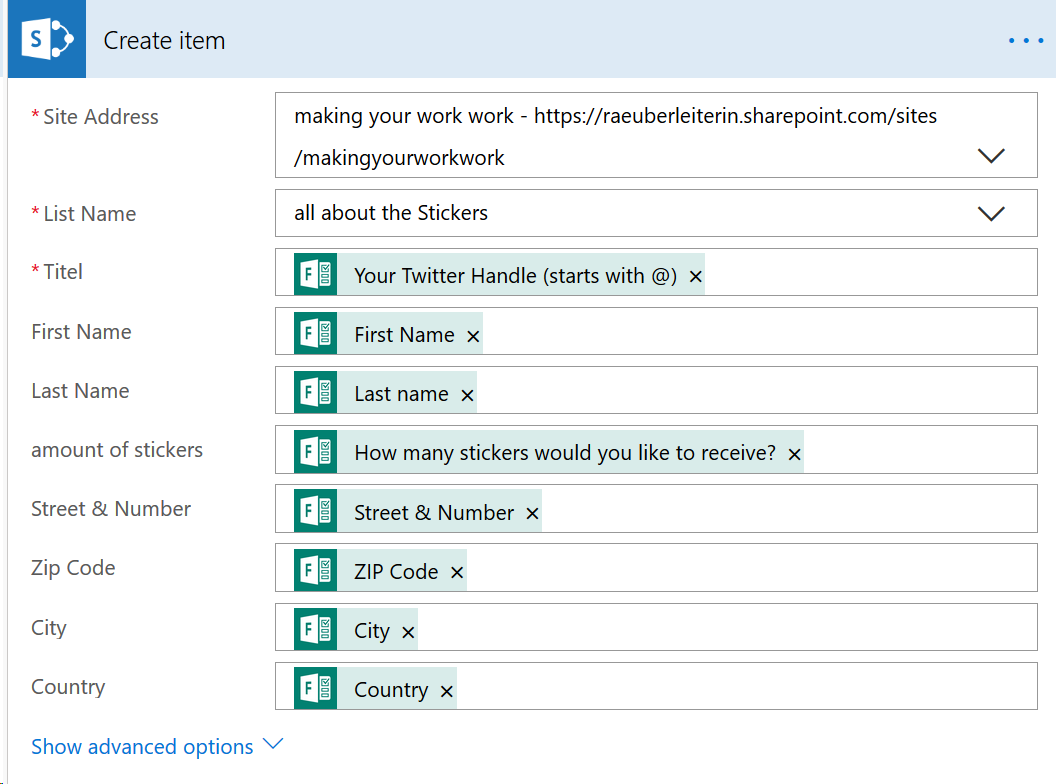
m) Now that you created your SharePoint list, we want to make sure, that Flow processes the information from Forms to SharePoint. Just hop over to Flow again, and select your SharePoint Site and in that Site your SharePoint list:

Just click on the Dynamic Contents at the right hand side:
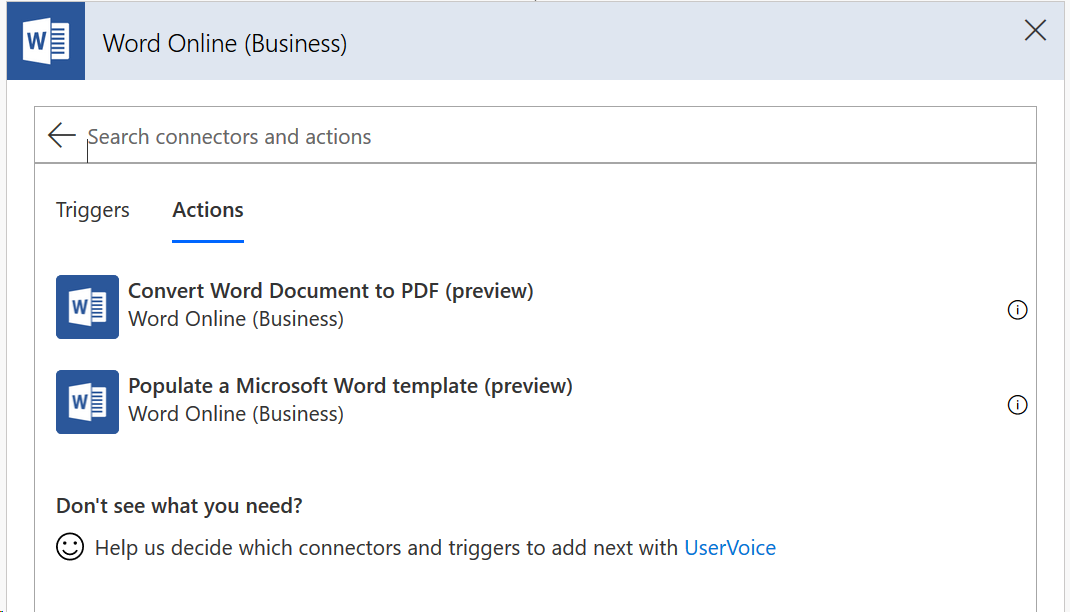
n) Click Next Step, Type “Word” and select “Word for Business”, then Select “Polulate a Microsoft Word template”
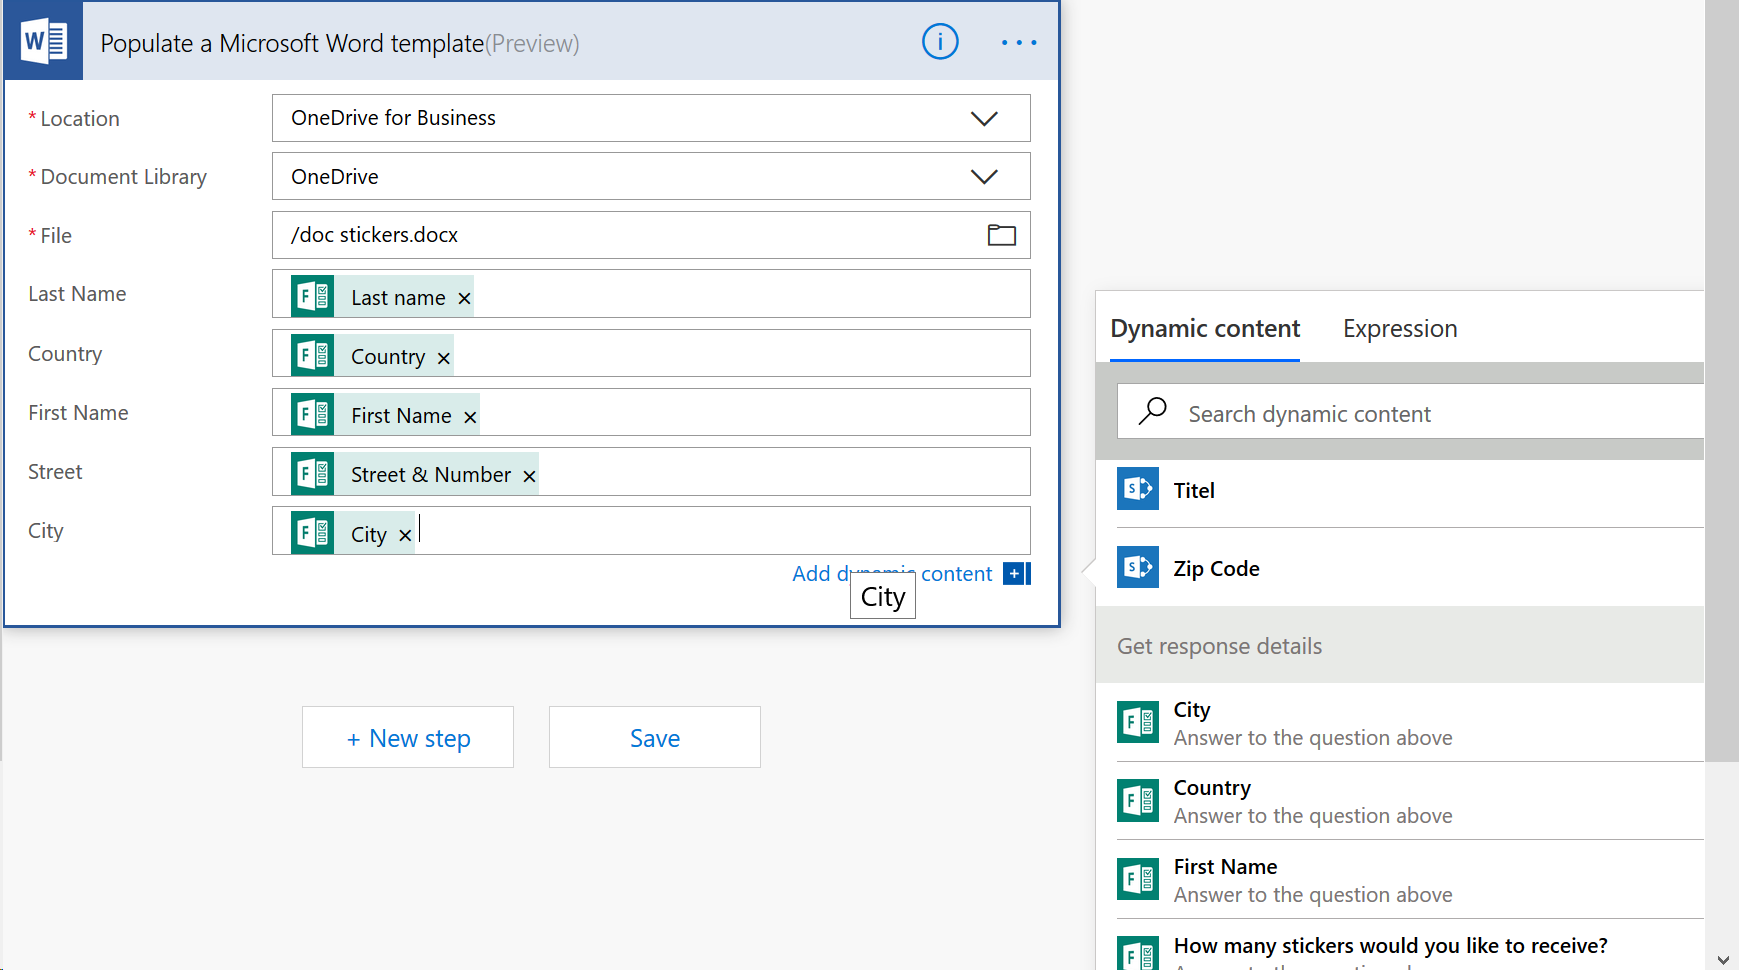
o) Select “OneDrive for Business” as Location, “OneDrive” as your Doc Library and browse to your Word document by clicking the tiny folder icon. Fill out the other fields with the Dynamic Contents from Forms just like this.
p) Click “next step”, then “Create file”, because after populated the new Word document we need to create a new file for each time a new form is submitted:
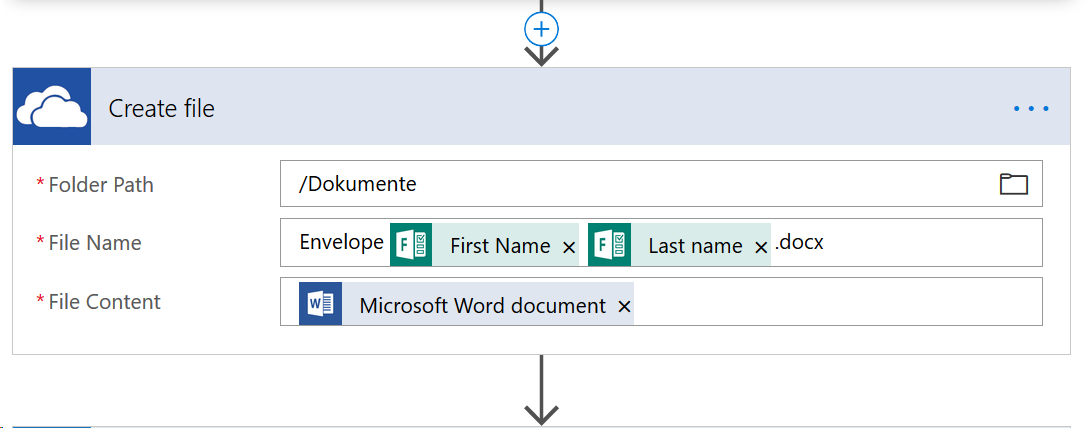
Make sure that each Document has a unique name, I just chose “Envelope First Name Last Name” which makes it easy to recognize.
3. Turn on Notifications on your SharePoint List
Just click on the … icon and select notifications

Now choose the notification you prefer and click OK. I prefer a daily summary — dont want to spam myself :-)
That’s it! — for must-haves
Every time, a new form is submitted, a new Word Document, which can be an envelope or label is generated and once a day I get a summary of all submissions in my SharePoint list.
nice-to-haves
Just because this works, we don’t need to stop and can add some additional steps. Here are the nice-to-haves:
Thank-you tweet
Click the +Icon to add a next step wherever you like, the order does not play any role.
Type “Twitter” in search bar, select “Post a tweet”

Type in the text you want to tweet, enrichen that with some Dynamic Contect like First Name etc. Please note: If you choose Twitter Handle this won’t cause an @ mention in your tweet, because twitter doesn’t want you to automate @ mentions — for reasons :-)
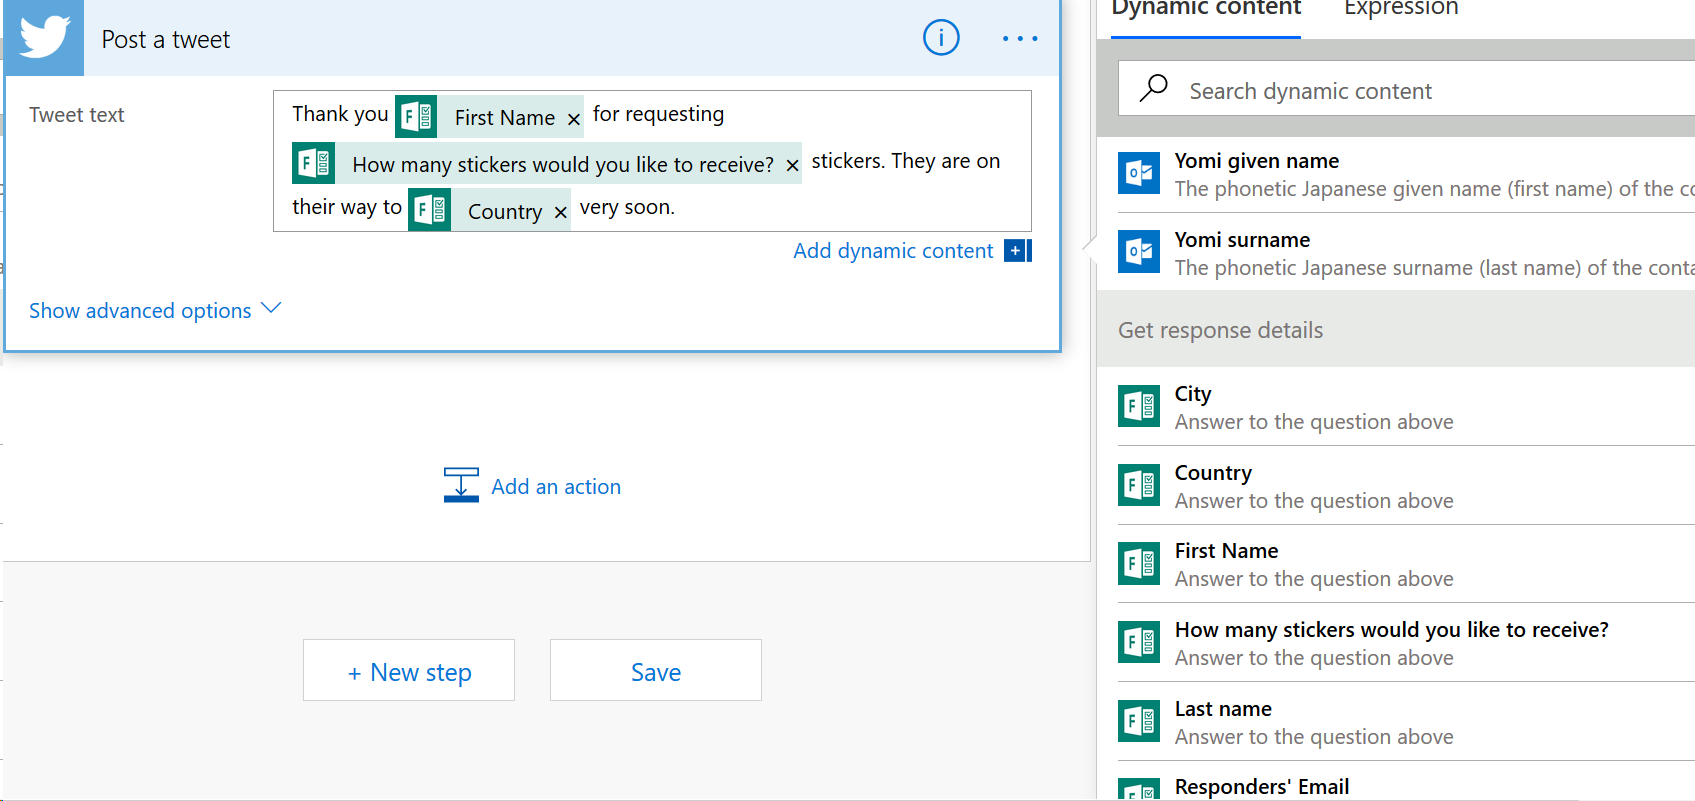
Picture for thank-you tweet
tweets with pictures are more engaging than those without pictures. To be able to post a picture (that of the stickers) you need to upload that photo first to your OneDrive and then add an action before (!) that twitter action:
Type “get file content” in search bar an select the OneDrive action:

Browse to the picture you like to post by clicking on the folder icon. Now insert that file in your tweet action:
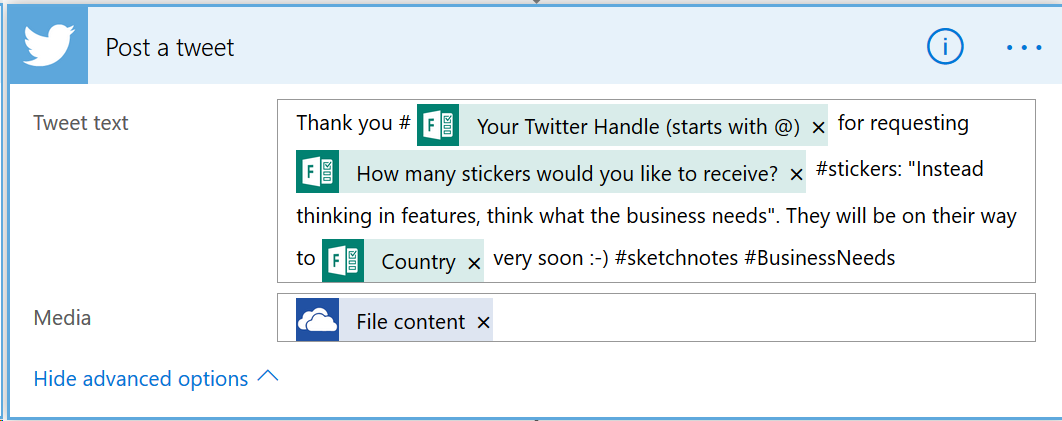
Email to user
If you additionally like to send your user an email, just add an action “Send email”
Type “send email” in search bar and select the Office 365 Outlook action:

Just specify the 3 fields with your text and some Dynamic Content:
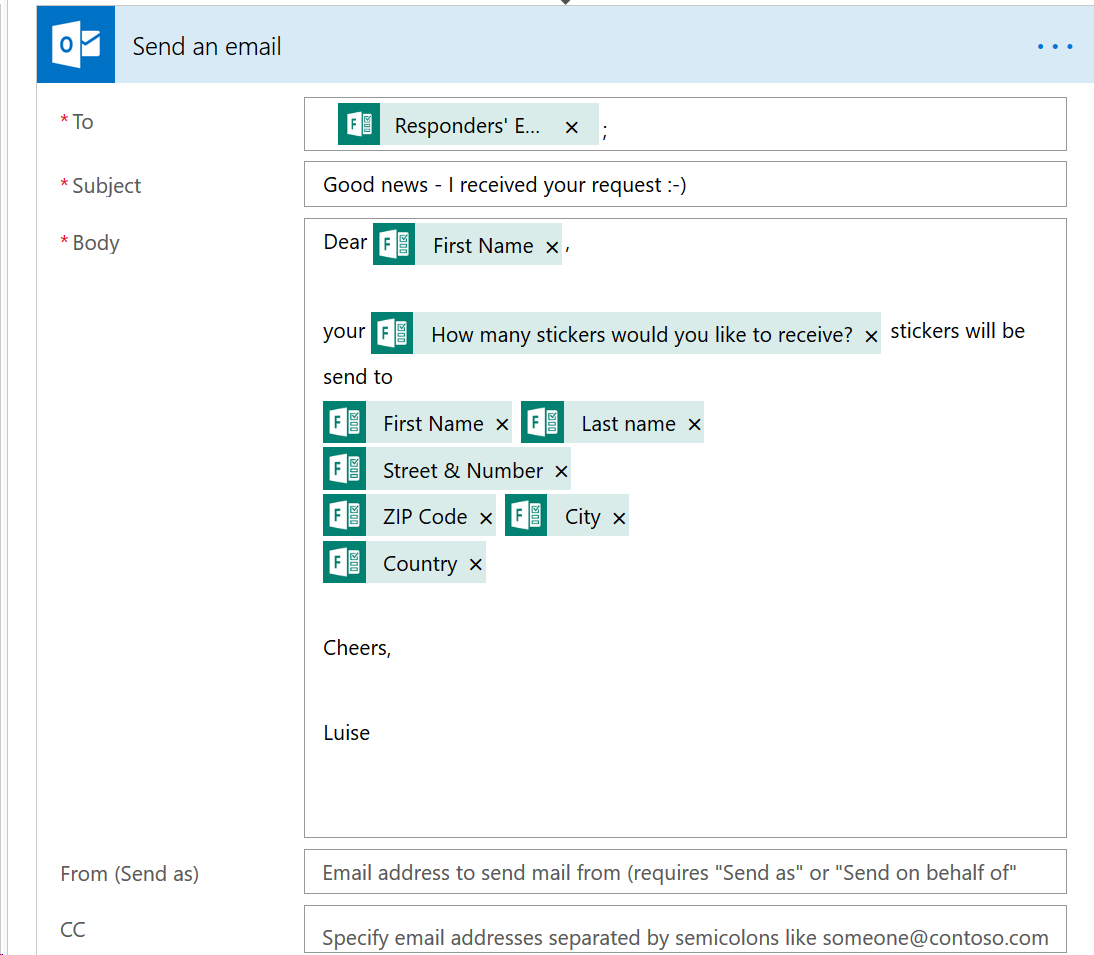
Click on “Advanced Options” and click on “Is HTML” → yes!

To Do in Microsoft To-Do
If you like your To Dos in Microsoft To-Do, it could be helpful to automate this as well.
First, let’s create a new list in Microsoft To-Do.
Then just add another action in your flow, type “To-Do” in search bar and select “Microsoft To-Do”, then “Add a to-do”

I want the twitter Handle and the amount of stickers in the title, so I just add that Dynamic Content:
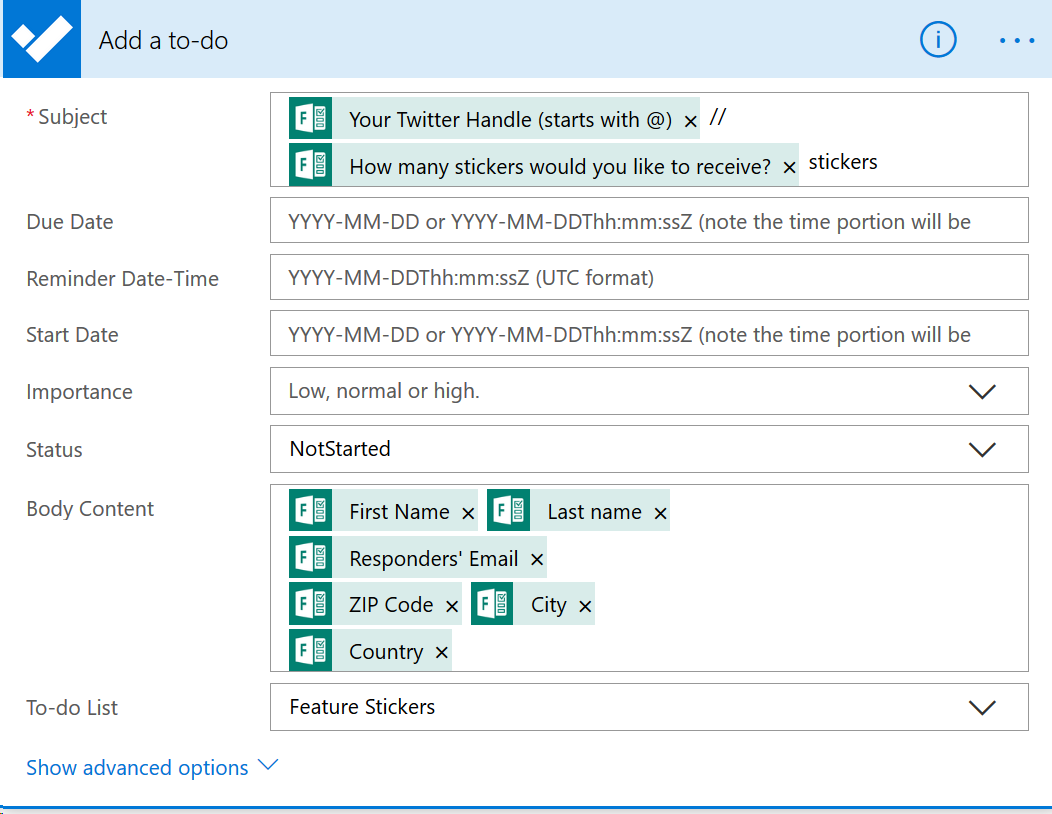
In the body I just inserted the address of the user, just in case :-)
Alternative to #MicrosoftToDo: #MicrosoftPlanner!
If you need your tasks in a Planner Board, thats easy to manage. Please do yourself a favor and create first a bucket in planner where you want those tasks to appear. Saves you some back-and-forth work (trust me! :-))
Just delete the Microsoft To-Do action (as we don’t want duplicates of our tasks in several apps!) and add another action. Type “Planner” in search bar and choose “create a new task”. Pick the rigt plan and give the task a nice name like that:

Also choose the bucket you created.
Now the hardest part… Took me some time to figure out how that works, but I will guide you through. I want to set a due date, which is 3 days after the task was automatically created.
For that we need to use those expression you can find on the right hand side. Just click Dynamic Content and then the tab “Expressions”:
A few explainations:
- just now = utcNow()
the brackets are important!
I want to add 3 days to now.
- The formula has named addDays and needs that syntax (like an Excel formula, so nothing really scary!):
addDays(timestamp, number of days, format)
the timestamp is our utcNow
number of days shall be 3, but you can choose another value as well.
format needs to be ‘YYYY-MM-dd’
Ok lets put that together:
- addDays(utcNow(),3,’yyyy-MM-dd’)
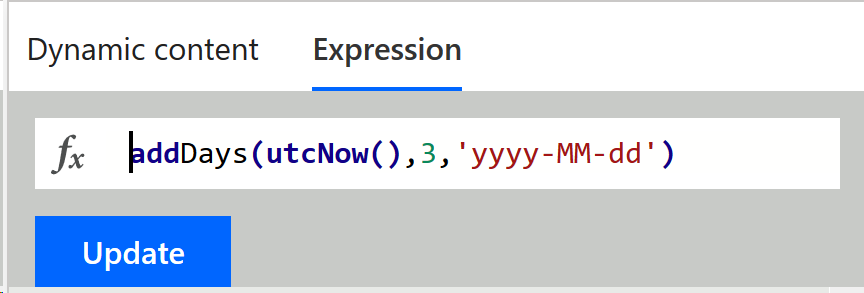
you see, it’s not that hard :-)
Please note: right now, this is actually broken in ToDo and in Outlook tasks, only works in planner.
Again, that’s it!
Every time, a new form is submitted, additionally to our earlier achievements with the must-haves, we now post a tweet with a nice picture, send an automated mail to user and are able to check our To-Dos in Microsoft To-Do or in Planner.
What do you think?
Is there anything missing? Please keep in my mind, that I am a beginner in Microsoft Flow, I started 8 Weeks ago with that journey.
Read here the very beginning what happened to me when I created my very first flow and here how I build some stuff to make it easier for me (and for my customer) to track working hours.
I would love to take that to the next level! Any recommendations are more than welcome, please engage right here or on twitter, just use hasttag #JustGoWithTheFlow
Update
I updated my flow with two small changes:
- I deleted the twitter-action (and the get file content action as well) because I got feedback that someones whole timeline was full of my tweets :-) 2. I added some Power-Bi magic to just visualize the data. Its really easy.
a) go to powerbi.microsoft.com and login.
b) click in My Workspace on Create (upper right Corner) and choose “Streaming Data Set”, then select API, next
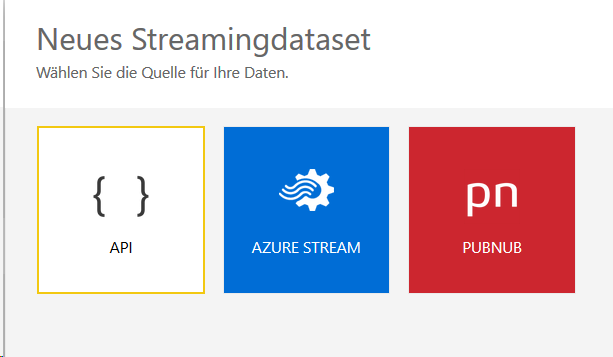
c) Just name your Data Set and Create two values, I chose Country and Amount (needs to be a number). Click Finish.
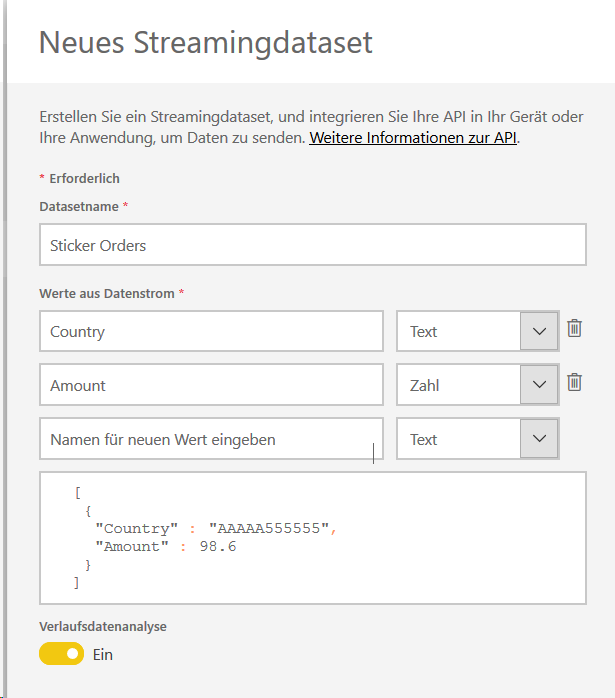
d) Hop over to flow again and add an action. Type “PowerBi” and select “Add rows to a Streaming Data Set”
e) Fill out required fields with your data and the additional fields with Dynamic Content from the form.

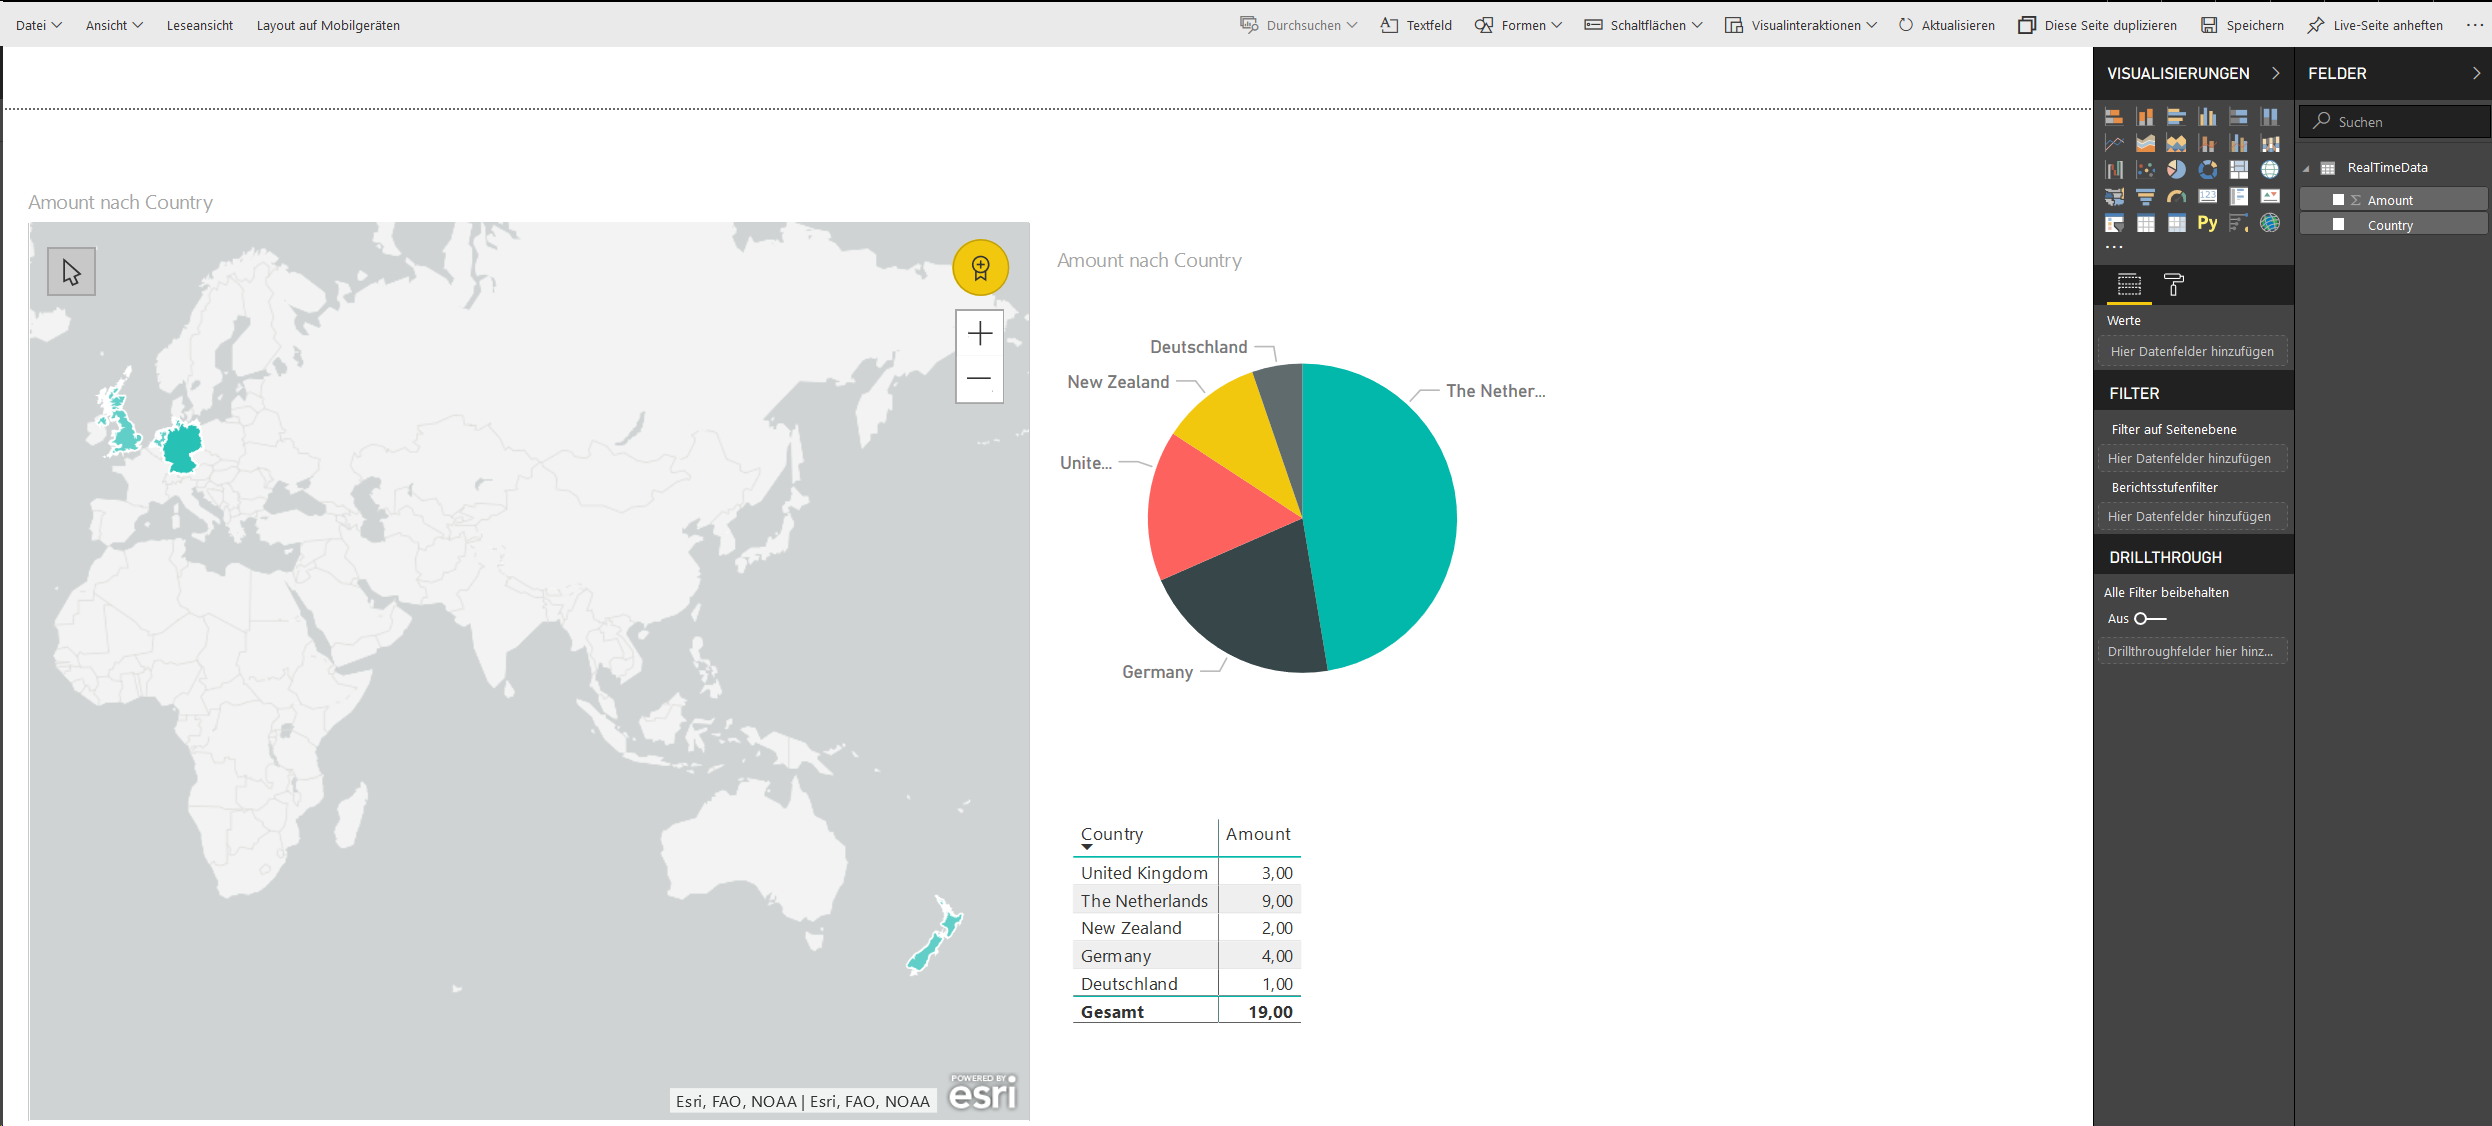
f) Play around in PowerBI:
Just try some buttons at the right hand side to create an awesome lookung report:
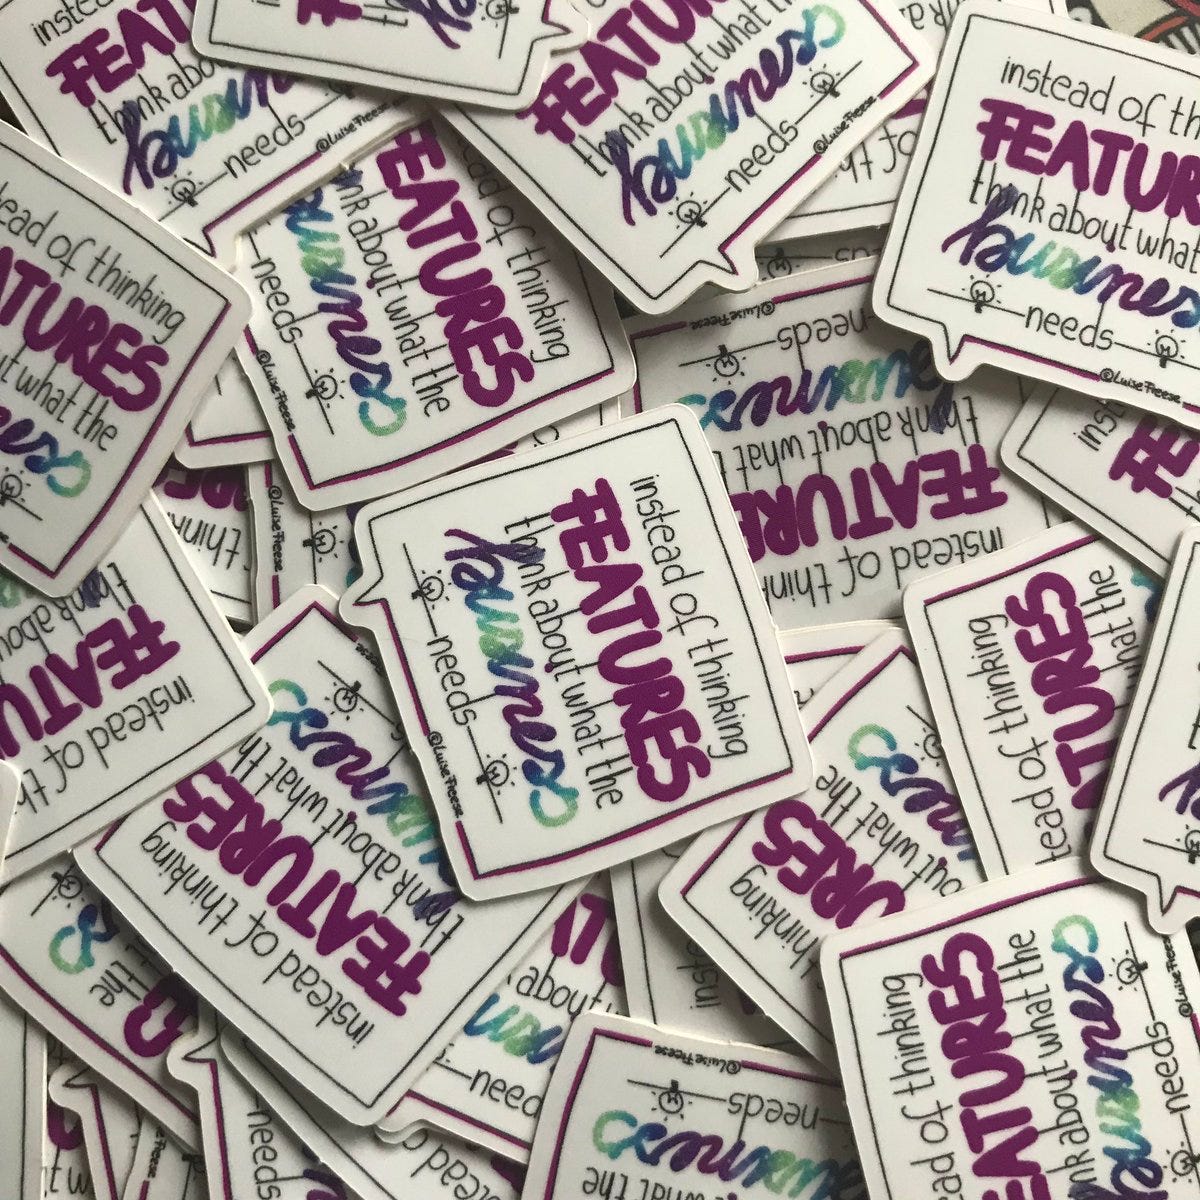
Stickers
You want to experience the frontend or just need some stickers? Click
Do you find this kind of blogpost helpful? Please clap to make sure I get that feedback.
You May Also Like
How can we overcome the pain with email?
Inbox Zero? I reached this goal, inbox zero. I wrote a tutorial how everyone can achieve that, too. Why is this important? For several reasons: Your inbox folder is just a mailbox. You empty your …
How do we organize our phones?
After my last blog post about 11+3 reasons why I fell in love with Microsoft To-Do, my dear colleague Darrell from Regarding 365 emphasized how cool he is about sorting my apps on my iPhone. That …
11 + 5 reasons to fall in love with Microsoft To Do
Wow! Really?Falling in love with a tool? Are you nuts, Luise? Yes, maybe :-) I’m a very creative person. Not only because I draw #sketchnotes at conferences and show others how important …


