
How to use Bicep to deploy Azure LogAnalytics Workspace and link Application Insights to it
This post is part of a series
- 📍 you are here - How to use Bicep to deploy Azure LogAnalytics Workspace and link Application Insights to it
- How to use Azure Container registry to standardize deployments using Bicep across your organization - to be published soon
- How to utilize the Azure Container Registry in your Azure DevOps pipeline - to be published soon
I like to deploy my Azure resources using Bicep - If you never heard about it, I blogged a while ago on how to get started with Bicep - please catch up first if you are not yet familiar with Bicep!
I strongly believe that we can’t meaningfully improve what we don’t measure. Especially though when it comes to improving apps, user feedback alone is sometimes not as reliable as we wanted it to be. This is why I like to monitor performance and track user behavior with Azure Application Insights.
Azure Application Insights
Application Insights is a tool in Azure that helps you keep an eye on your app’s performance and user activity. It tracks things like response times, errors, and failures so you can spot problems before users raise lots of tickets. You can get alerts, if something is off and of course as it is an Azure service, it works well with all kin of other Azure services.
For the longest time, Application Insights could store its data independently, but a couple of months ago Microsoft changed this and Application Insights now requires you to use a Log Analytics Workspace as the backend for storing telemetry data. This raises obviously the question: What is a Log Analytics workspace?
Azure Log Analytics Workspace
An Azure Log Analytics Workspace is like a central hub where you collect and analyze log data from various sources, including your Power Apps and Azure services.
When you use Application Insights to monitor your app’s performance, connecting it to a Log Analytics Workspace supercharges your capabilities:
- It lets you run advanced queries to dig into your data and uncover insights that basic Application Insights might miss
- If you’re tracking multiple apps or resources, a Log Analytics Workspace pulls all the data together in one place, making it easier to spot patterns and issues
How do we create now the Log Analytics Workspace and Application Insights?
Please make sure, that you installed the Bicep tools
We will work through this in modules. If you are not familiar with this approach yet, using modules in Bicep is all about making your infrastructure code more organized and reusable. Instead of having one big, messy file, you can break things down into smaller, more focused pieces. For this deployment, we will need 3 files. 1 for the Log Analytics Workspace, 1 for the Application Insights and 1 main, that will call the other ones. Let’s get started!
- Create a new bicep file, name it
loganalyticsworkspace.bicep
param location string
param logAnalyticsWorkspaceName string

resource logAnalyticsWorkspace 'Microsoft.OperationalInsights/workspaces@2020-08-01' = {
  name: logAnalyticsWorkspaceName
  location: location
  properties: {
    sku: {
      name: 'PerGB2018'
    }
    retentionInDays: 30
  }
}
- Create a new bicep file, name it
appinsights.bicep
param location string
param appInsightsName string
param applicationType string = 'web'
param logAnalyticsWorkspaceId string

resource appInsights 'Microsoft.Insights/components@2020-02-02' = {
  name: appInsightsName
  location: location
  kind: applicationType
  properties: {
    Application_Type: applicationType
    WorkspaceResourceId: logAnalyticsWorkspaceId
  }
}
- Create a new Bicep file, name in
main.bicep
param location string = resourceGroup().location
param logAnalyticsWorkspaceName string
param appInsightsName string
param applicationType string = 'web'

// Deploy Log Analytics workspace
module logAnalytics 'logAnalyticsWorkspace.bicep' = {
  name: 'logAnalyticsDeployment'
  params: {
    location: location
    logAnalyticsWorkspaceName: logAnalyticsWorkspaceName
  }
}

// Deploy Application Insights and link to Log Analytics workspace
module appInsights 'appInsights.bicep' = {
  name: 'appInsightsDeployment'
  params: {
    location: location
    appInsightsName: appInsightsName
    applicationType: applicationType
    logAnalyticsWorkspaceId: logAnalytics.outputs.logAnalyticsWorkspaceId
  }
}

4. Now deploy this using Azure CLI

```azurecli
# Set variables
$RESOURCE_GROUP="yourResourceGroupName"
$LOCATION="yourLocation"
$LOG_ANALYTICS_WORKSPACE_NAME="yourLogAnalyticsWorkspaceName"
$APP_INSIGHTS_NAME="yourAppInsightsName"

# Create resource group if it doesn't exist
az group create --name $RESOURCE_GROUP --location $LOCATION

# Deploy the main Bicep file
az deployment group create \
  --resource-group $RESOURCE_GROUP \
  --template-file main.bicep \
  --parameters logAnalyticsWorkspaceName=$LOG_ANALYTICS_WORKSPACE_NAME appInsightsName=$APP_INSIGHTS_NAME location=$LOCATION
💡 please make sure that you put actual values into the placeholders
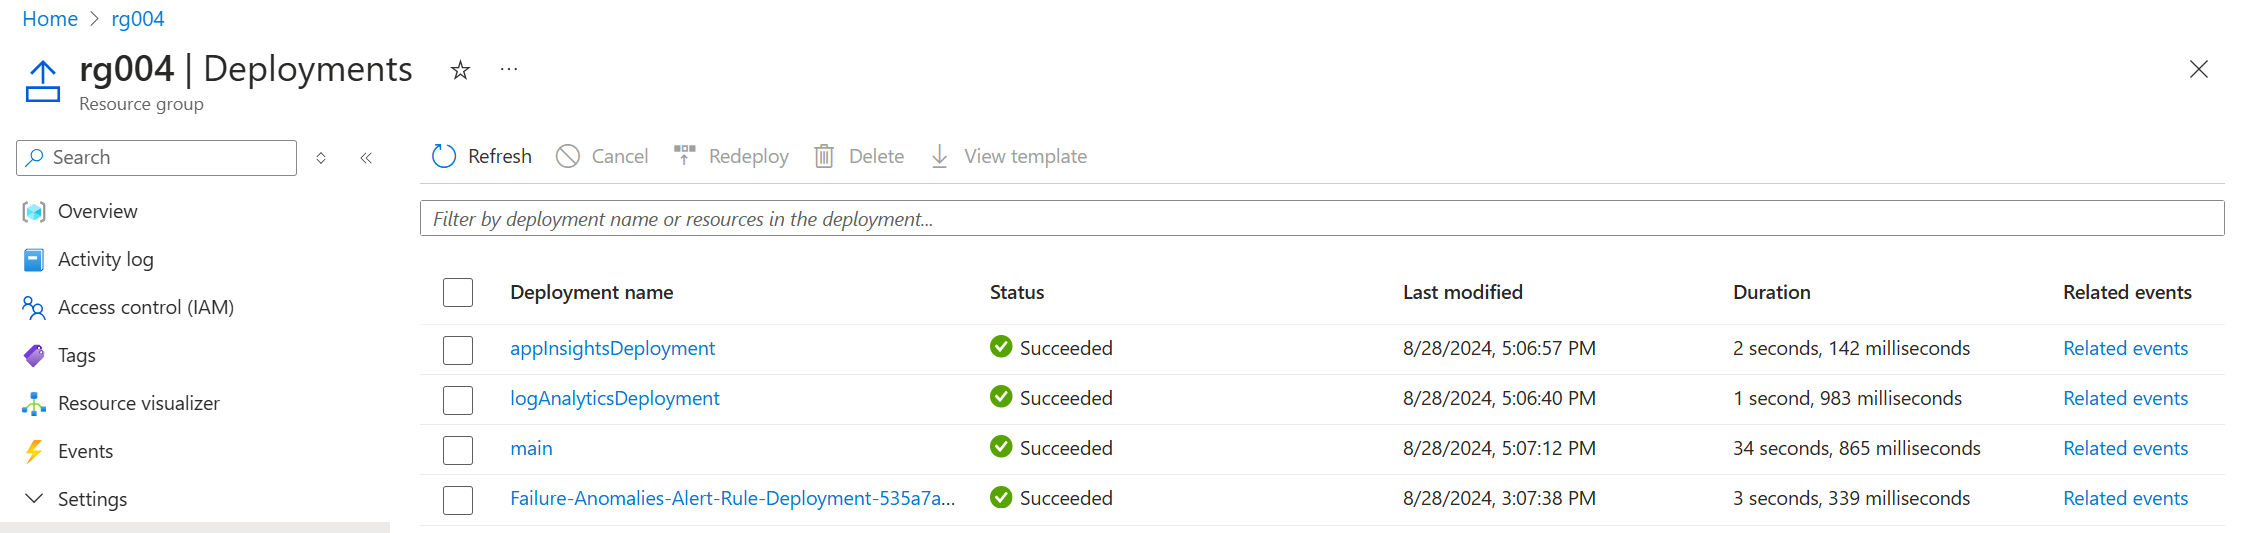
As a result, we can now see
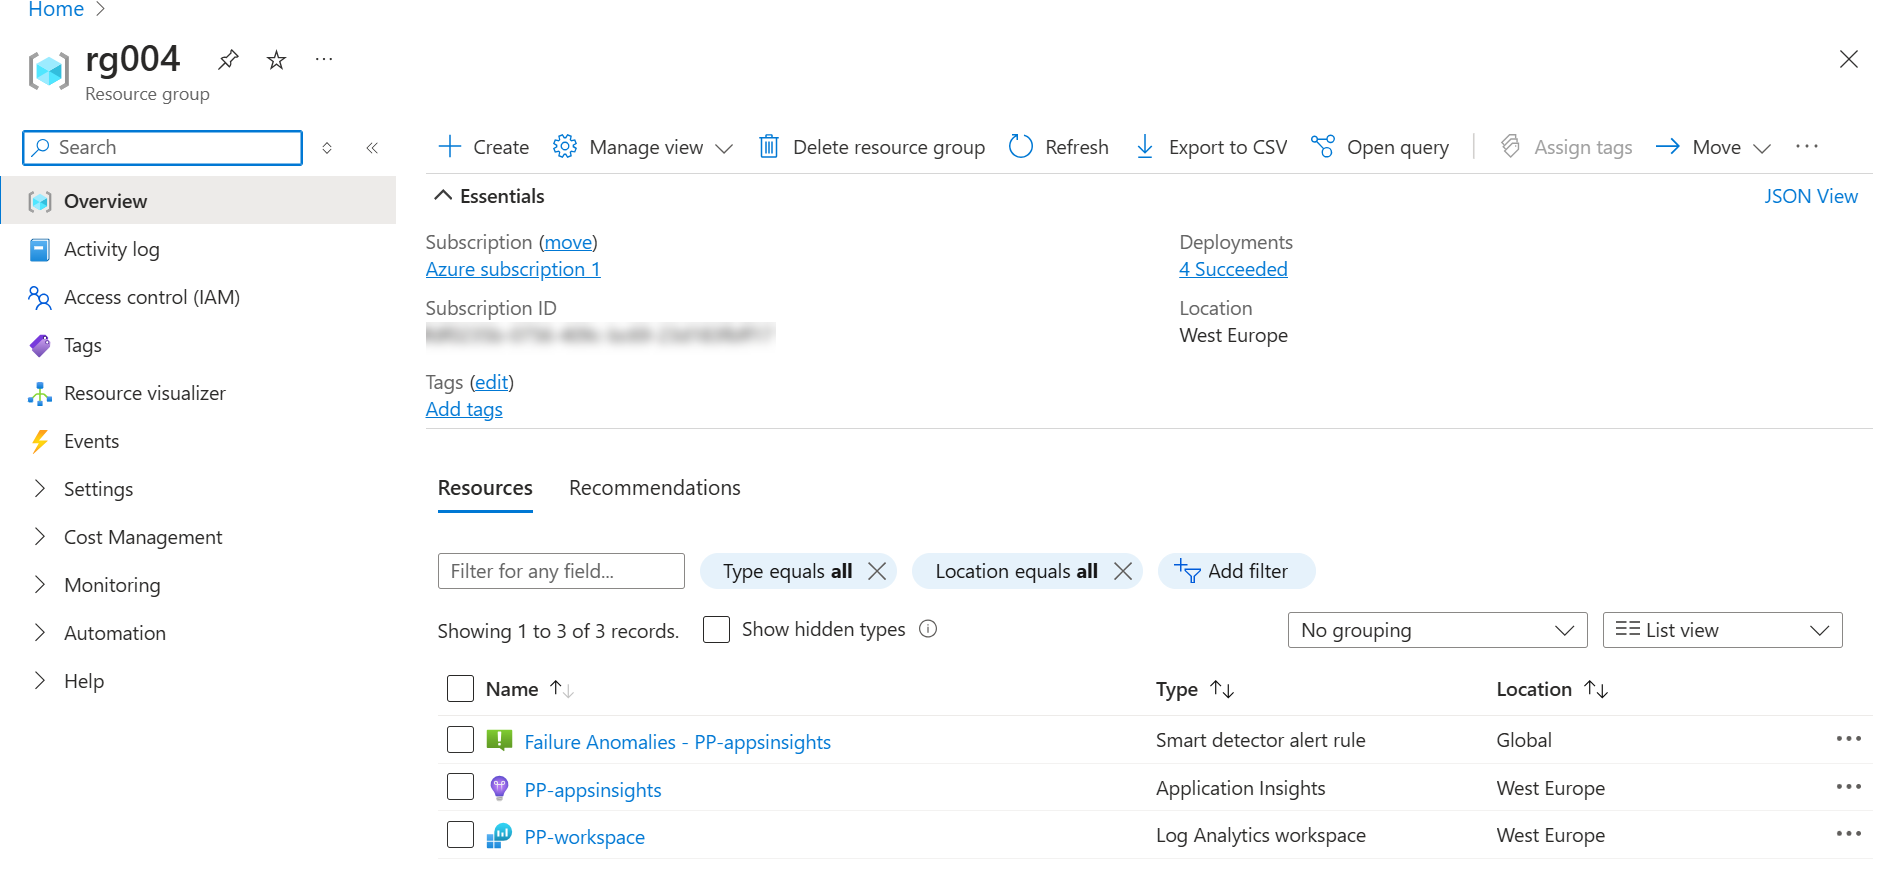
that the deployment worked like a charm! We can even see, that in fact, we have 4 deployments - One of them being Smart detection - Failure Anomalies, that gets automatically deployed. The other 3 are exactly the files that we created!
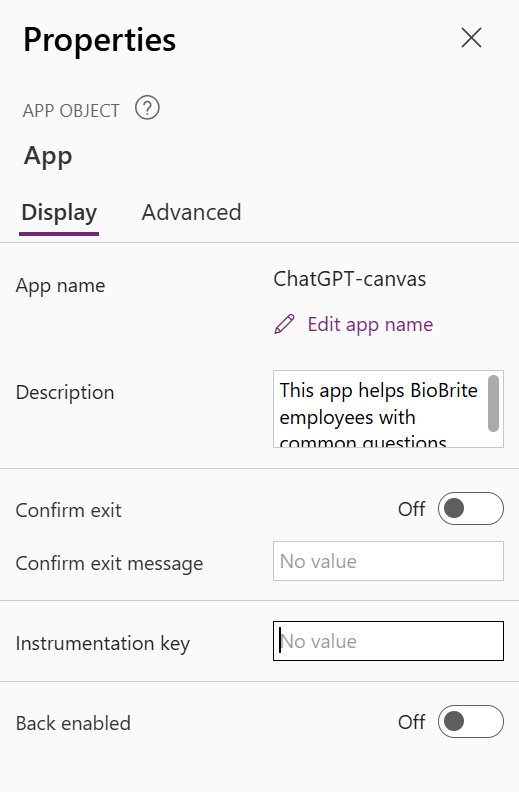
Bonus for Power Apps people
You can now link your Application Insight Instrumentation Key to a Canvas app an track its performance! OPen your app in EDIT mode, open the APP object and find the Instrumentation Key property on the right pane:
Conclusion
Bicep modules make it very easy to deploy Azure resources - If you’d like to take that one or two levels up, then stay tuned for next parts of this series… Where we cover how to utilize a Docker container to store our Bicep files org wide, and how to use this then in automated Azure DevOps pipeline!

My name is
Luise Freese
You May Also Like
How to get from Dev? Ooops! 🤭 to proper (Azure) DevOps for Power Platform
Watch out - this is part 2 of a series around very good practices in Power Platform Part 1: Yolo! Let’s deploy Friday?! 📍 You are here –> Part 2: How to get from Dev? Ooops! 🤭 to …

How to upload files to SharePoint for Dataverse integration in a Power Apps canvas app
Use Case Recently, someone asked me if it was possible to utilize the SharePoint integration in Dataverse not only from a model-driven app, but also from a canvas app. Challenge accepted! Tl;dr: yes, …

How to build a deskbooking tool with Microsoft Planner and Power Automate
Use Case Recently, a customer asked if it was possible to low code build a desk booking tool without using Power Apps. Tl;dr: yes, it is! We will leverage the UI of Microsoft Planner and use Power …