
How to secure access to an Azure Container registry with RBAC
This post is part of a series
- How to deploy Azure LogAnalytics Workspace and link Application Insights to it
- How to use Azure Container Registry to standardize deployments using Bicep across your organization
- 📍 you are here - How to secure access to an Azure Container Registry with RBAC
- How to secure access to an Azure Container Registry with a Managed Identity
- How to utilize the Azure Container Registry in your Azure DevOps pipeline - to be published soon
I like to deploy my Azure resources using Bicep - If you never heard about it, I blogged a while ago on how to get started with Bicep - please catch up first!
How to Secure Access to an Azure Container Registry with RBAC
We discussed in the previous post how an Azure Container Registry may help you standardize and ease the work with deployment files. One of the questions I received (thanks Christian 👏) and wanted to address in this post was why not just use git (for example in Azure repos)? The answer is, that while git is amazing for during development, enabling teamwork, version control, traceability, images published to Azure Container Registry are immutable, so that they can’t be modified anymore. This ensures, that the files we work with are not being altered anymore. In this post, we’ll explore how to now secure access to an Azure Container Registry (ACR) using Role-Based Access Control (RBAC).
Before we start
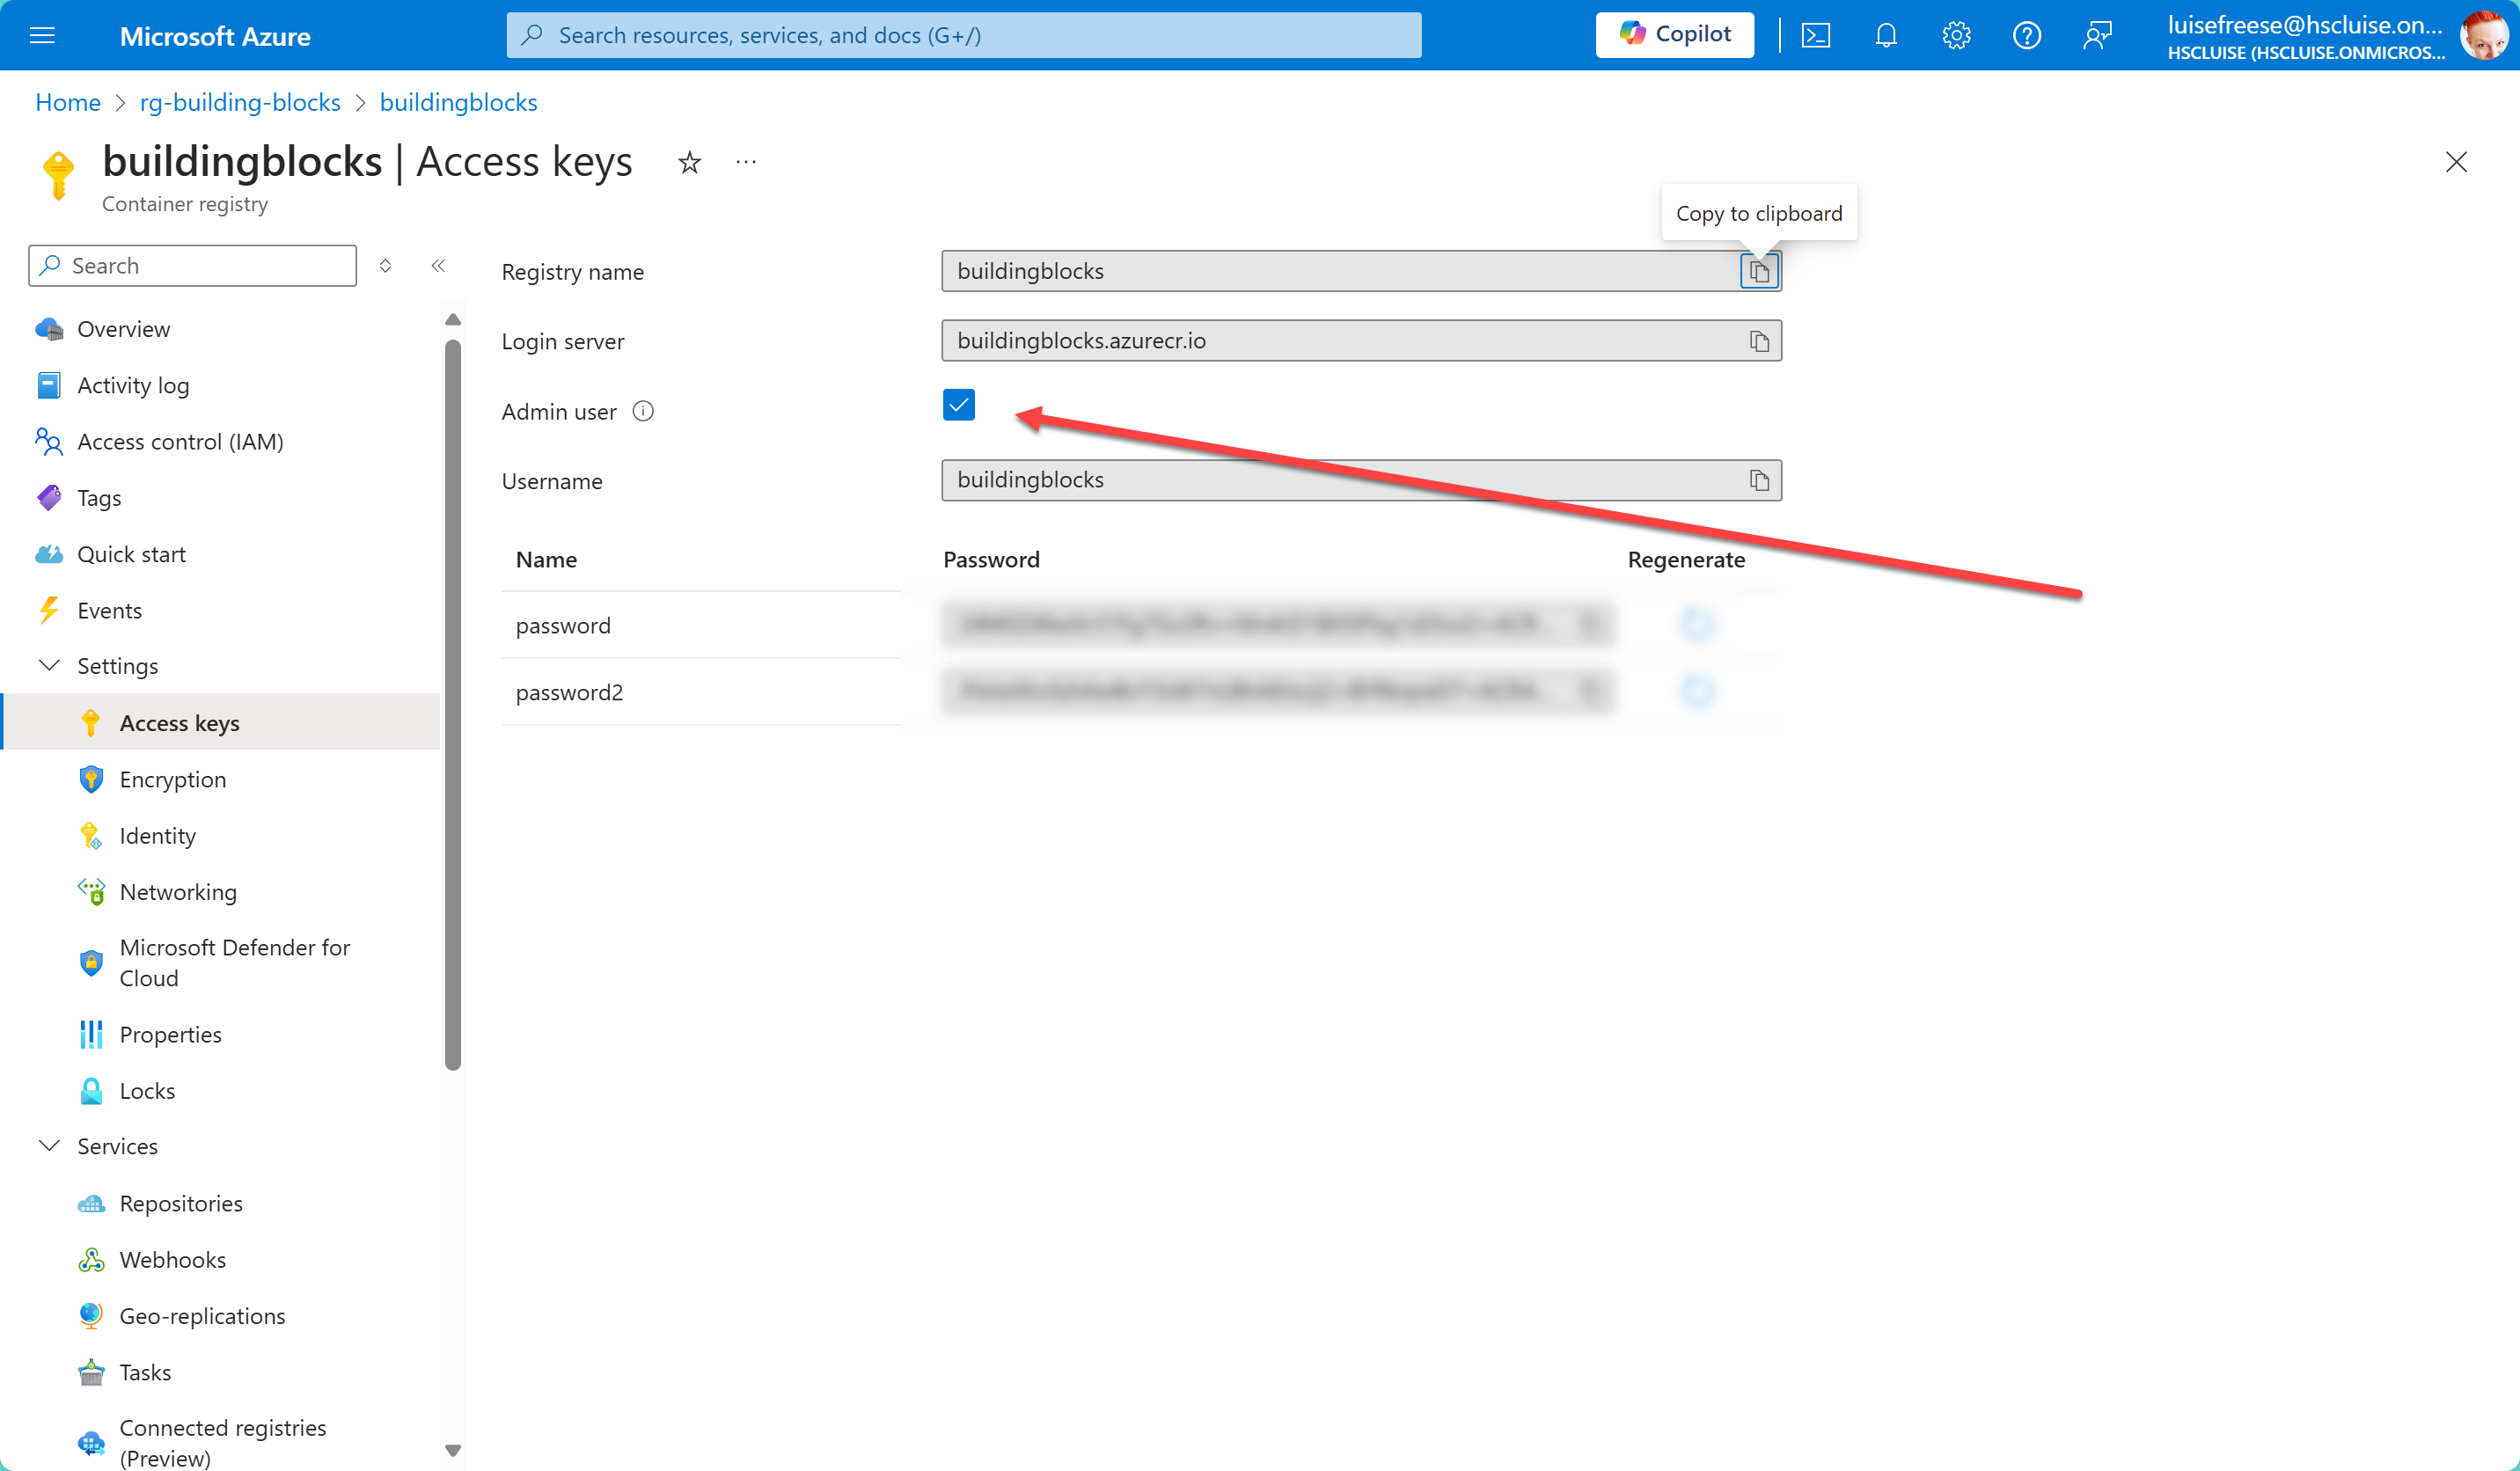
Hate to break it to you, but there is a standard setting in Azure Container Registry, that I very much dislike.
It’s called Azure Container Registry Admin Access and allows accessing the entire ACR as an admin. Sounds super convenient, but pretty scary to me. And as if that wasn’t scary enough, for everyone who like to read audit logs as good night stories: If this stays enabled (because yes, this is ON by default 😱), it’s always the admin’s username appearing in the log files. That will make traceability of any issue really hard. So do yourself and me a favor and turn this off.
Ok, I’m glad we can finally proceed :-)
Understanding Azure RBAC for Container Registry
Azure Container Registry (ACR) supports a set of built-in Azure roles that provide different levels of permissions. These roles can be assigned to users, service principals, or other identities to control access to the registry. The primary roles include:
- Owner: Full access to all resources
- Contributor: Can manage all resources but cannot grant access to others
- Reader: Can view all resources but cannot make changes
- AcrPush: Can push container images to the registry
- AcrPull: Can pull container images from the registry
Using Azure RBAC, you can assign these roles to ensure that only authorized identities can interact with your registry, whether it’s for pulling or pushing container images. For example, someone would be the person to exclusively push images (for examples the bicep deployment files from the last blog post) to ACR, but a set of developers should be able to consume (pull) the imaged from ACR.
Creating a Service Principal
To automate interactions with your ACR, you can create a service principal and assign it the necessary RBAC roles. I’d like to use a Key Vault then to securely store the credentials. Let’s go:
# Variables
$vaultName = "<name of your key vault>"
$spName = "<name of the service principal>"
$subscriptionId = "<your Azure subscription id>"
$resourceGroup = "name of the resource group>"
$acrName = "<name of your Azure Container Registry>"
$location = "<name of the location>"
$userObjectId = "<object id of our user>"

# Assign `Owner` to your user so that you have enough privileges to create service principal
az role assignment create --assignee $userObjectId --role "Owner" --scope /subscriptions/<your-subscription-id>

# Create a service principal and capture the output
$spOutput = az ad sp create-for-rbac --name $spName --role acrpull --scopes "/subscriptions/$subscriptionId/resourceGroups/$resourceGroup/providers/Microsoft.ContainerRegistry/registries/$acrName" --query "{appId: appId, password: password, tenant: tenant}" -o json

# Parse the JSON output to extract appId, password, and tenant
$spDetails = $spOutput | ConvertFrom-Json
$appId = $spDetails.appId
$password = $spDetails.password
$tenantId = $spDetails.tenant
Store the values in Azure Key Vault
Now we want to store the values in an Azure Key Vault. If you don’t already have one (and permissions to write to it), let’s create one first:
az keyvault create --name $vaultName --resource-group $resourceGroup --location $location
To be able to push values into the Key Vault, we need to assign an RBAC role Key Vault Secrets Officer. So let’s get that done as well:
# Assign the Key Vault Secrets Officer role to your user
az role assignment create --assignee $userObjectId --role "Key Vault Secrets Officer" --scope "/subscriptions/$subscriptionId/resourceGroups/$resourceGroup/providers/Microsoft.KeyVault/vaults/$vaultName"
💡RBAC in Key Vault can be a bit tricky, as sometimes we will need to allow a bit more of propagation time for the role assignment to be fully effective. We can solidify our little script like this:
# Wait for role assignment to propagate
$maxRetries = 10
$retryCount = 0
$roleAssigned = $false

while (-not $roleAssigned -and $retryCount -lt $maxRetries) {
    Start-Sleep -Seconds 10
    $roleAssignment = az role assignment list --assignee $userObjectId --scope "/subscriptions/$subscriptionId/resourceGroups/$resourceGroup/providers/Microsoft.KeyVault/vaults/$vaultName" --query "[?roleDefinitionName=='Key Vault Secrets Officer']" -o json | ConvertFrom-Json
    if ($roleAssignment -ne $null) {
        $roleAssigned = $true
    } else {
        $retryCount++
        Write-Output "Waiting for role assignment to propagate... ($retryCount/$maxRetries)"
    }
}

if (-not $roleAssigned) {
    Write-Error "Role assignment failed or has not propagated yet. Please try again after some time."
    exit 1
}
Once that is completed successfully, we will push our credentials into the Key Vault
az keyvault secret set --vault-name $vaultName --name acr-sp-id --value $appId
az keyvault secret set --vault-name $vaultName --name acr-sp-password --value $password
az keyvault secret set --vault-name $vaultName --name acr-tenant-id --value $tenantId

Write-Output "Service principal credentials stored in Key Vault successfully ✅."
Lets briefly check this in the Azure portal:
- Select the resource group in which the ACR resides
- Select the ACR
- Select Access Control (IAM)
- Select Check access
- Search for the name of your service principal
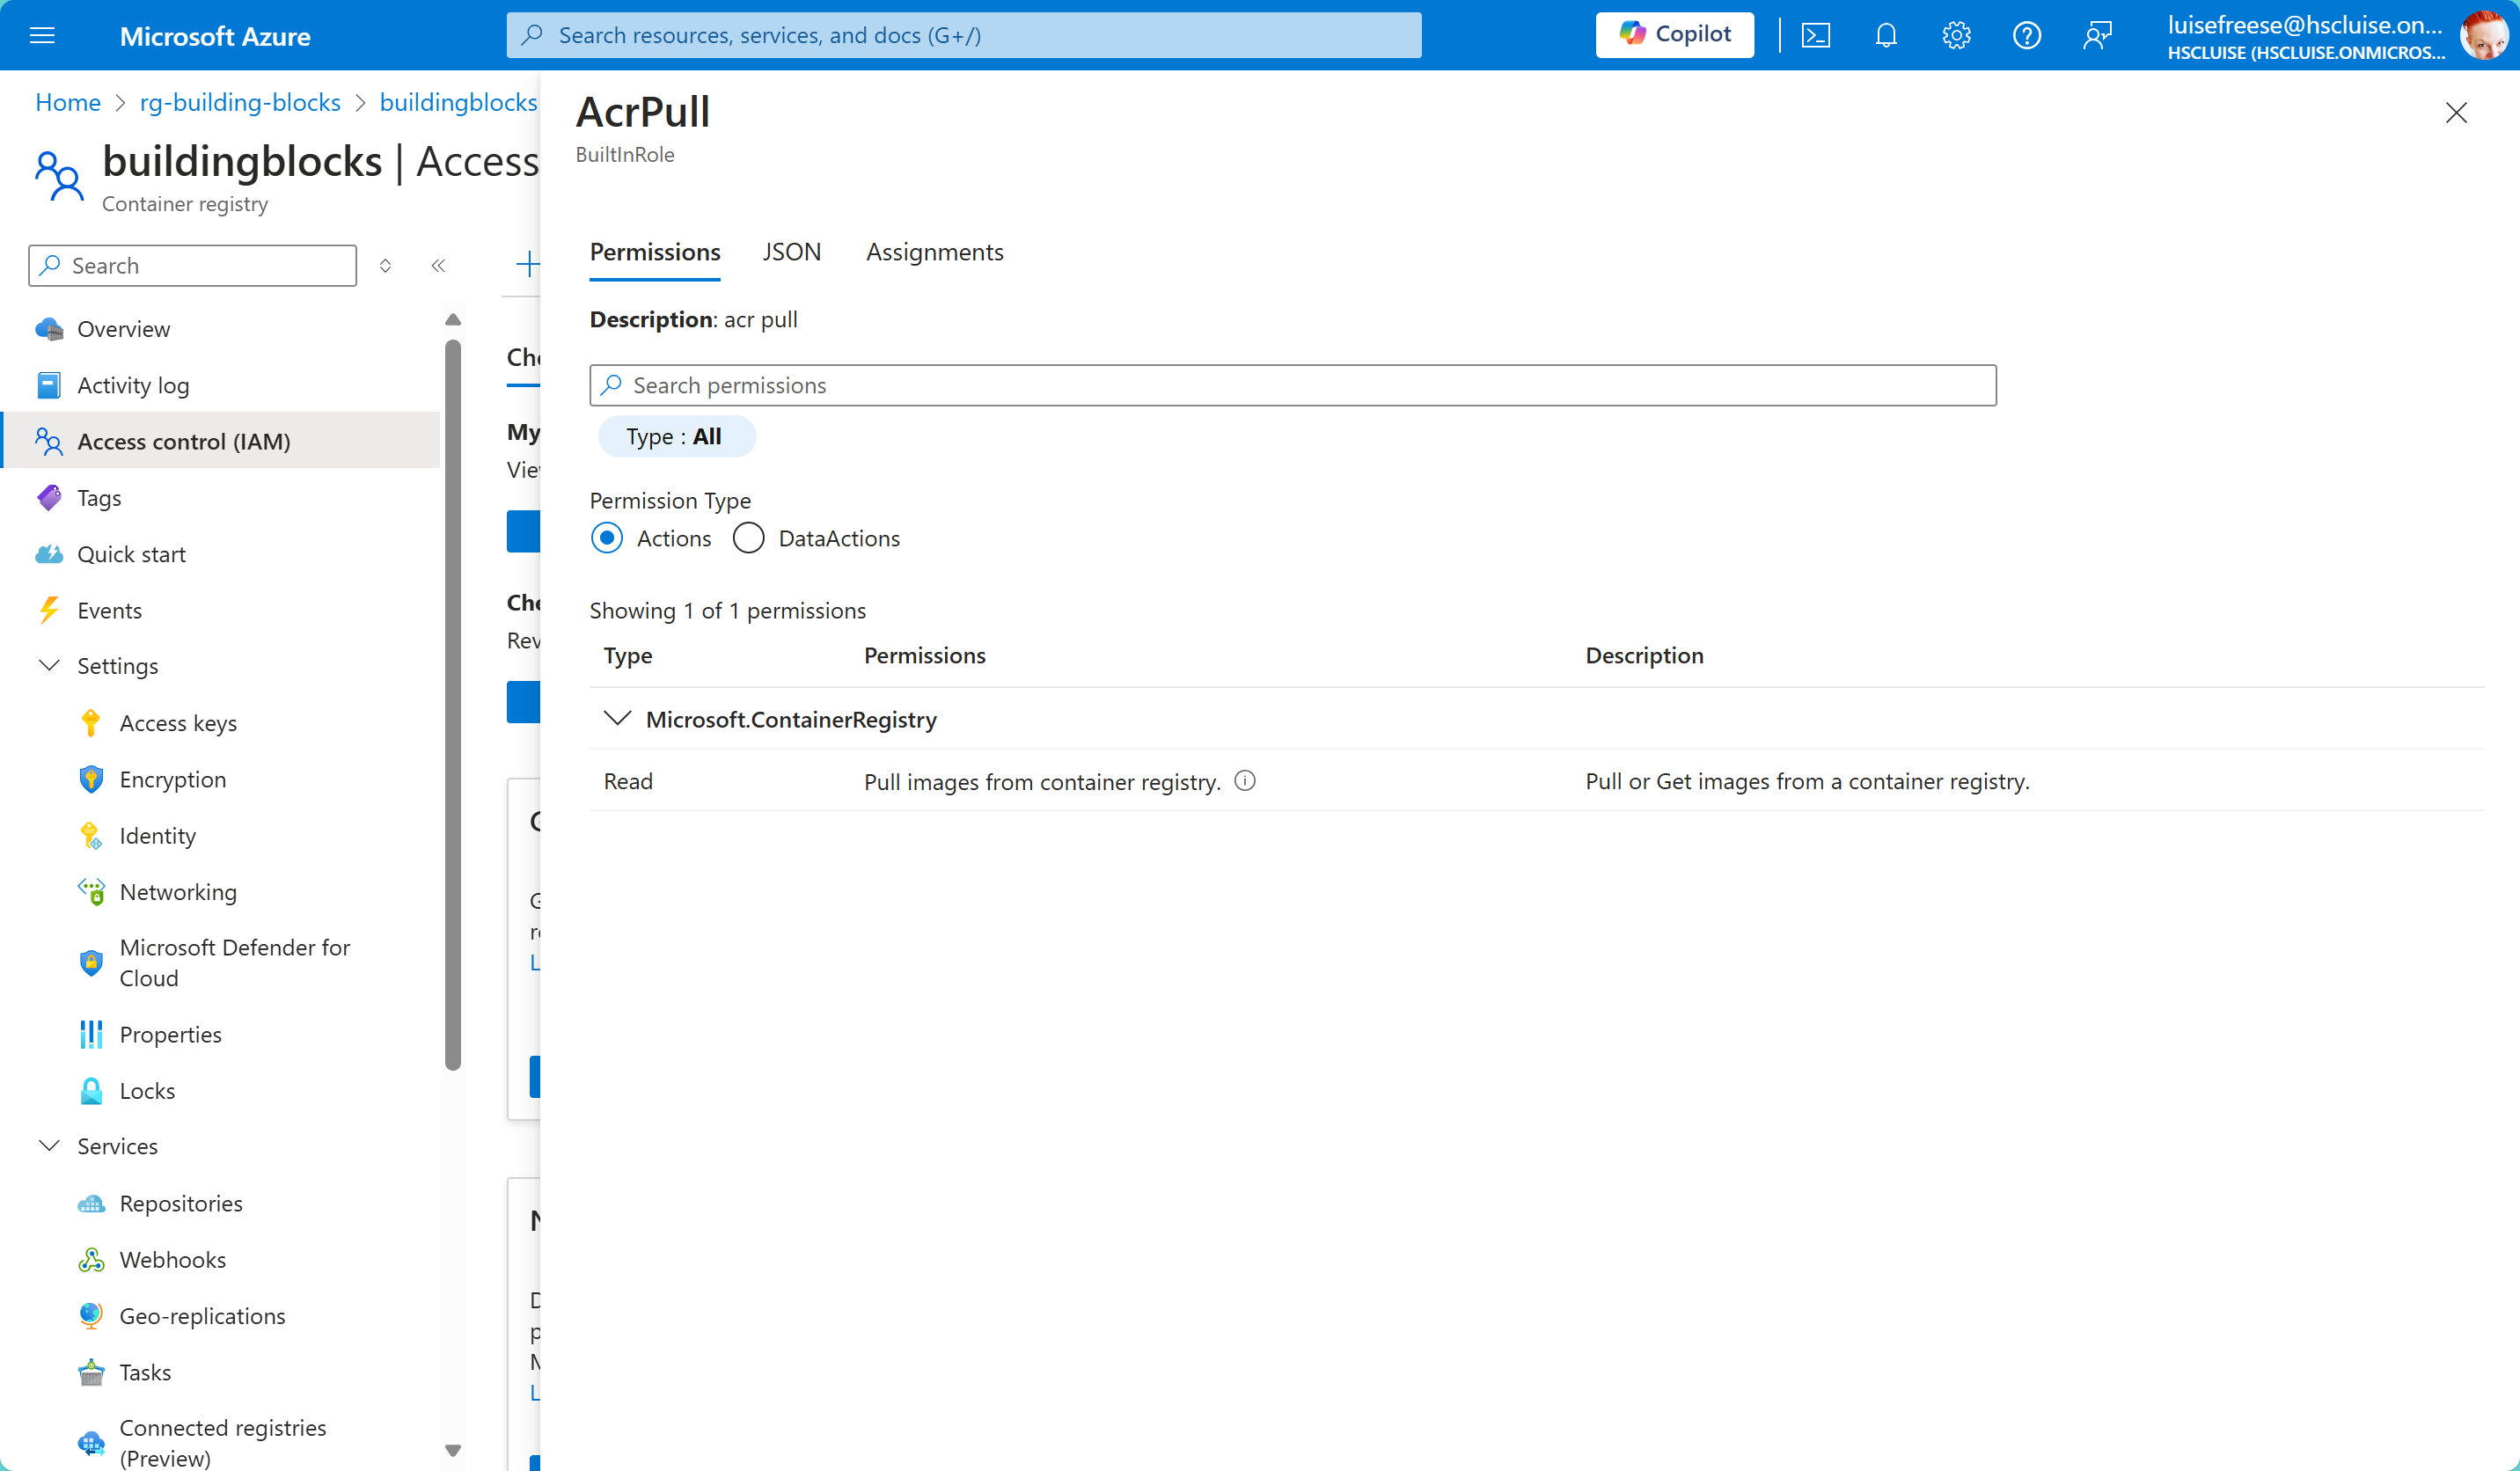
- Select it - You can now see an overview of the roles of the service principal. In our case, it’s the
acr-pullrole. You can select this now again and view the permissions associated to this role.
Conclusion
We created a service principal, stored its credentials securely in an Azure Key Vault and assigned an RBAC role to it which will only grant pull permissions to the Azure Container Registry. This ensures, that using this service principal, no new images can’t be published to the ACR. The Azure Container Registry stores our published Bicep 💪 files and makes them ready to deploy, reducing the time it takes to write the Infrastructure as Code significantly.
Stay tuned for the next part of this series, where I’ll guide you through using the same concept but instead of a service principal with a Managed Identity (and why I prefer this even more).
Questions? Let me know!

My name is
Luise Freese
You May Also Like

How to use Azure Container registry to standardize deployments using Bicep across your organization
This post is part of a series How to deploy Azure LogAnalytics Workspace and link Application Insights to it 📍 you are here - How to use Azure Container registry to standardize deployments using …

How to use Bicep to deploy Azure LogAnalytics Workspace and link Application Insights to it
This post is part of a series 📍 you are here - How to use Bicep to deploy Azure LogAnalytics Workspace and link Application Insights to it How to use Azure Container registry to standardize …

How to get from Dev? Ooops! 🤭 to proper (Azure) DevOps for Power Platform
Watch out - this is part 2 of a series around very good practices in Power Platform Part 1: Yolo! Let’s deploy Friday?! 📍 You are here –> Part 2: How to get from Dev? Ooops! 🤭 to …