
How to secure access to an Azure Container registry with a Managed Identity and RBAC
This post is part of a series
- How to deploy Azure LogAnalytics Workspace and link Application Insights to it
- How to use Azure Container Registry to standardize deployments using Bicep across your organization
- How to secure access to an Azure Container Registry with RBAC
- 📍 you are here - How to secure access to an Azure Container Registry with a Managed Identity
- How to utilize the Azure Container Registry in your Azure DevOps pipeline - to be published soon
I like to deploy my Azure resources using Bicep - If you never heard about it, I blogged a while ago on how to get started with Bicep - please catch up first!
In the last post, I showed you how assigning an RBAC role to a service principle can be used to make sure that someone can only pull images from an Azure Container Registry. This post will cover how to secure your Azure Container Registry with a Managed Identity.
What is a Managed Identity?
If you don’t know about Managed Identities yet: a Managed Identity gives your app an identity in the cloud without the need to register an app in Microsoft Entra (the artist formerly known as Azure Active Directory). This means, that you don’t need to create secrets or certificates and you also don’t need to store secrets or rotate them - Microsoft manages that for you. Because if we are all being honest: Yes, we know that we should rotate secrets. But not enough organizations do this. Managed Identities come in 2 flavors: system assigned and user assigned.
- System assigned means that they belong to a certain Azure resource and share its lifecycle
- User-assigned means, that they are resource on their own and can be assigned to one or more other resources.
I covered more about this in this blog post
Now let’s get started:
A little bit of prep work
To assign a Managed Identity to an Azure Container Registry we need have an Azure Container Registry in the first place. If you followed the blog post series - this should already be done. If not - please catch up now.
After that, we create the user-assigned Managed Identity itself:
$Managed_Identity = "<name of your managed identity>"
az identity create --resource-group $RESOURCE_GROUP --name $Managed_Identity
You can check in the Azure portal that it does in fact exist:

Assign Managed Identity to ACR
Now let’s assign our Managed Identity to the Azure Container Registry
az acr identity assign --name $ACR_NAME --identities $Managed_Identity --resource-group $RESOURCE_GROUP
Create the role assignment
As a last step, we need to create the RBAC in our identity. To do this, we need the principalId property (aka the Object ID of our Managed Identity)
$PRINCIPAL_ID=$(az identity show --resource-group $RESOURCE_GROUP --name $Managed_Identity --query "principalId" --output tsv)
Now we will use this to create the role assignment:
az role assignment create --assignee $PRINCIPAL_ID --role "AcrPull" --scope "/subscriptions/$subscriptionId/resourceGroups/$RESOURCE_GROUP"
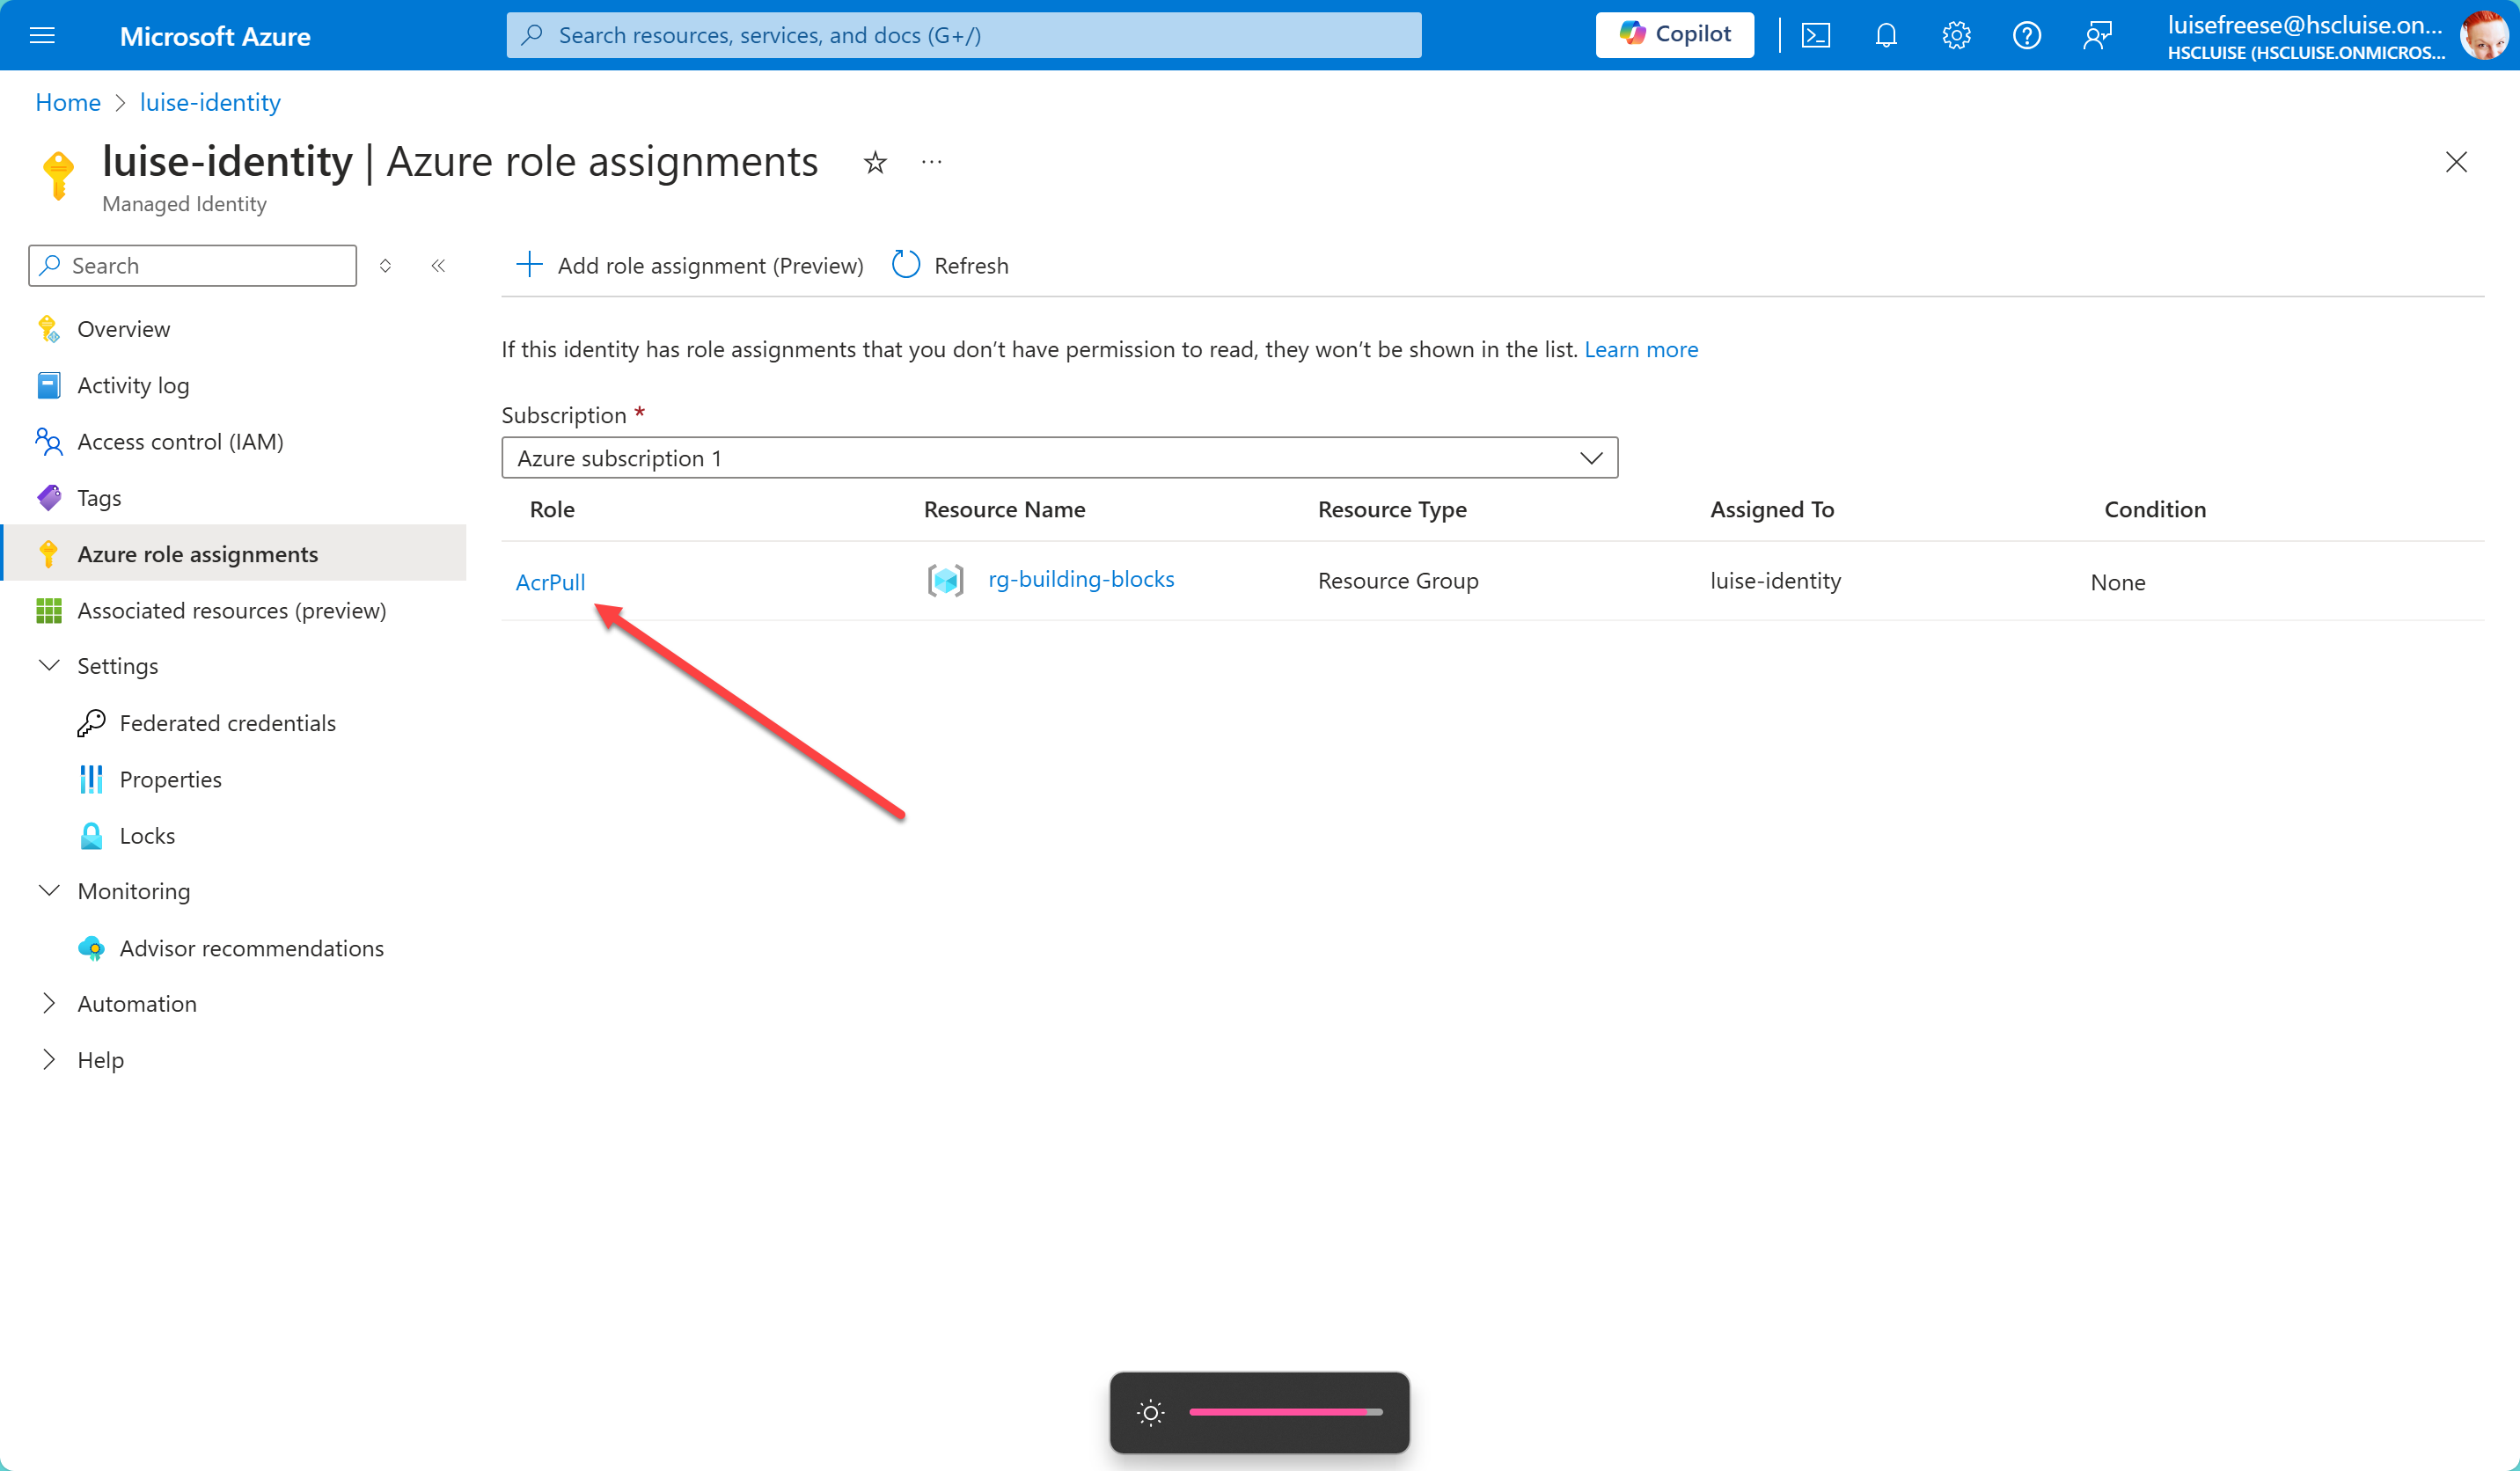
That’s it! Let’s quickly check in the Azure portal that it worked and we are done:
The elephant in the room
You might now ask - if I am such a fan of IaC, why wouldn’t we then deploy the Managed Identity with a bicep file (preferably published to an Azure Container Registry for easy use by all developers in the organization)? I’m so glad you asked! 😇
I love to have more than just one tool under my belt. For quick demos or to try out things during first phase of development, I usually use Azure CLI to get started. It’s the easiest way to create and modify the resources I need.
If my solution then scales, I like to have proper Bicep files in place, so that deployments are so repeat and we can easily track what exactly we deployed via source control. So if you want to create a Bicep file for a Managed Identity, here is the module that I would use:
Let’s first get the role id for AcrPull
$ACRPULL_ROLE_ID=$(az role definition list --name acrpull --query "[0].id" --output tsv)
$roleId = (az role definition list --name "AcrPull" --query "[0].id" --output tsv)
$ACRPULL_ROLE_ID = $roleId.Split('/')[-1]
Main Bicep file (main.bicep)
param resourceGroupName string
param subscriptionId string
param managedIdentityName string
param acrName string
param location string = resourceGroup().location
param acrpullRoleId string

module managedIdentityModule 'managedIdentity.bicep' = {
  name: 'managedIdentityDeployment'
  params: {
    name: managedIdentityName
    location: location
  }
}

module roleAssignmentModule 'roleAssignment.bicep' = {
  name: 'roleAssignmentDeployment'
  params: {
    managedIdentityPrincipalId: managedIdentityModule.outputs.principalId
    acrName: acrName
    subscriptionId: subscriptionId
    acrpullRoleId: acrpullRoleId
  }
}
Managed Identity Module (managedIdentity.bicep)
param name string
param location string = resourceGroup().location

resource managedIdentity 'Microsoft.ManagedIdentity/userAssignedIdentities@2018-11-30' = {
  name: name
  location: location
}
Role Assignment module
param managedIdentityPrincipalId string
param acrName string
param subscriptionId string
param acrpullRoleId string

var acrId = resourceId(subscriptionId, 'Microsoft.ContainerRegistry/registries', acrName)

resource roleAssignment 'Microsoft.Authorization/roleAssignments@2020-04-01-preview' = {
  name: guid(acrId, managedIdentityPrincipalId, 'AcrPull')
  properties: {
    roleDefinitionId: '/subscriptions/${subscriptionId}/providers/Microsoft.Authorization/roleDefinitions/${acrpullRoleId}'
    principalId: managedIdentityPrincipalId
    scope: acrId
  }
}
You can now either deploy this from here (locally) with Azure CLI or you publish these modules to an Azure Container Registry so that others can consume them from there easily. I described earlier in this series how the latter works; here is the Azure CLI command:
$ACRPULL_ROLE_ID = (az role definition list --name "AcrPull" --query "[0].id" --output tsv).Split('/')[-1]

az deployment group create --resource-group $RESOURCE_GROUP --template-file main.bicep --parameters resourceGroupName=$RESOURCE_GROUP subscriptionId=$subscriptionId managedIdentityName=$Managed_Identity acrName=$ACR location=$location acrpullRoleId=$ACRPULL_ROLE_ID
Boom - done ✅
You now have two ways to automatically create a Managed Identity, and assign the RBAC to it.
Conclusion
We can now use the Managed identity instead of our service principal and don’t need to worry anymore that we really don’t care about secret rotation. Azure Key Vault is already good to store credentials, but following best practices we would want to regularly rotate them. This is now automagically being take care of by Microsoft :-)
PS
When I mentioned “Writing ablog post about Bicep and RBAC”, Janek Fellien very casually told me that RBAC is so 2023 and that ABAC is the hottest shit. Let me know if I should find a good scenario for that and write about it!

My name is
Luise Freese
You May Also Like

How to secure access to an Azure Container registry with RBAC
This post is part of a series How to deploy Azure LogAnalytics Workspace and link Application Insights to it How to use Azure Container Registry to standardize deployments using Bicep across your …

How to use Azure Container registry to standardize deployments using Bicep across your organization
This post is part of a series How to deploy Azure LogAnalytics Workspace and link Application Insights to it 📍 you are here - How to use Azure Container registry to standardize deployments using …

How to use Bicep to deploy Azure LogAnalytics Workspace and link Application Insights to it
This post is part of a series 📍 you are here - How to use Bicep to deploy Azure LogAnalytics Workspace and link Application Insights to it How to use Azure Container registry to standardize …