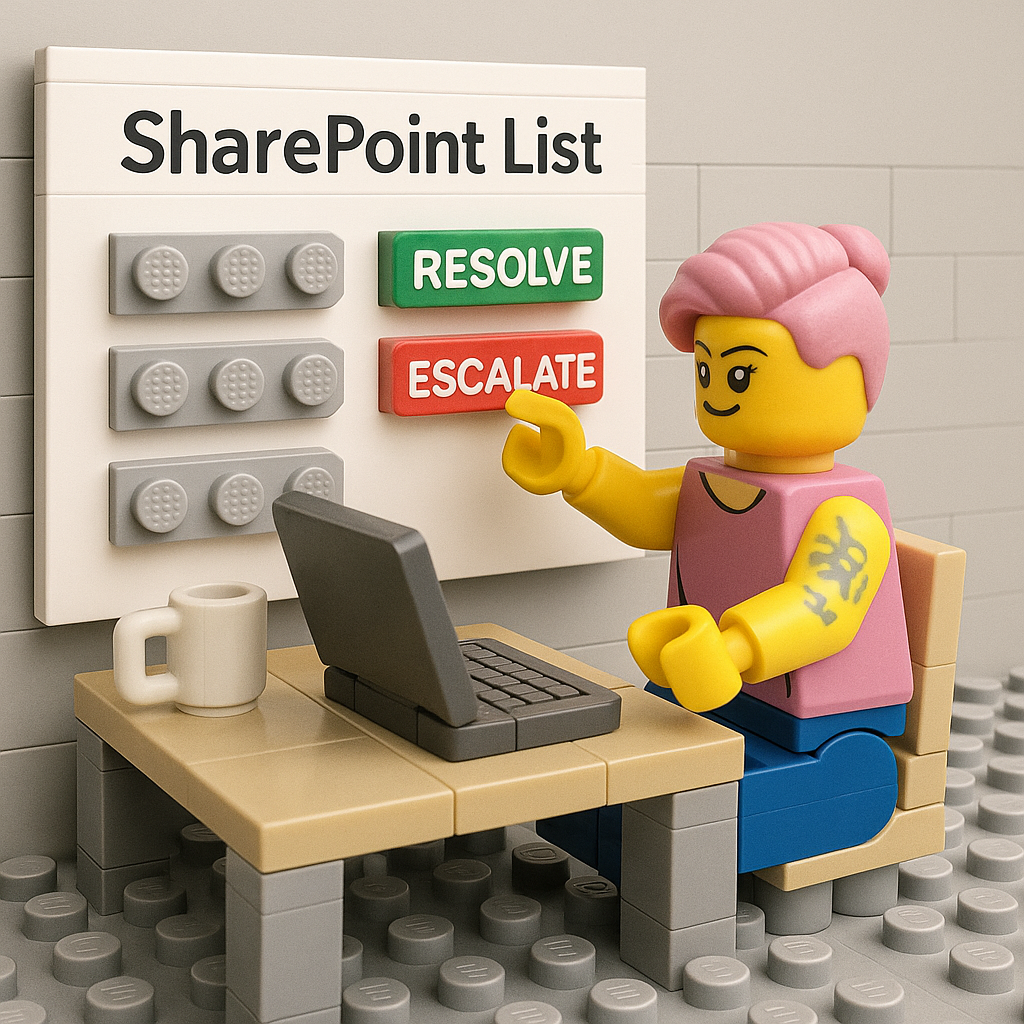
Smart buttons for incident tracking in SharePoint
Incident tracking in SharePoint lists often involves too many clicks. Users need to open each item, change a value, wait for the value to be saved, and hope they didn’t miss anything. With JSON column formatting and Power Automate, this process can be streamlined using inline action buttons.
Use case
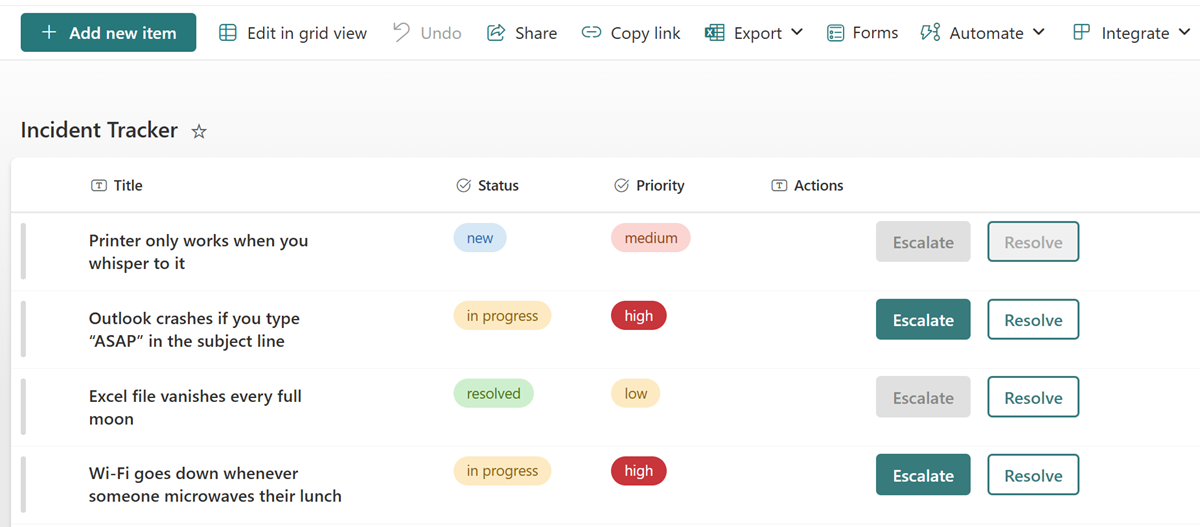
A SharePoint list tracks incidents with fields for title, priority (low, medium, high), and status (new, in progress, resolved). To improve efficiency, two buttons are added directly in the list view:
- Escalate: triggers a Power Automate flow to notify a manager
- Resolve: triggers a flow to mark the item as resolved
Both buttons are conditionally enabled: Escalate is only active when Priority = high, Resolve is only active when Status ≠ new
SharePoint List setup
Create a list with the following columns:
- Title (single line of text) (it’s already there)
- Priority (choice)
- Status (choice)
- Actions (single line of text; used for formatting only)
Power Automate flow setup
Create two flows in Power Automate:
- Escalate flow: Use “For a selected item”, then notify the people you like this to receive or start any other protocol that you might already have in place
- Resolve flow: Same trigger, update the Status column to be
resolvedand maybe send some message to the person who raised the incident
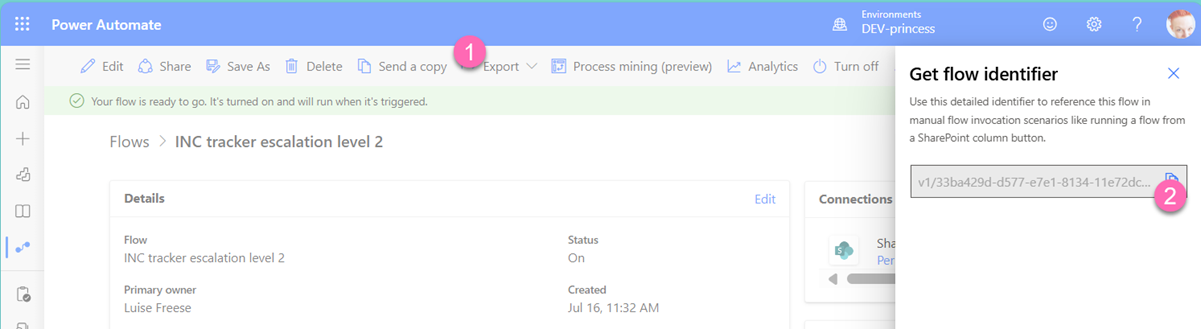
Copy the Flow IDs from their URLs.
Apply JSON formatting
Go to the Actions column → Column settings → Format this column. Paste the JSON below (replace the Flow IDs):
{
  "$schema": "https://developer.microsoft.com/json-schemas/sp/v2/column-formatting.schema.json",
  "elmType": "div",
  "style": {
    "display": "flex",
    "gap": "10px",
    "justify-content": "center"
  },
  "children": [
    {
      "elmType": "button",
      "txtContent": "Escalate",
      "style": {
        "background-color": "=if([$Priority] == 'high', '#287b7d', '#e0e0e0')",
        "color": "=if([$Priority] == 'high', 'white', '#888888')",
        "border": "2px solid transparent",
        "padding": "6px 12px",
        "border-radius": "4px",
        "cursor": "=if([$Priority] == 'high', 'pointer', 'not-allowed')",
        "font-weight": "600",
        "margin": "2px",
        "box-sizing": "border-box"
      },
      "customRowAction": {
        "action": "executeFlow",
        "actionParams": "=if([$Priority] == 'high', '{\"id\": \"<FLOWID_ESCALATE>\"}', '')"
      }
    },
    {
      "elmType": "button",
      "txtContent": "Resolve",
      "style": {
        "background-color": "=if([$Status] == 'new', '#f0f0f0', 'transparent')",
        "color": "=if([$Status] == 'new', '#aaaaaa', '#287b7d')",
        "border": "2px solid #287b7d",
        "padding": "6px 12px",
        "border-radius": "4px",
        "cursor": "=if([$Status] == 'new', 'not-allowed', 'pointer')",
        "font-weight": "500",
        "margin": "2px",
        "box-sizing": "border-box"
      },
      "customRowAction": {
        "action": "executeFlow",
        "actionParams": "=if([$Status] != 'new', '{\"id\": \"<FLOWID_RESOLVE>\"}', '')"
      }
    }
  ]
}
How it works
The root element is a div that acts as a container for the buttons, and we apply flexbox styling to align buttons horizontally with spacing between them. All buttons are nested inside the children array. We add conditional styling and call a Power Automate flow when the button gets selected.
Outcome
Users can take action directly in the list view without opening the item. You can find this soon as a sample in the PnP Listformatting repo - PR got approved ✨

My name is
Luise Freese
You May Also Like

Improving a Web Part with PnP.js and React Webhooks
A deep dive into enhancing a SharePoint Web Part using PnP.js, custom hooks, and component splitting for better maintainability.

Building my first SharePoint Web Part with SPFx Toolkit
I’ll walk you through how I transformed my standalone JavaScript web tool into a SharePoint Web Part using SharePoint Framework (SPFx) Toolkit. My original web tool was pretty straightforward. It …

Display SVGs with multiple paths in a SharePoint list
I had this neat idea that depending on a value in a number column, the field would show a plant - a very small one for value 1, and then increasingly growing with more leaves up to value 4. To get you …