Populate SharePoint List multiple choice column with Microsoft 365 Groups-and add some List formatting
Recently, a customer asked me if I could automagically populate Microsoft 365 Group Names to a multiple choice column in a SharePoint list. Of course I told them that one can create an ootb Person field and allow group selection, but that was not quite what they wanted. So I built a simple Power Automate flow that would populate the choice column and applied some nice list formatting to it.
Prerequisites
- Have a SharePoint list
- Create a Choice column (I named mine
Group) - Under More options flip the switch Allow multiple selections to
Yes
The Power Automate flow

We will use non-Premium connectors, first leveraging the Azure AD Group connector (time for a rename @Microsoft, huh?) to get all the groups, then use the SharePoint connector to send a request via SharePoint REST API. Let’s get started!
Get your groups
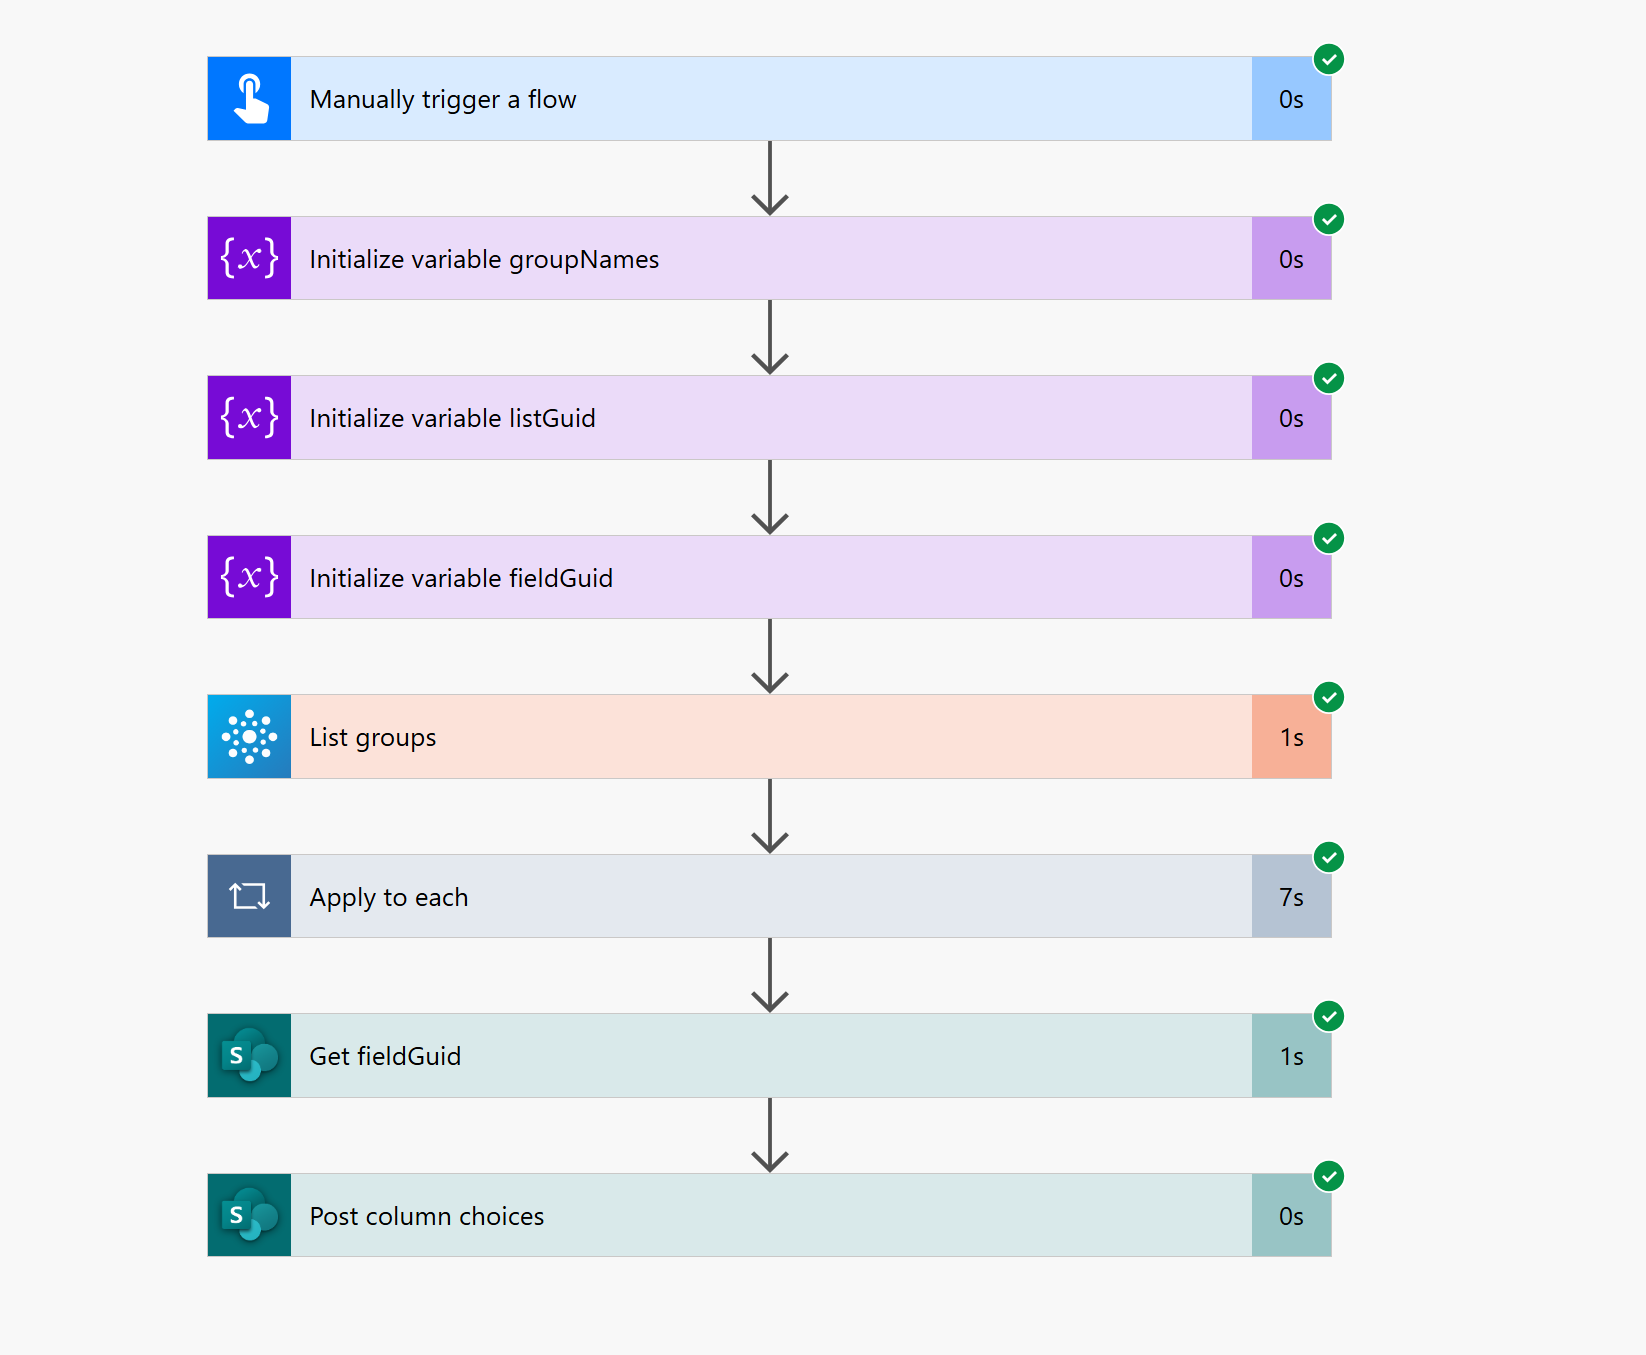
- We trigger the flow as per our needs (manually, if there is not a lot of change in groups) or on a schedule (if there is a lot of changes in groups)
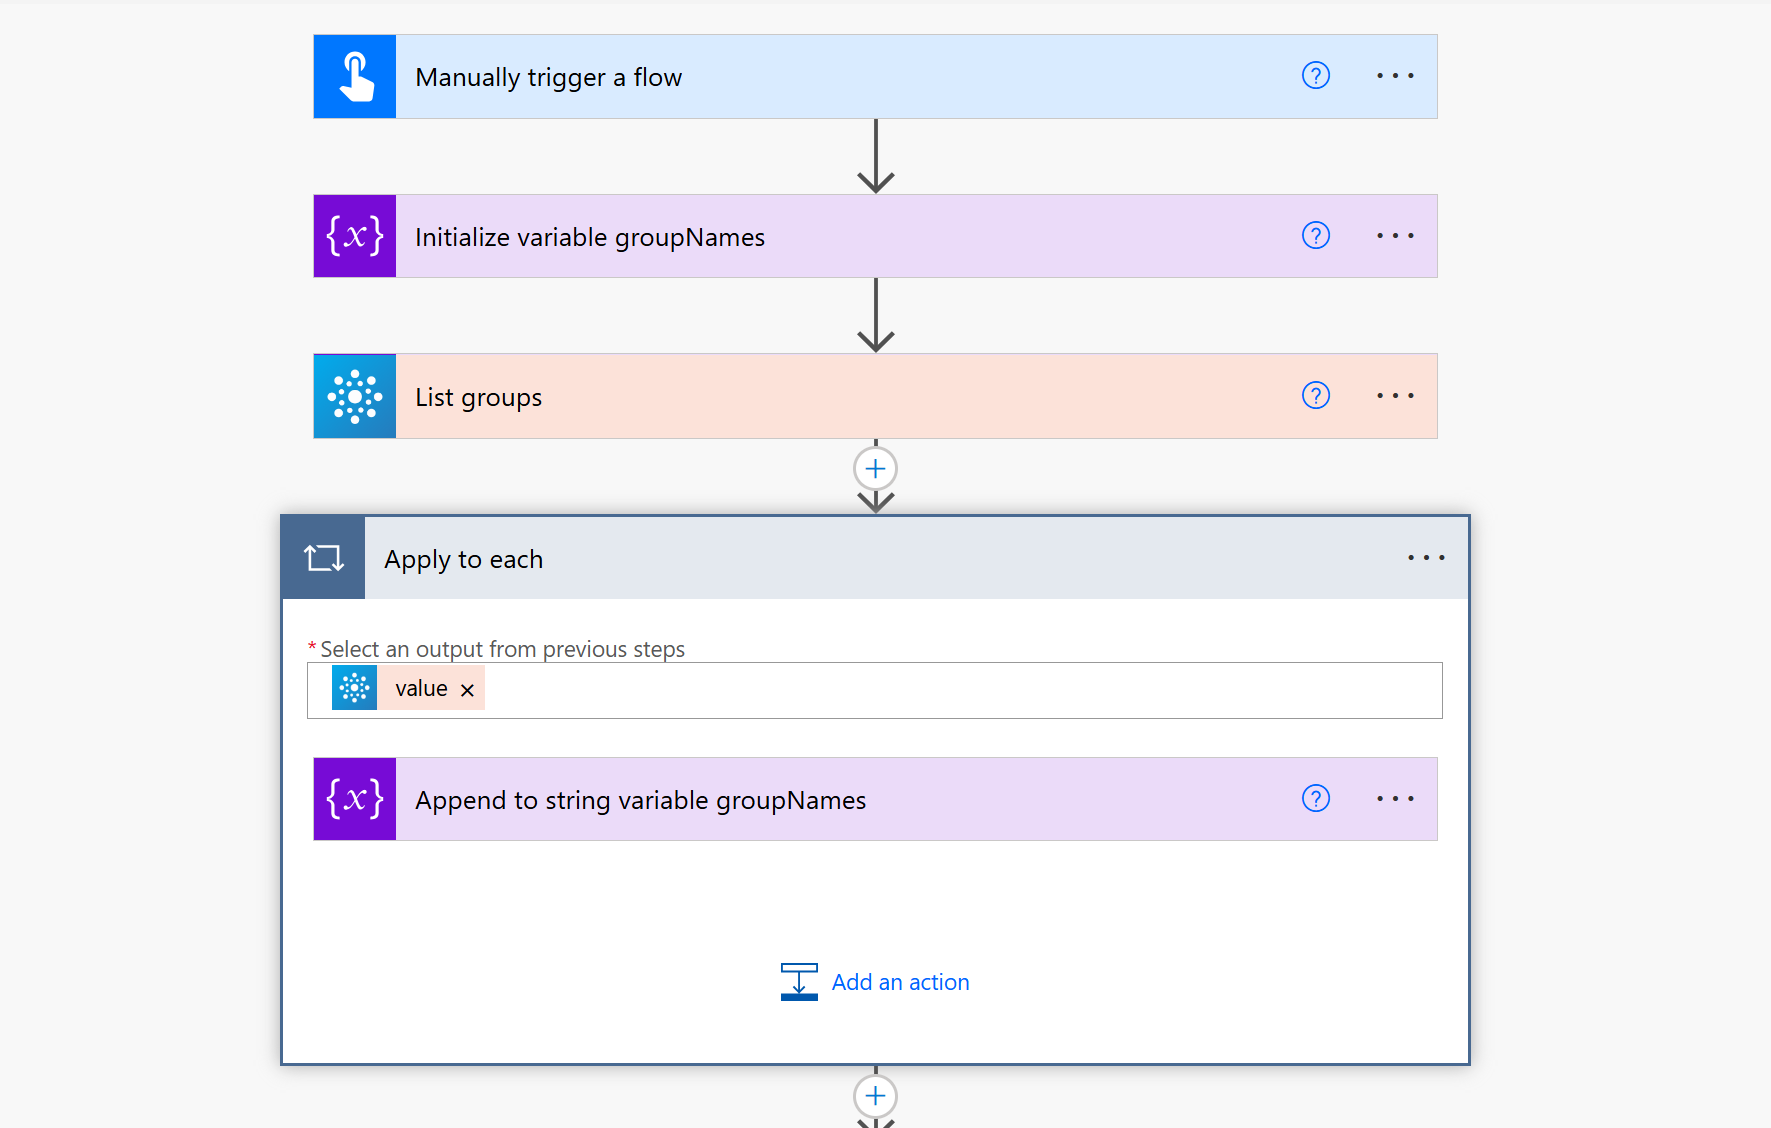
- we then initialize a variable (I used string, but you can also do an array) for the
groupNames - then we use the Azure AD Groups - List Groups action to list all groups. Filter if needed!
- Then we append the
Name(and a comma) in a loop to ourgroupNamesvariable

Obtain listguid and fieldguid
Now we need to obtain 2 things
- the listguid of our SharePoint list: Select the Settings gear ⚙️ on your list, List Settings, you will find it in the URL. The List guid sits right in between
%7Band%7D(Of course there are a gazillion of other ways to obtain this, but that is a super easy one). If you like to, write this value into a variable - it looks just more neat and tidy! - the fieldguid of the field that we are trying to populate: You can either follow this post here or stick with me and:
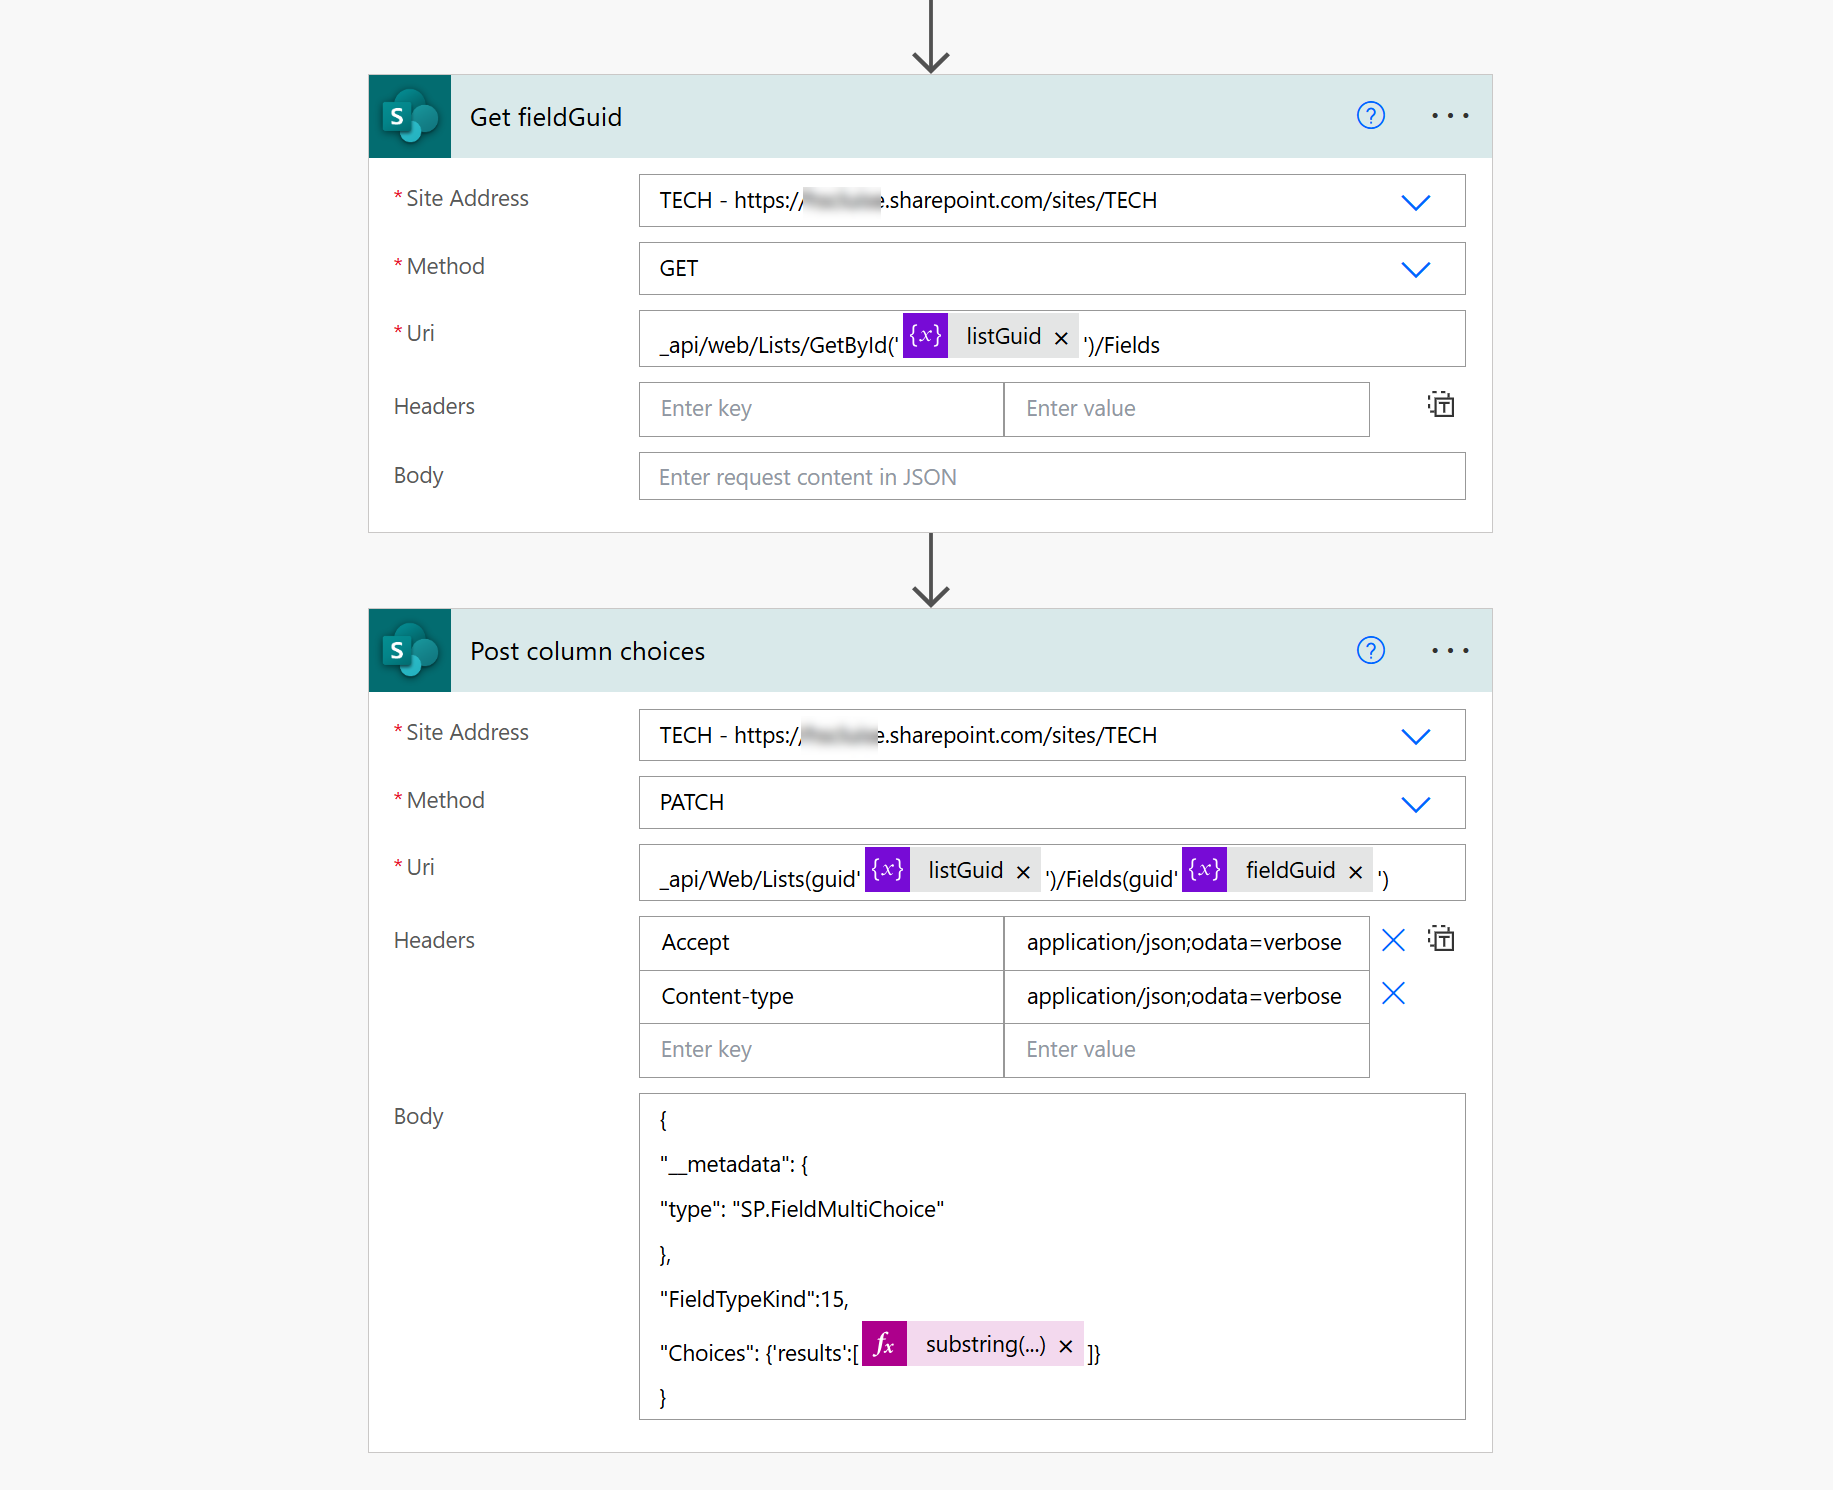
- Use Send an HTTP request to SharePoint
- Method: Get
- URI:
_api/web/Lists/GetById('@{variables('listGuid')}')/Fields
This will return a massive json object from which you can now find the id of the field you are interested in. Again, use a variable if you like to!
If you need this for several multiple choice columns, I suggest that you filter down your results array to the column that you are interested in and then select the id from that.
Patch the choice column
As a last step, we just patch our choice column with the groupNames. As we comma-separated the variable, we need to make sure that we remove that comma now:

- Use Send an HTTP request to SharePoint
- Method:
Patch - URI:
_api/Web/Lists(guid'listGuid')/Fields(guid'fieldguid') - Headers:
- Accept:
application/json;odata=verbose - Content-type:
application/json;odata=verbose
- Accept:
- Method:
- Body:
{
"__metadata": {
"type": "SP.FieldMultiChoice"
},
"FieldTypeKind":15,
"Choices": {'results':[@{substring(variables('groupNames'),0, sub(length(variables('groupNames')),1))}]}
}
If we now check in SharePoint, this already looks good, but I want to improve the experience with some colors.
Some List Formatting
What I want is a refection of which department is selected - remember that this is a multiple choice field? Let’s make that happen!

- Go tou your list
- Select the multiple choice field > Column settings > Format this column
- Select Advanced mode
- Delete the code in the box
- Paste in this snippet and select Save
{
  "$schema": "https://developer.microsoft.com/json-schemas/sp/v2/column-formatting.schema.json",
  "elmType": "div",
  "children": [
    {
      "elmType": "div",
      "txtContent": "=if(indexOf(@currentField, 'Dept-Finance') >= 0, 'Dept-Finance', '')",
      "style": {
        "display": "inline-block",
        "width": "25%",
        "background-color": "=if(indexOf(@currentField, 'Dept-Finance') >= 0, '#ffcc99', 'transparent')",
        "color": "black",
        "text-align": "center",
        "padding": "5px"
      }
    },
    {
      "elmType": "div",
      "txtContent": "=if(indexOf(@currentField, 'Dept-IT') >= 0, 'Dept-IT', '')",
      "style": {
        "display": "inline-block",
        "width": "25%",
        "background-color": "=if(indexOf(@currentField, 'Dept-IT') >= 0, '#ccffff', 'transparent')",
        "color": "black",
        "text-align": "center",
        "padding": "5px"
      }
    },
    {
      "elmType": "div",
      "txtContent": "=if(indexOf(@currentField, 'Dept-HR') >= 0, 'Dept-HR', '')",
      "style": {
        "display": "inline-block",
        "width": "25%",
        "background-color": "=if(indexOf(@currentField, 'Dept-HR') >= 0, '#ff9999', 'transparent')",
        "color": "black",
        "text-align": "center",
        "padding": "5px"
      }
    },
    {
      "elmType": "div",
      "txtContent": "=if(indexOf(@currentField, 'Dept-Marketing') >= 0, 'Dept-Marketing', '')",
      "style": {
        "display": "inline-block",
        "width": "25%",
        "background-color": "=if(indexOf(@currentField, 'Dept-Marketing') >= 0, '#b3ffcc', 'transparent')",
        "color": "black",
        "text-align": "center",
        "padding": "5px"
      }
    }
  ]
}
How does this list formatting work?
We separate into the number of <div> we need (note this is just an example, there were way more groups to select from) and that set the width to the percentage the <div> may consume. The colors are applied dynamically using indexOf(@currentField, 'Dept-Name') >= 0, which checks if the department is selected in the column. Each part of the cell shows the department name if it is selected. If the department is not selected, the <div> will be empty and have no background color (transparent).
Conclusion
Good old Send and HTTP request to SharePoint saved the day again! No need for app registrations, but a super straight forward flow that populates the multiple choice colum to our needs. Of course you don’t need to do groups, but can apply any array that you fits your use case!
You May Also Like
Resource naming reloaded: Azure Policy and Bicep for the winner!
Let’s solidify naming conventions with Azure Policy In one of my last blog posts, How to use Azure Policy to enforce resource naming conventions in your DevOps pipelines I explained how one could …
How to rotate secrets with Azure Logic Apps, Key Vault and Managed Identity
Do we REALLY need to rotate secrets? Ever wonder why we’re always harping on about rotating secrets in Microsoft Entra App Registrations? Rotating secrets is kind of like changing the locks on your …
How to use Azure Policy to enforce resource naming conventions in your DevOps pipelines
Lets talk about Azure naming conventions I know, I know, you are probably thinking, “Seriously? We’re gonna talk about names?” But trust me, this stuff matters. Why Should You Care …


