
How to get started with GitHub and Git
Intro
Ever wondered how you could get started in contributing to open-source projects? Let’s say you would like to contribute to an open-source project and the contributing guide tells you that you would need to fork a repository and you have no idea what this should mean? Fear not, help is on the way and you already opened it. We will also cover how you connect everything in the code editor Visual Studio Code and where you can find like-minded people.
What are GitHub and Git?
Don’t confuse Git and GitHub- they are related to each other, but not the same:
- GitHub is website for hosting projects that use Git.
- Git a software for version control that makes it easy for developers (authors, makers and more) to track even minor (but also big) changes in files.
At the very heart of GitHub, you will find repositories to host your content in. You can invite specific people to collaborate with or open your project for everyone - while still staying in control. Small changes in files can be made on the GitHub.com website. This is very convenient, as it gives you a nice interface and you don’t need to store any files on your computer. However, the bigger the change is that you want make, the more you will need a more sophisticated system. For example, if you need to pause your work and want to continue later on, there is no way on the website to save your files without committing them. So, what is a commit and how does that work?
A commit is a change to one or more files. You save your work by committing it, and git (not GitHub) will create and assign unique ID, which is called hash or SHA. This then allows you to answer questions like:
- Who changed that? (author)
- What exactly changed? (highlights the changes)
- Why did this change happen? (reading the commit message (should be a short description what changed and why))
This enables traceability, revertability, and collaboration. Just imagine we would work with code like we did this with Excel sheets and PowerPoint presentations for years… saving the 2021-09-08-project-deathstar-draft_07-super-important_finalFINAL2.pptx (1) and then mailing copies of copies of that file around 🙄
As already mentioned, GitHub is a good way to host your projects, but its website comes with some limitations, as, for example, we can’t save this for later but I don’t want to commit yet, and most probably no one wants to write their code on a website… it means you can’t work offline or with poor connectivity, also, what if you accidentally close the browser tab? What if we could write our code, documentation, more in local files on our computer and then use Git to upload them to GitHub once we are ready? To achieve this, we need a couple of things and this article will cover all of that:
Install Git
First, we will install Git for Windows, if you work on a macOS, download Git for macOs. To continue with Windows,
- Open Git for Windows
- Download the latest version (64-bit or 32-bit).
- Optional: If you are not sure what you need, you can check it:
- Press WIN key and type
about - Select about your PC, it shows you the System type in the device specifications
- Press WIN key and type
- Open the downloaded file
- Confirm the User Account Control window by selecting Yes
- In the Git Setup window, select Next for 6 times, Git will now extract the files
- Select Finish
Create a Git account
Now let’s first check if you installed Git correctly
- Open PowerShell or PowerShell in the terminal of Visual Studio Code. (If you don’t have VS Code installed please install it- it’s an amazing Code editor.)
- Type
git --versionin a directory of your choice - You should see the installed version as a response
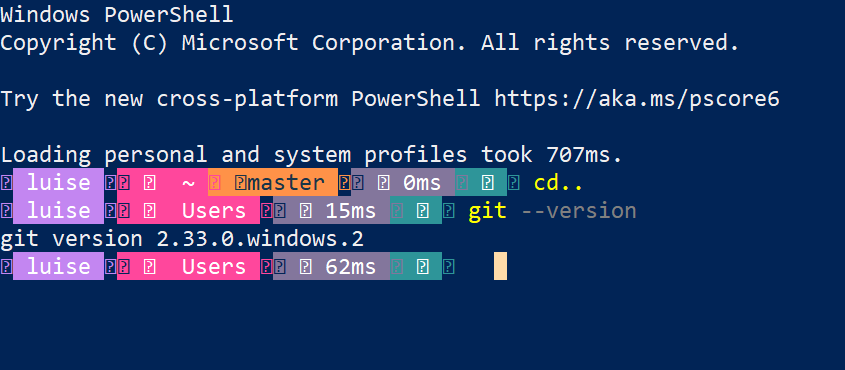
If so, you can proceed!
- Set your user name with
git config --global user.name "<your-first-name> <your-last-name>"- replace the<placeholders>with the real values - Set your email address with
git config --global user.email "<your-email-here>"- replace the<placeholder>with the real values
Congrats, you now have a Git account.
To use Git, we will either need a GUI (graphical user interface) client or a CLI (command-line interface). This is somehow a matter of personal preference, but I found GUI clients a bit more confusing.
Before we learn some Git commands, lets head over to GitHub and get you an account if you don’t already have one.
Create a GitHub account
- Open github.com
- Select Sign up
- Type in your email address when prompted
- Select Continue
- Type in a password
- Select Continue
- GitHub will generate a username for you, but you may change it
- Select Continue
- Type
yif you want product updates per mail, else typen - Select Continue
- Verify that you are a human by selecting Start puzzle
- Select the correct image that meets the criteria described - maybe you need to do this twice.
- Select Create account
- Type in the 6 digit code that you received per mail
- Optional: personalize your experience
Create a repository
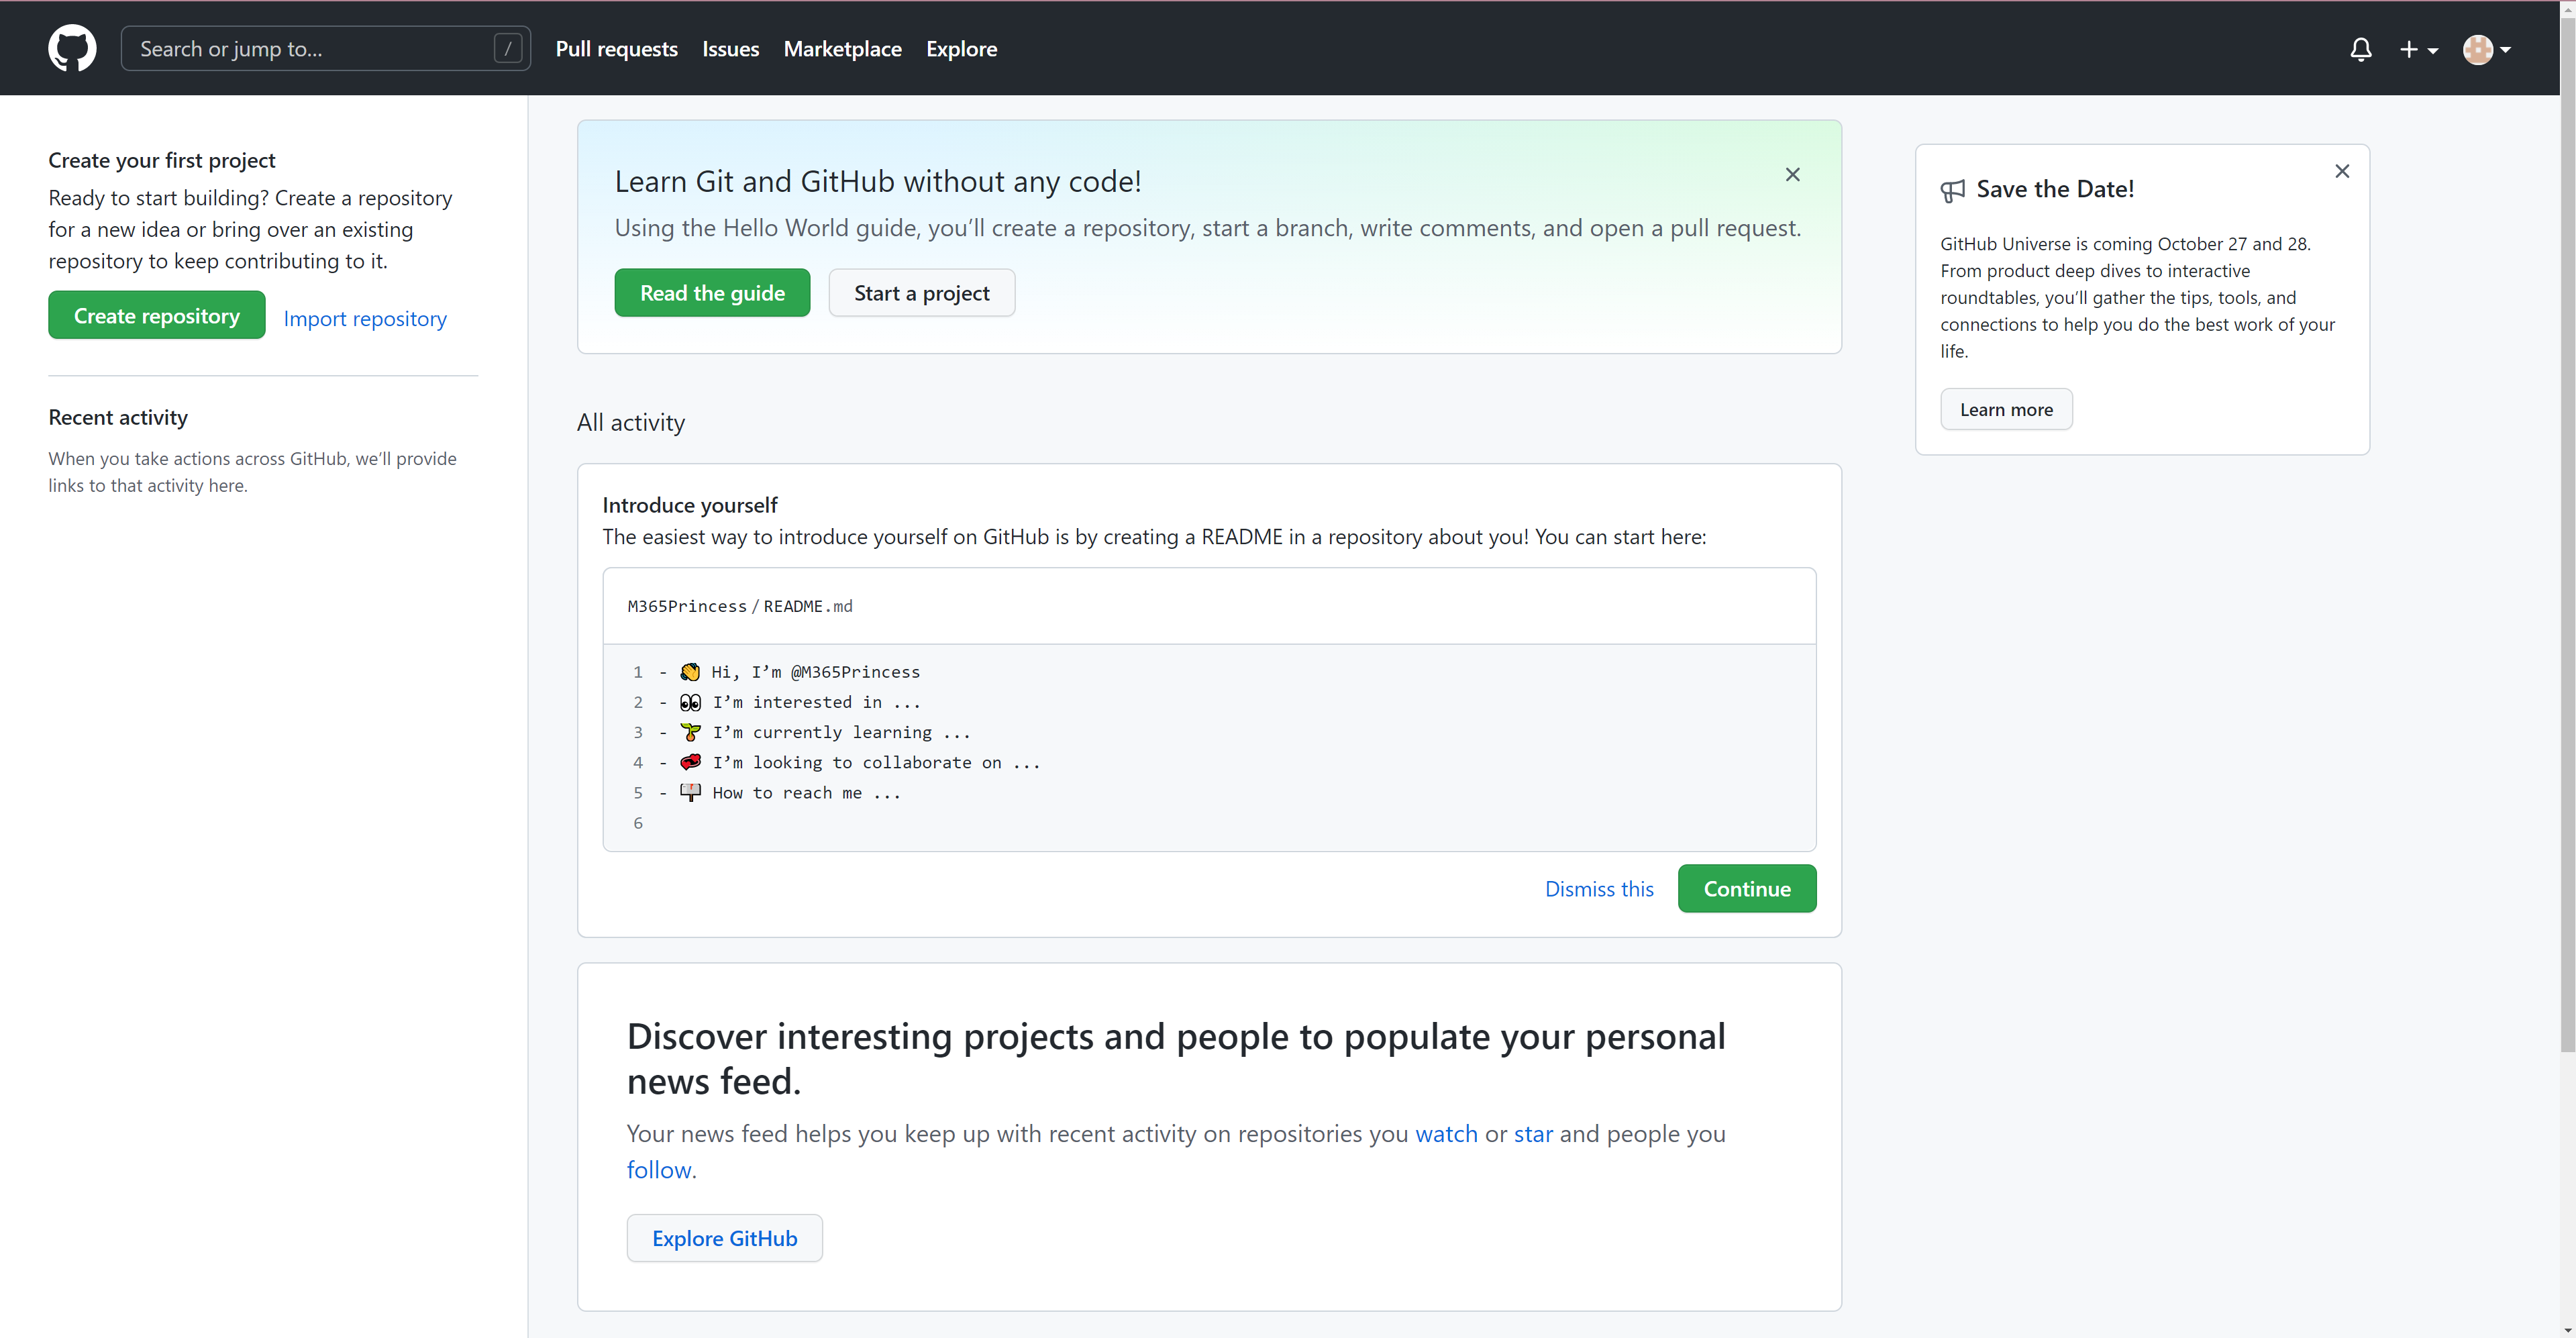
Now create your first repository and make it available for you in VSCode:
- Select Create repository
- Notice that you will be the owner of said repository
- Type in a name for the repository
- Select
add a README file - Select Create repository
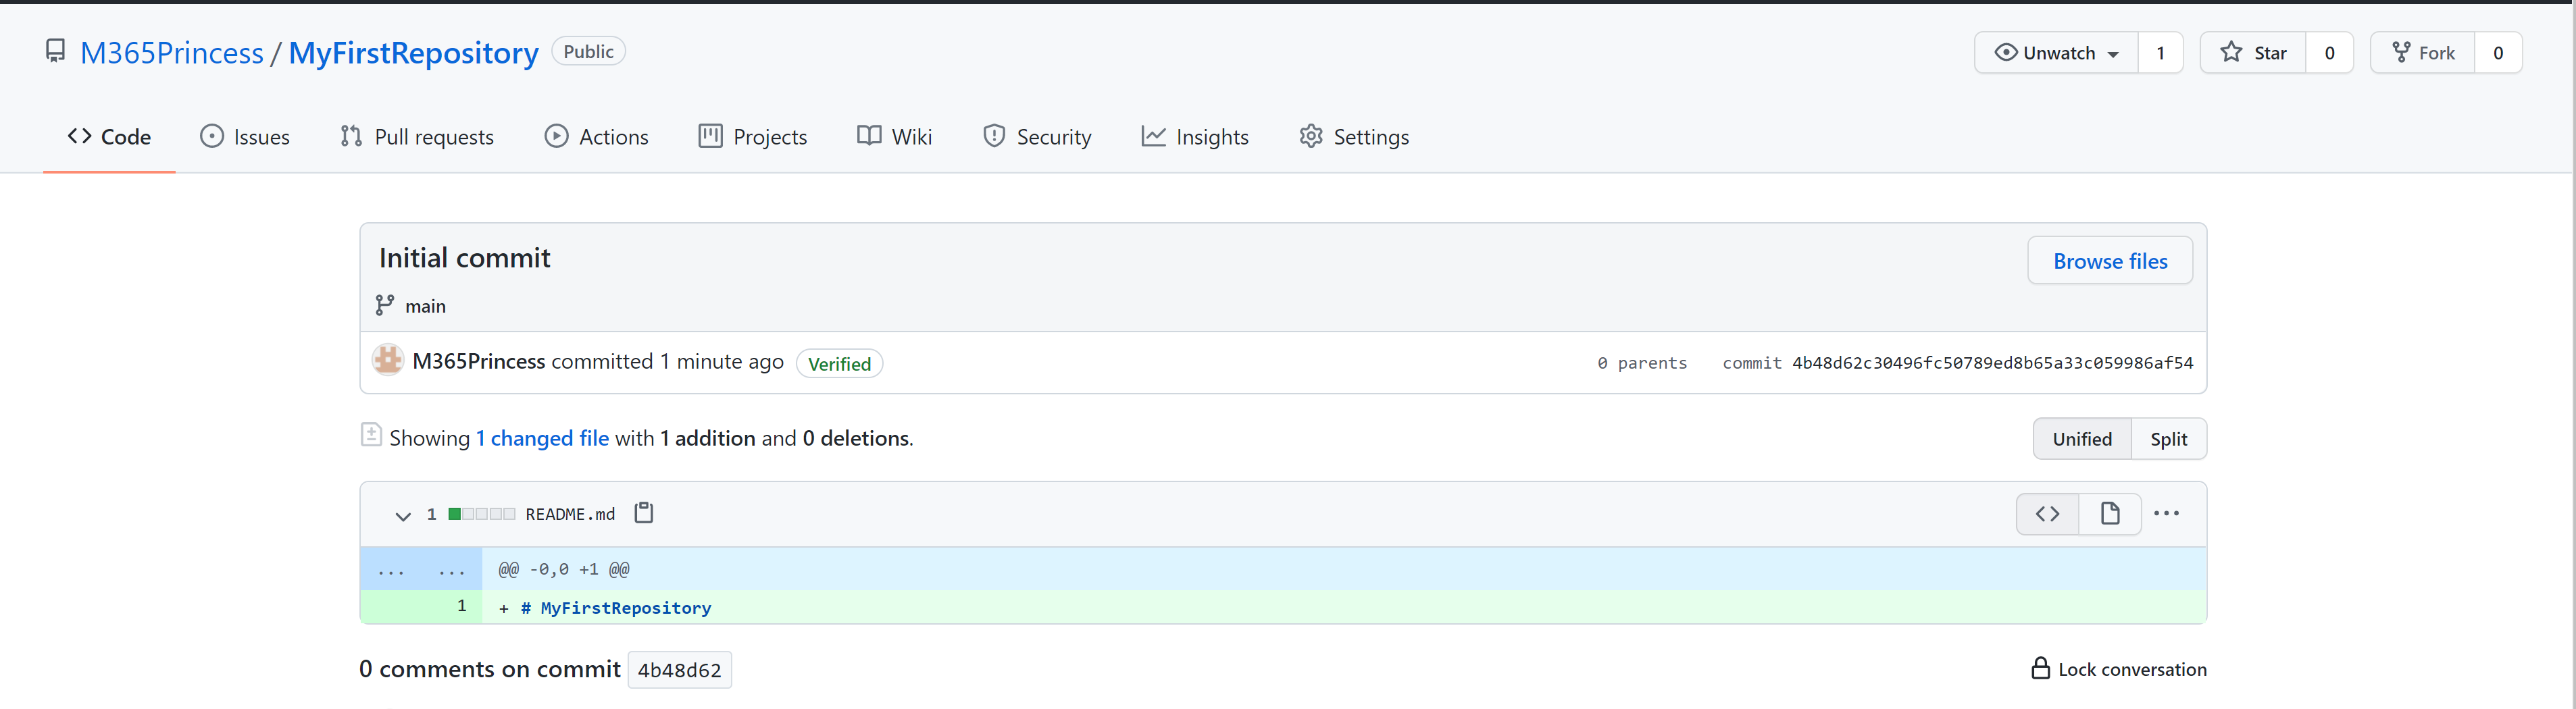
- Notice that this is already a commit, and more specific the
initial commit- If you select1 commityou can see the the changes made:- additions highlighted in green
- deletion highlighted in red (this time, we only added something and that was the name of the repository)
- author who changed the file (your account)
- time of when the changes were made
- hash of the commit
Now that you have your own repository, make it available on your computer. We do this by cloning the repository:
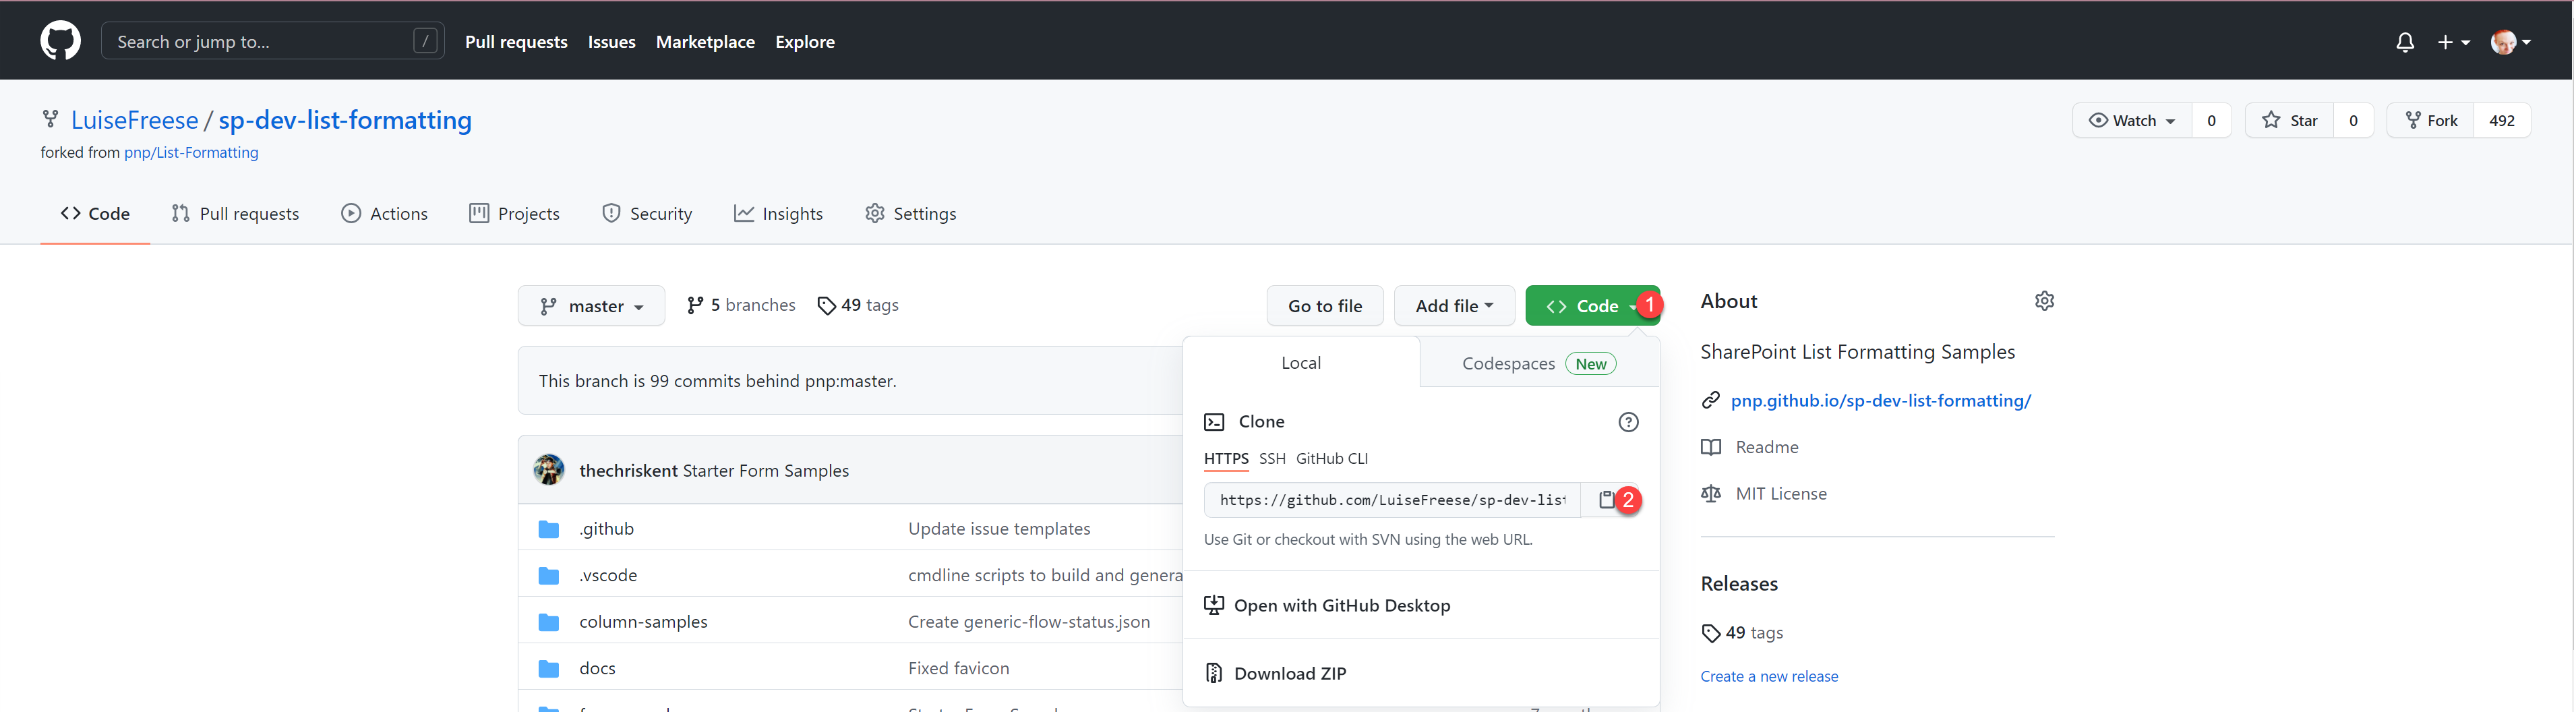
Clone the repository
- Select Code
- Copy the URL (it is
https://github.com/<YOUR GITHUB ACCOUNT>/<YOUR REPOSITORY NAME>.git)
- Open the terminal in VS Code
- navigate to a directory where you want to clone the repository (you can use
cd <PATH OF YOUR DIRECTORY>for this) - type
git clone <COPIED URL HERE>
This will create a copy of your remote repository in that folder. Now navigate to your local copy with cd <YOUR REPOSITORY NAME HERE>
Open the project in Visual Studio code by typing code . in PowerShell or terminal in VS Code (yes, there is a between code and .)
Work with your clone
Now either add some files or change the only existing file (it’s the README.md). When you completed your changes, you want 3 things:
- add the files you want to commit to a staging area (and only those)
- commit the files with a descriptive commit message
- push the files so that the changes will be reflected on the GitHub website as well.
As you probably already assumed, there are some specific command to achieve this:
- to add a specific file to that staging area from which you can commit it (without touching the other files that are not ready to be committed now), type
git add <YOUR FILENAME HERE>for a specific file orgit add <YOUR PATH HERE>for a specific directory. If you want to add all changes to the staging area, typegit add .(yes, there is abetweenaddand.) - to commit all files that are now in staging area, type `git commit -m “
” - to push your changes, type
git push
Your changes are online 🎉
If you now use both, the GitHub website and your local files, the changes that you make remote won’t be reflected automatically in the local files. To do that, you will need to type git pull to pull all the changes that were made remote. If you forget that, or if others were working on your repository and you want to push next time, git will tell you:
! [rejected]        main -> main (fetch first)
error: failed to push some refs to 'https://github.com/M365Princess/MyFirstRepository'
hint: Updates were rejected because the remote contains work that you do
hint: not have locally. This is usually caused by another repository pushing
hint: to the same ref. You may want to first integrate the remote changes
hint: (e.g., 'git pull ...') before pushing again.
hint: See the 'Note about fast-forwards' in 'git push --help' for details.
Read the message carefully and go ahead with git pull to be up to date in your local files. You can now accept the maybe conflicting changes in the editor and resolve the situation.
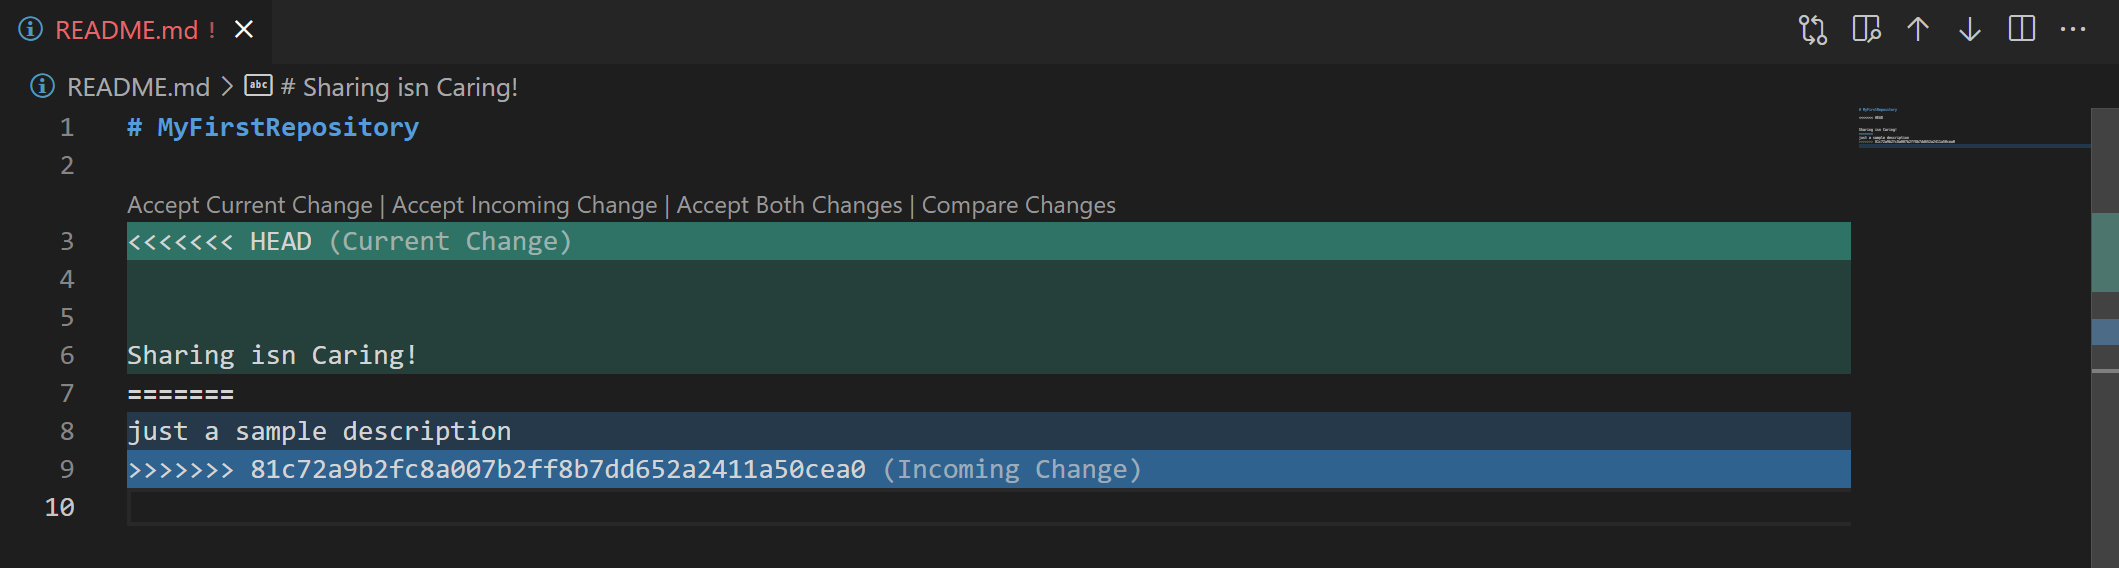
Then use the commands git commit and git push again. (You can always access your last commands with the arrow-up and arrow-down key.) You should see a response that looks about like this:
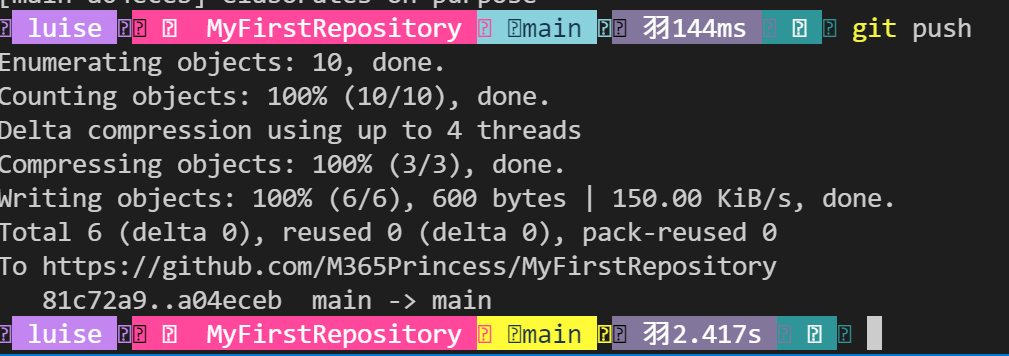
Please note that you see two abbreviated hashs, with which you could also compare what happened in the last commit compared to the previous one: Type git diff <FIRST HASH HERE> <SECOND HASH HERE>
Contribute to open-source projects
But what if you want to contribute to a repository of which you aren’t the owner? It’s possible to work locally in those projects as well, but we need to do a couple of more steps:
Fork the repository
as the repository owner would not want you to directly commit to their repository, you will first create a remote copy - this is then called your fork. To do that:
- open the repository that you want to contribute to
- make sure you understand the contributing guide, in most cases, you will be asked to fork the repository:
- Select Fork, the URL of your fork is now
https://github.com/<YOUR GITHUB ACCOUNT>/<REPOSITORY NAME>/
Now clone this repository locally.
Add Upstream
You will now want to make sure, that all your contributions point to the original repository, which is why you want to add an upstream to it:
- navigate to the folder where your cloned repository is located
- type
git remote add upstream <ORIGINAL REPOSITORY URL HERE> - to check if everything works correctly, type
git remote -v, you should see this output:
origin https://github.com/<YOUR ACCOUNT HERE>/<REPOSITORY NAME>.git (fetch)
origin https://github.com/<YOUR ACCOUNT HERE>/<REPOSITORY NAME>.git (push)
upstream https://github.com/<ORIGINAL ACCOUNT HERE>/<REPOSITORY NAME> (fetch)
upstream https://github.com/<ORIGINAL ACCOUNT HERE>/<REPOSITORY NAME> (push)
Some repository owners will ask you in the contribution guide to create a new branch for the feature you want to add - you can create and switch to that new branch with git checkout -b <YOUR BRANCH NAME HERE>.
Like in your own repository, you can work on the local files and commit and push your changes to your remote fork.
Pull request
You will now want to (kindly) ask the repository owner/ maintainer to pull in your changes. You do that by doing a pull request:
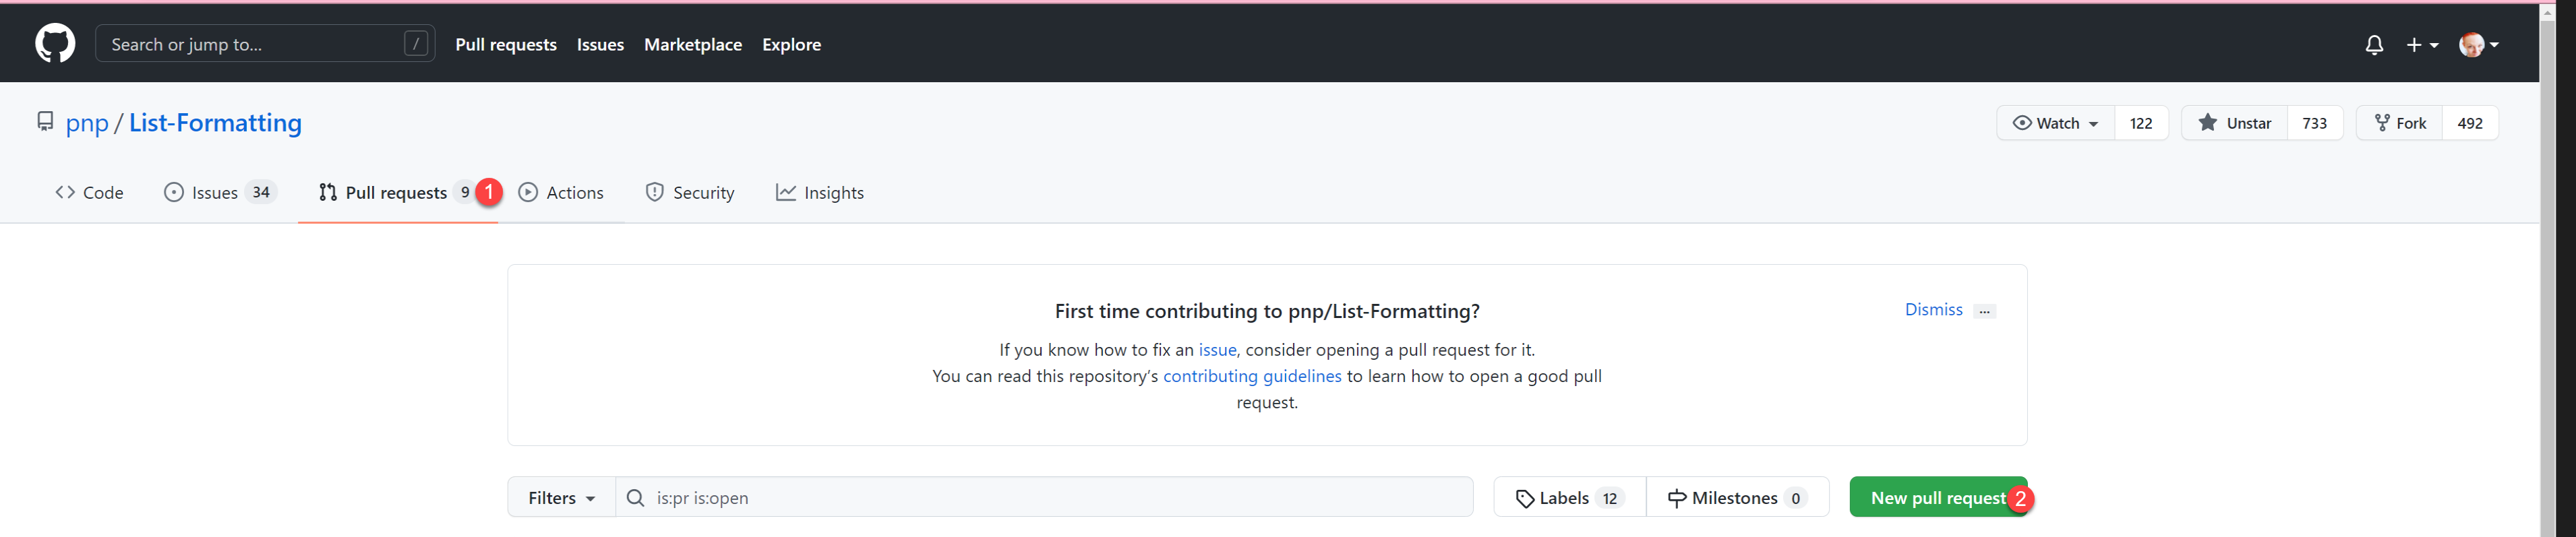
- Open the original repository
- Select Pull requests
- Select New pull request
- Select compare across forks
- Select your fork from the head repository
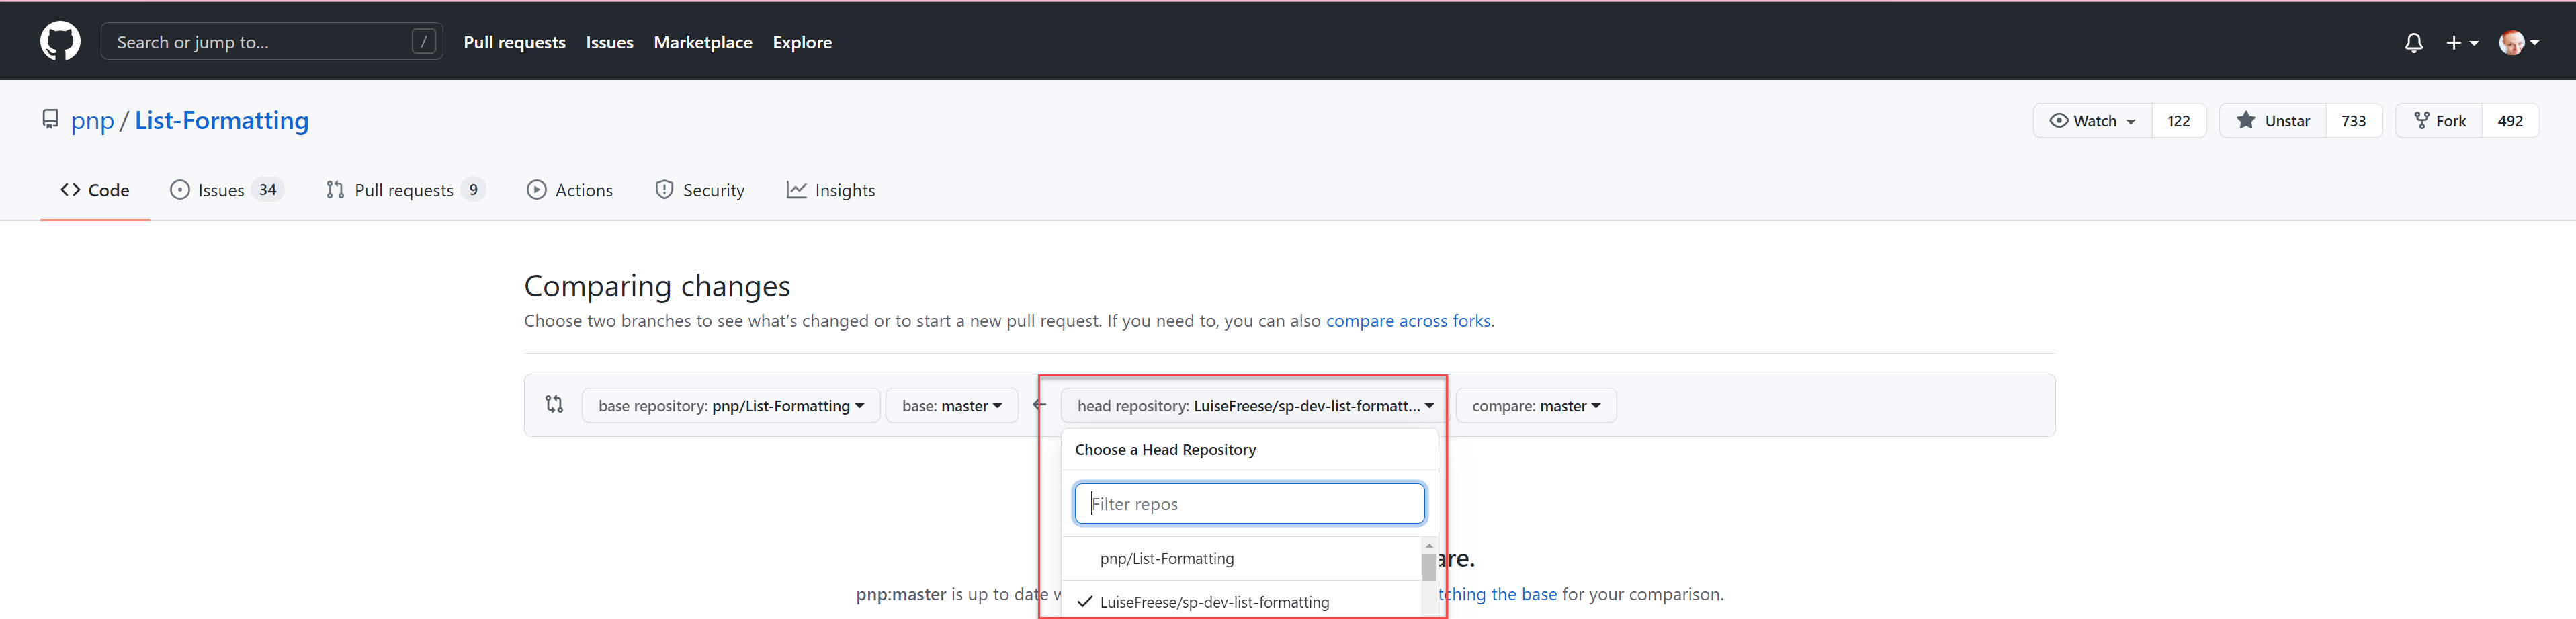
- fill out the form
working together
A maintainer will review your pull request and
- reach out to you with a comment (you will get a notification about that)
- request changes or
- merge your changes. This means that they approved your work and that your changes will be added to the original repository.
Additional resources
If you ned more help for your first contributions, have questions or just want to connect with like-minded people, and for everyone who is more into interactive sessions: Within Microsoft 365 PnP, I am part of the Sharing is Caring initiative, who aims to lower barriers for new contributors. We run a couple of sessions, please check out Sharing is Caring
You can also have a look into the documentation of GitHub and Git- this article should only get you started, not replace reading the docs.
Open-source is fun and very rewarding and I hope that this article made your start a little bit easier! Please reach out if you have questions, comments, or want to connect.

My name is
Luise Freese
You May Also Like

Create a portfolio site with GitHub pages and reveal.js
In this post I want to show how you can create a simple portfolio site with GitHub pages and reveal.js GitHub pages lets you host your website directly from the GitHub repository But instead of having …

Putting some more FUN into Azure Functions, Managed Identity & Microsoft Graph
I want to show, how you can use a Managed Identity in Azure Functions to get an access token for Microsoft Graph API. I will later expand on that scenario and make the solution available to be …

The friendly SMS reminder with Logic Apps, Azure Functions & Key Vault
Yay, this is a new blog post series on how to put the FUN in Azure Functions 🙂 Recently, I was learning about Azure Functions and came up with a sweet use case what I could do to combine Azure …