
Introducing the SVG to JSON for SharePoint List formatter
In my latest blog posts, I played a lot of SVGs in SharePoint lists. For everyone who isn’t aware - Unlike other image formats like .png or .jpg, .svg are vectors - which can be expressed as code. If you open an SVG image in your browser, you can hit the F12 key on your Keyboard to inspect this code. You will see, that it contains lots of paths - the more complex the image is, the more paths you will find. If you only have a few paths, you can just copy them like I showed in this blog post, but at some point, this is a rather tedious task. So I asked myself, if there was a better way - and for sure, there is!
The minimal viable product
I created a super simple JavaScript file that would take an data.svg, extract each d attribute and fill and then output an array ob objects like this:
{
  "elmType": "path",
  "attributes": {
    "d": "<path goes here>"
  },
  "style": {
    "fill": "<hex value of fill color goes here>"
  }
}
Once that worked on my machine I thought about how I could make this better
The minimal lovable 💖 product
To take this from a something that is more or less viable to something that users can fall in love with, I had two main ideas:
Make it work as a public tool
To make this public as fast as possible (this was a sunday morning project), I decided to deploy with Netlify - this already works nice for this blog, so I already had an account. Netlify will use the code you have on GitHub and deploy it to a static site for you. You will need an account at Netlify, once you have that and are logged in
- Select Add new site > Import an existing project
- Select GitHub
- You will now authorize Netlify to read your GitHub repositories
- Select the repo that your code sits in
- Enter a Site Name
- Select Deploy
From now on, every push to main will trigger a new deployment. You can adjust this to your needs.
Provide the entire json that is needed to paste into a SharePoint List column
The core
The core functionality of the tool sits in the app.js file, which
- takes as input the provided code (needs to be either pasted in or an SVG file can be dragged’n’dropped to the inputbox reading its file content)
- builds the initial JSON structure for the column
- extracts all the
dandfillattributes from all paths - ingests these attributes into the object as shown above
- initiates download of the result
document.addEventListener('DOMContentLoaded', () => {
    const svgInput = document.getElementById('svgInput');
    const convertBtn = document.getElementById('convertBtn');

    svgInput.addEventListener('dragover', (event) => {
        event.preventDefault(); // Prevent default to allow drop
        svgInput.classList.add('dragover-active'); // Add the highlight class
    });

    svgInput.addEventListener('dragleave', () => {
        svgInput.classList.remove('dragover-active'); // Remove highlight when drag leaves
    });

    svgInput.addEventListener('drop', (event) => {
        event.preventDefault(); // Prevent default to stop file from opening in a new tab
        svgInput.classList.remove('dragover-active'); // Remove the highlight class on drop

        const files = event.dataTransfer.files;
        if (files.length > 0) {
            const file = files[0];
            const reader = new FileReader();

            reader.onload = (e) => {
                svgInput.value = e.target.result; // Set the content to the textarea
            };

            reader.readAsText(file);
        }
    });

    convertBtn.addEventListener('click', () => {
        const content = svgInput.value;
        processSVGContent(content);
    });

    function processSVGContent(content) {
        const parser = new DOMParser();
        const svgDoc = parser.parseFromString(content, 'image/svg+xml');
        const paths = svgDoc.querySelectorAll('path');

        const result = {
            "$schema": "https://developer.microsoft.com/json-schemas/sp/v2/column-formatting.schema.json",
            "elmType": "div",
            "children": [
                {
                    "elmType": "span",
                    "txtContent": "@currentField"
                },
                {
                    "elmType": "svg",
                    "attributes": {
                        "viewBox": svgDoc.documentElement.getAttribute("viewBox")
                    },
                    "children": []
                }
            ]
        };

        // Process each <path> element and add it to the JSON structure
        paths.forEach(path => {
            const pathObj = {
                "elmType": "path",
                "attributes": {
                    "d": path.getAttribute('d')
                },
                "style": {
                    "fill": path.getAttribute('fill') || "#000000" // Default to black if no fill is provided
                }
            };
            result.children[1].children.push(pathObj);
        });

        // Convert the result object to JSON and start the download
        const jsonString = JSON.stringify(result, null, 2);
        const blob = new Blob([jsonString], { type: 'application/json' });
        const link = document.createElement('a');
        link.href = URL.createObjectURL(blob);
        link.download = 'svg-to-sharepoint-json.json';
        link.click();

        // Clear the input field
        svgInput.value = '';
    }
});
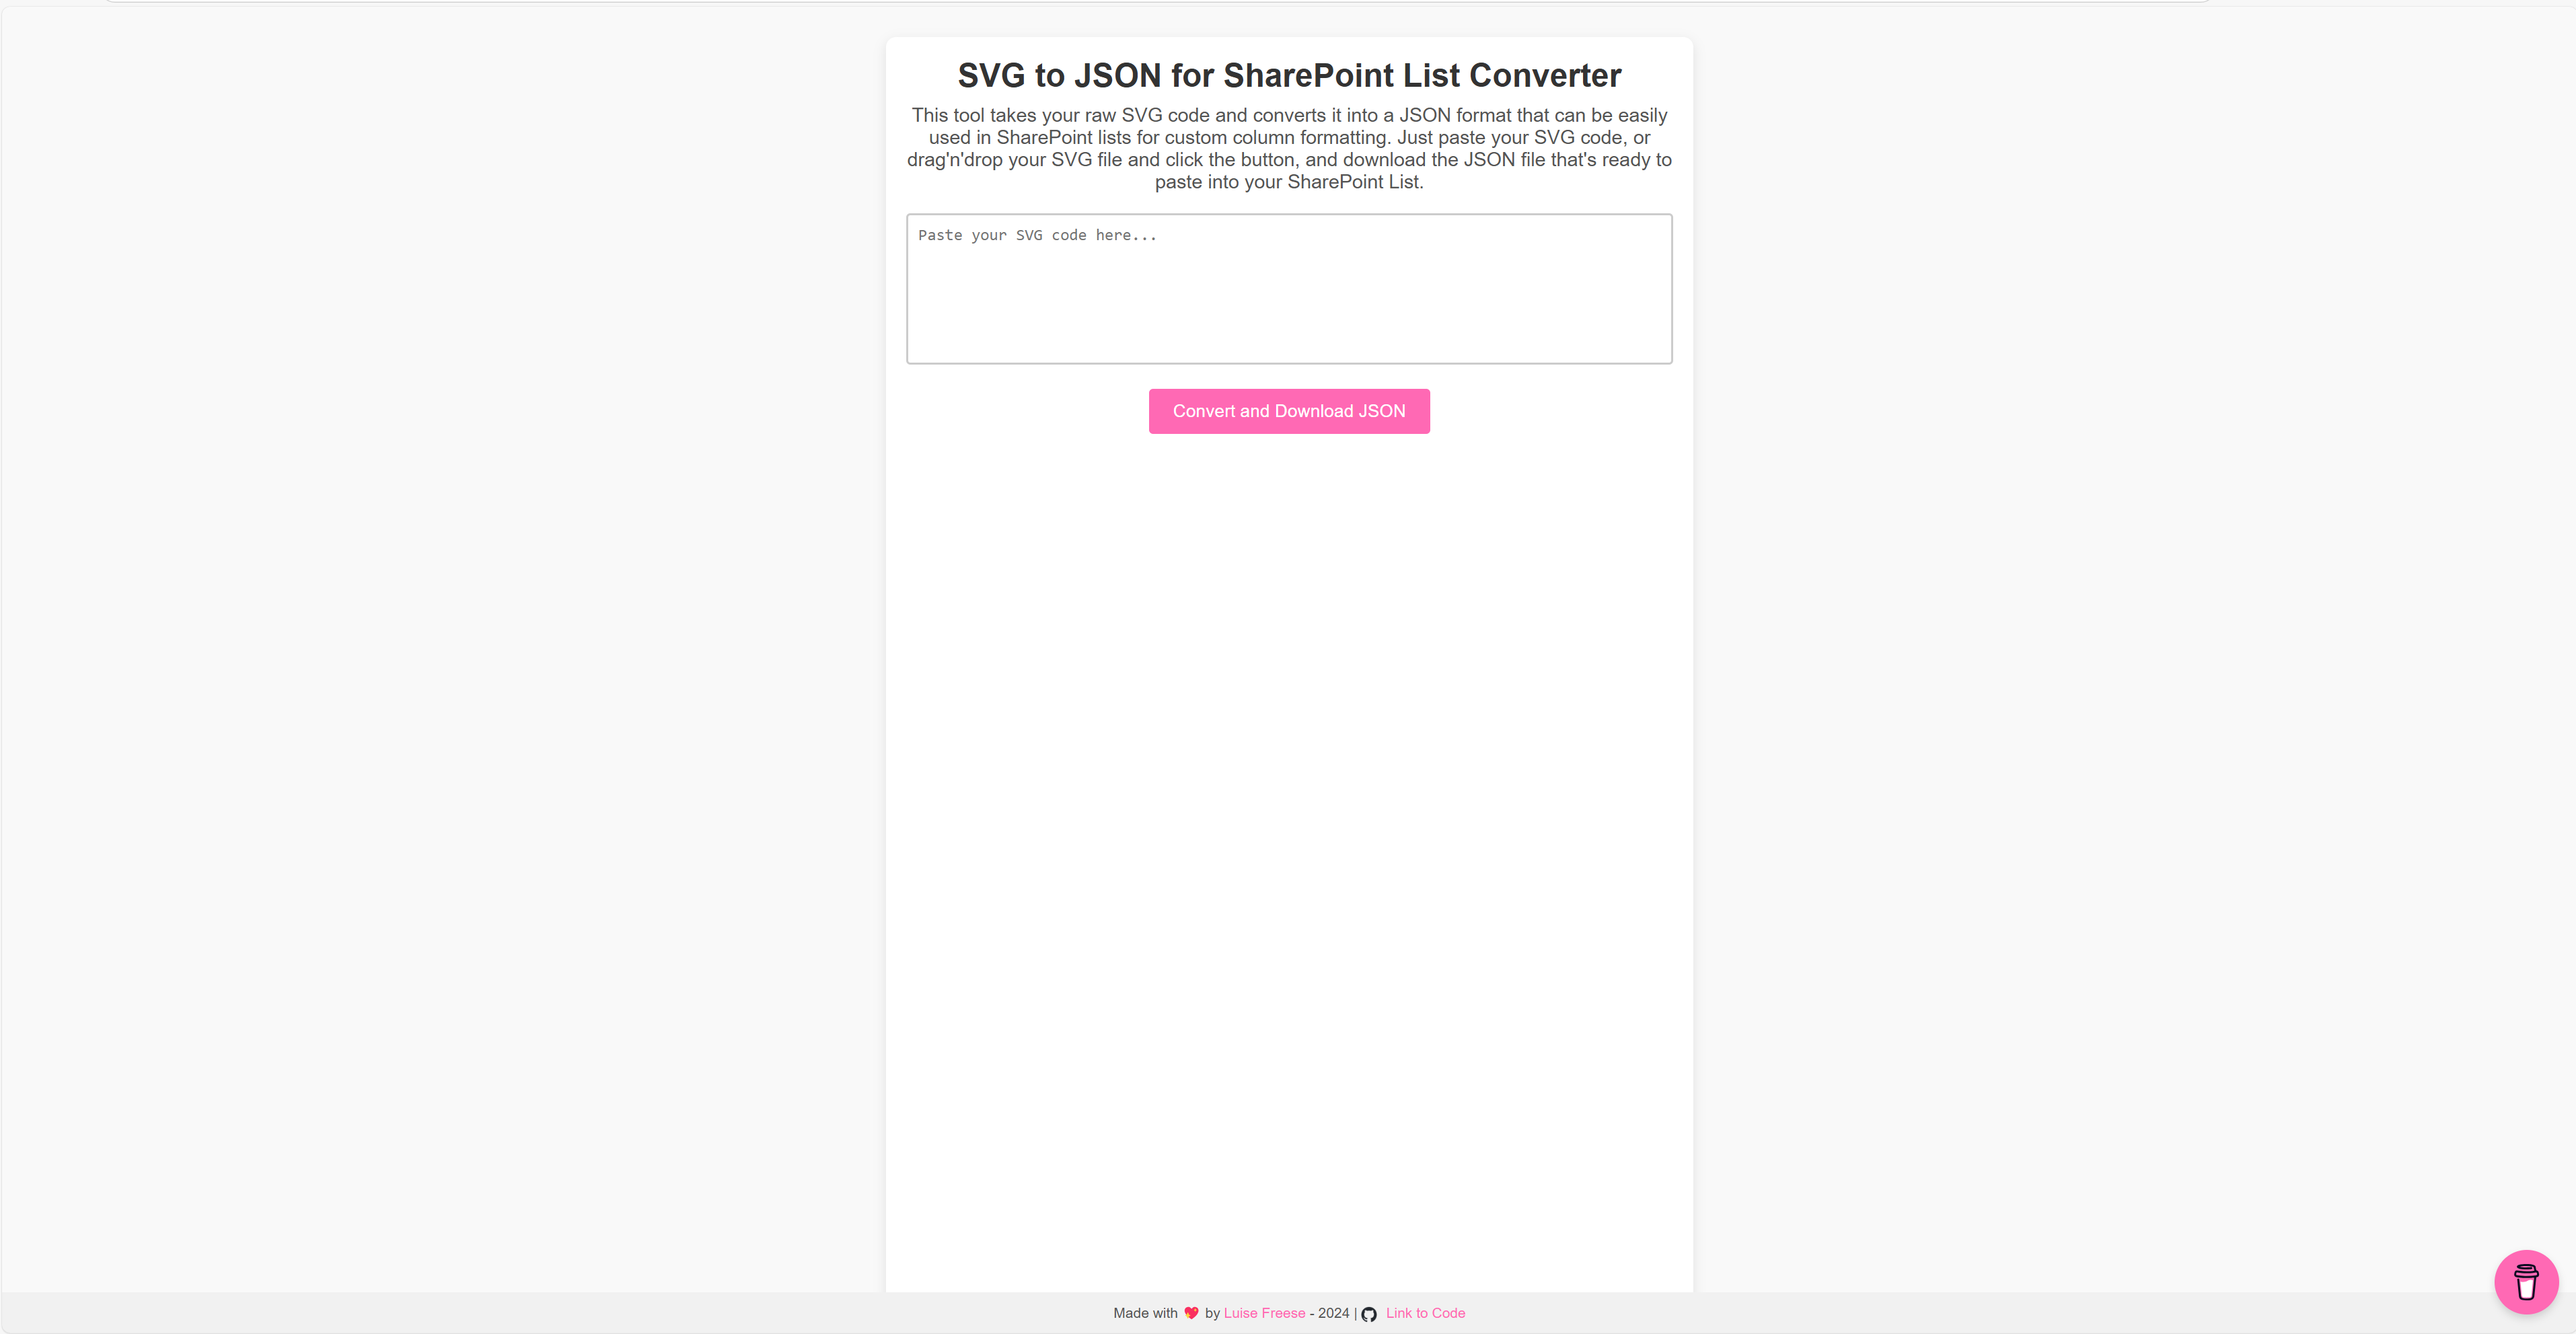
UI
Now obviously, we would need some interface to let people drag’n’drop their SVG image or paste in their SVG code. I created a basic HTML page with an inputbox and a button and a corresponding style.css that would take care of making this a bit more 💖 pink and more visually pleasing. Additionally, I took care of giving users visual feedback when hovering with their drag-n-drop file over the dropzone.
See the tool in action
If you want to use this, you can choose between either drag’n’drop an SVG image onto the inputbox or pasting the SVG code:
For drag’n’drop
- Open SVG to JSON for SharePoint List Converter
- Drag’n’drop an SVG file to the input box (it will highlight)
- Select the Convert and Download JSON button
For pasting the SVG code
- Open an SVG in your browser
- Hit F12 on your keyboard
- In the first line of the code, right-click and select Edit as HTML
- Select the entire code and copy it
- Open SVG to JSON for SharePoint List Converter
- Paste in your code
- Select the Convert and Download JSON button
Format your SharePoint List’s column
After you did that, a .json file is being downloaded. Now head over to the SharePoint list that you want to prettify!
- Select your field > Column settings > Format this column
- Select Advanced mode
- Delete the code in the box and paste the code that you just downloaded
- Select Save
Conclusion
Now obviously, you will need to find the cool usecases for displaying SVG images in your List - most of them will make sense with some conditional formatting - like displaying an image only if a date column displays a certain date or month or if a choice column changes to a specific value. I hope my tool made the process of prettifying your apps a bit easier!

My name is
Luise Freese
You May Also Like
ProvisionGenie - an open-source provisioning engine for Microsoft Teams
Once upon a time I teamed up with my friend and partner in crime Carmen Ysewijn. We both work as Power Platform developers and Microsoft 365 consultants, and got both tired of doing the same things …

Stop using GitHub Copilot as a chatbot!
Chat feels natural, but software engineering is not a conversation. This post explains why conversational interaction models optimize for negotiation, not commitment; and why treating GitHub Copilot …

You are holding GitHub Copilot Wrong!
If you’re constantly prompting, re-prompting, and steering GitHub Copilot, you’re using it wrong. This post explains why the problem isn’t your prompts, but the interaction model itself.